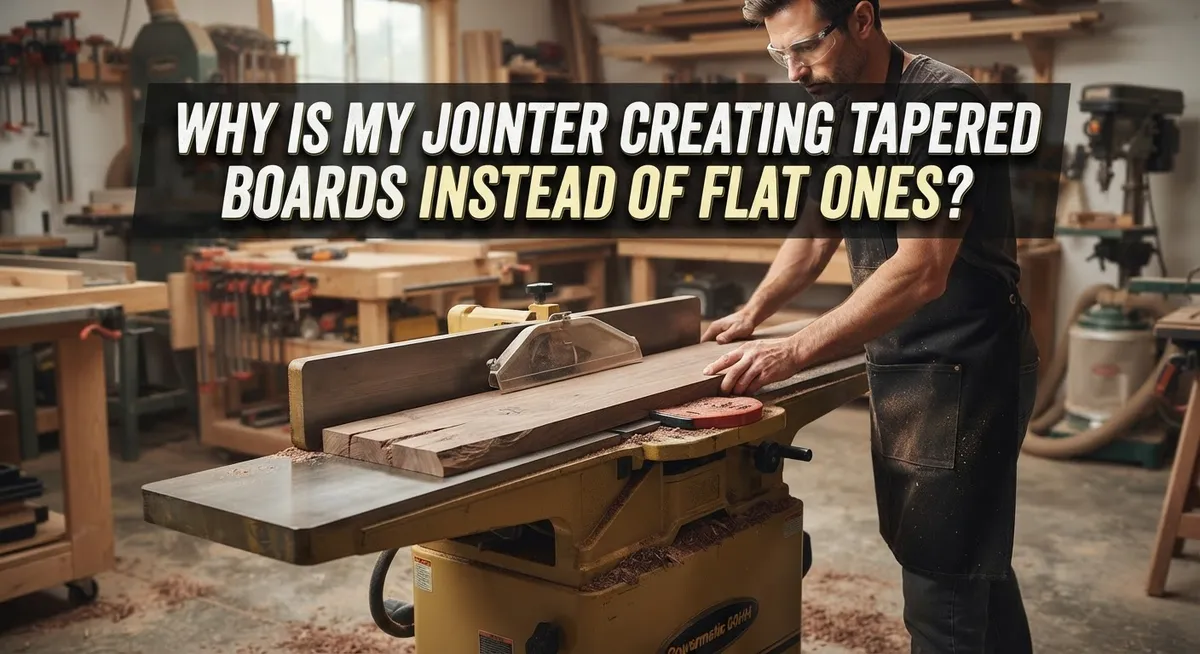
Why Is My Jointer Creating Tapered Boards Instead Of Flat Ones?
You feed a board into your jointer. You expect a flat, clean edge. Instead, you get a taper, thick on one end and thin on the other.
This problem frustrates many woodworkers. You check your blade. You check your fence. Everything looks fine. Yet the taper keeps showing up.
The truth is simple. Your jointer removes material based on surface irregularities. Uneven defects on your board lead to uneven removal. That uneven removal creates a taper.
Several factors cause this issue. Your outfeed table might sit too high compared to your knife level. Your infeed and outfeed tables might not align properly. Your board might have hidden inconsistencies before you even start cutting.
In a Nutshell
- Check your table height first. Your outfeed table must sit exactly level with the jointer knives. Even a tiny gap causes tapered cuts.
- Look for uneven table alignment. Infeed and outfeed tables need to match each other perfectly. Use a straight edge to test this before you cut anything.
- Inspect your board before jointing. Many boards look flat but have hidden bows or twists. These pre-existing flaws cause the jointer to remove more material from one end.
- Understand the removal principle. Your jointer cuts based on surface irregularities. Uneven defects always create uneven removal, and this results in a taper.
- Watch your feed pressure. Changing pressure during the cut, especially at the start, shifts how much material gets removed along the board length.
- Fix knife alignment issues. Knives that sit higher or lower than your outfeed table create an inconsistent cutting path across the entire board.
How a Jointer Is Supposed to Flatten a Board
A jointer flattens boards by removing high spots and leaving low spots untouched. The machine works like a precision scraper that shaves away material based on what the knives encounter.
Here’s how the process actually works. You place a board on the infeed table and push it forward. The rotating knives cut the top surface as the board passes over them. The board then exits onto the outfeed table, which catches the freshly cut surface.
The critical part is this: the outfeed table height determines your final result. When set correctly, the outfeed table sits exactly at the height where your knives finish their cut. This means every board that leaves the jointer has one flat face that matches the outfeed table height.
Your jointer removes material proportional to surface irregularities on the board. If one end of your board sits higher than the other end, the knives remove more material from that high spot. This is normal and correct behavior for a jointer.
The problem emerges when your tables are misaligned. If the outfeed table sits too high compared to where your knives actually cut, the board tips downward as it transitions from infeed to outfeed. This creates a tapered surface rather than a flat one.
Think of it this way: your jointer can only flatten what it can reach. If your setup forces the board to angle during the cut, taper becomes inevitable. The machine isn’t broken or defective. Instead, your table alignment needs adjustment so the outfeed table sits perfectly level with your knife height and your infeed table.
The Core Reason Jointers Produce Tapered Cuts
A tapered board comes from one simple fact: your jointer removes more material from one end than the other. This happens because the machine cuts based on surface irregularities, not on what you want the final result to be.
Here’s the core issue. Your jointer knives follow the contour of whatever surface sits in front of them. If your outfeed table sits too high compared to the knife level, the board tips down as it exits. The jointer then removes extra material from the far end. Your board emerges thinner on one side than the other.
Unequal defects across the board width create unequal removal. If one edge of your board has a deeper dip or bow than the opposite edge, your jointer removes more from that side. The result is a tapered surface, not a flat one.
The infeed and outfeed tables must sit perfectly level to each other. When they don’t align, the board rides at different heights as it passes through. This changes how much the knives engage with the wood throughout the cut.
Your board itself might already be the problem. Many boards look flat but hide bows, twists, or inconsistent edges. A jointer can only work with what it receives. If the board enters the machine uneven, the jointer removes material unevenly.
Pressure changes during the cut also matter. If you push harder at the start than at the end, you alter how deep the knives bite. This creates an inconsistent cut pattern that produces taper.
The solution starts with checking your table alignment first, then inspecting your knives, and finally examining your board before it enters the machine.
Checking Table Coplanarity: Infeed, Outfeed, and Knife Alignment
Table coplanarity means your infeed and outfeed surfaces sit at exactly the same height. When they don’t, your jointer creates tapers automatically.
Start by checking if your outfeed table aligns with your knife tips. The outfeed table should be perfectly level with the highest point of your knife rotation. Use a straightedge across both surfaces. Place it so it touches the knives and the outfeed table simultaneously. Any gap means misalignment exists.
Next, verify that your infeed table matches your outfeed table height. These two surfaces must be coplanar. Use the same straightedge method. Check at multiple points across the width and length of both tables. Don’t assume one spot is representative.
Why this matters for taper: If your outfeed table sits too high, the jointer removes less material as the board exits. This creates a tapered board that’s thicker at the end. If the outfeed table is too low, your board emerges thinner at the end instead.
Knife alignment directly affects both tables. Your knives must be set so their highest points match your outfeed table exactly. Knives that sit lower than the outfeed table prevent proper surface contact. Knives that sit higher cause gouging and inconsistent cuts.
Check your tables when your jointer is cold and hasn’t been used recently. Metal expands with heat, so measurements change. Make adjustments slowly and recheck multiple times.
This foundational step prevents most taper problems before they start. Proper table coplanarity is the single most important factor in producing flat boards consistently.
How Pre-Existing Board Defects Cause Uneven Material Removal
Your board might already have defects before it touches the jointer. These pre-existing problems cause uneven material removal and create that frustrating taper.
Here’s what happens: A jointer removes material based on how far each part of the board sits above the infeed table. If your board has a dip on one end and a dip on the opposite side, the jointer works harder to flatten the deeper dip. This means more material comes off that end, leaving you with a tapered result.
Think about a board with an uneven edge. One side might have a slight bow while the other side stays relatively straight. When you run this board across the jointer, the machine removes more material from the bowed section to make it level with the straighter section. The outcome? A board that’s thinner on one end.
Pressure changes during your cut also play a role. If you apply more downward force at the start of the cut than at the end, you push the board deeper into the knives initially. This removes extra material from the entry end, creating taper even if your board starts perfectly flat.
The key principle is simple: unequal defects equal unequal removal. Your jointer doesn’t know the difference between a defect and the board’s actual surface. It just removes whatever sits above the infeed table.
Before blaming your machine, inspect your board carefully. Look for dips, bows, and inconsistencies along both edges and across the face. Mark any problem areas with a pencil. This inspection reveals whether your board itself is causing the taper, not your jointer setup.
Step-by-Step: Diagnosing Your Jointer for Taper Problems
Start your diagnosis by gathering basic tools. You’ll need a straightedge, feeler gauges, and a pencil. These items help you identify exactly where the problem originates.
First, stop and examine your board before jointing. Place a straightedge along the edge lengthwise. Look for gaps between the straightedge and board surface. Mark any high spots or dips with your pencil. A board with uneven edges will produce uneven removal, which creates taper.
Next, check your infeed table. Set the straightedge across the table surface. Use feeler gauges to measure any gaps. The table should sit perfectly flat. Even small deviations cause problems.
Now inspect your outfeed table the same way. This table must align exactly with your infeed table height. If the outfeed sits too high, your jointer removes less material as boards exit. This creates taper toward the end.
Check your knife alignment next. The knives should sit level with your outfeed table. Misaligned knives force uneven cutting. Use a straightedge laid across the outfeed table and knife tips to verify alignment.
Finally, observe your cutting pressure during a test pass. Pressure changes during the cut alter removal depth. Push consistently from start to finish. Pressing harder at the beginning removes more material from that end.
Document your findings. Write down which tables are misaligned, where your board has defects, and how your pressure changes. This information pinpoints whether your machine needs adjustment or your board needs different preparation. Most taper problems stem from one of these three areas: table alignment, board defects, or inconsistent pressure.
Correcting Table and Knife Alignment for Consistent Cuts
When your jointer creates tapered boards, the problem almost always traces back to misaligned tables or knives. Fixing this requires systematic checking and adjustment.
Start by understanding what alignment means. Your infeed table, outfeed table, and knife tips must work together as one smooth surface. If any component sits out of position, your jointer removes uneven amounts of material across the board width.
Check your outfeed table first. This table controls how much material your knives remove. If it sits too high, the board exits the cut too soon and emerges tapered at one end. Use a straightedge placed across the outfeed table and your knife tips. They should touch the straightedge at exactly the same height.
Next, verify your infeed table height against your outfeed table. These two surfaces must sit perfectly level to each other. A small difference of even 1/32 inch causes noticeable taper. Place your straightedge across both tables with the jointer off. Rock it gently to feel any gaps.
Knife alignment requires equal attention. All knives must reach the same height at their peak. Unequal knife heights mean different cutting depths across the board width, creating taper even when tables are perfect.
Make these checks when your machine is cold and hasn’t run recently. Temperature changes affect metal expansion and can shift your settings.
After alignment corrections, test with a scrap board first. Feed it slowly and steadily, maintaining consistent pressure throughout the cut. This reveals whether your adjustments worked before processing valuable material. Document your settings so you can return to them if problems reappear later.
Common Mistakes That Lead to Persistent Tapering
Most tapering problems stem from operator errors rather than machine defects. Understanding these mistakes helps you fix the issue quickly.
Neglecting table coplanarity checks is the biggest culprit. Many woodworkers assume their tables are level without verification. Your infeed and outfeed tables must sit at exactly the same height. Even a small difference of 1/32 inch causes noticeable taper. Use a straightedge across both tables to check this alignment properly.
Assuming your board is already flat leads to frustration. Boards often arrive warped, cupped, or twisted from the lumber yard. You might blame the jointer when the problem exists before the first cut. Always inspect your workpiece carefully under good lighting. Place it on a flat surface and check for gaps underneath.
Improper knife alignment with the outfeed table creates uneven cutting. Your knives must reach their peak height exactly at the outfeed table level. If knives sit too low, they remove excess material at the start of the cut. This creates a tapered surface immediately.
Inconsistent pressure during cutting compounds these issues. You might press harder at the beginning and lighter at the end. This changes how much material the jointer removes across the board length. Maintain steady, even pressure throughout your entire pass.
Ignoring pre existing edge defects also causes problems. A board with an uneven edge before jointing gets jointed unevenly. The jointer removes material proportional to surface irregularities. Unequal defects mean unequal removal, which equals taper.
Fix these mistakes first. Most taper problems disappear once you address these common errors. Your jointer likely works fine. Your setup just needs adjustment.
Techniques to Prevent Taper on Future Cuts
Your jointer creates taper because it removes material based on surface irregularities. Preventing taper means controlling what your machine encounters. Here’s how to set yourself up for flat boards every time.
Start with your board itself. Inspect both the edge and face before jointing. Look for dips, high spots, or existing curves. A board with an uneven edge will produce an uneven cut. Run your hand along the surface to feel what the machine will remove. This simple step catches most problems before they happen.
Next, verify your table setup stays consistent. Your infeed and outfeed tables must sit at the exact same height. Check this relationship regularly, not just once. Machine vibration and temperature changes affect alignment over time. Use a straightedge across both tables to confirm coplanarity.
Knife height matters more than most woodworkers realize. Your knives must reach their peak at the same height as your outfeed table. Unequal knife heights create unequal removal across the board width. This directly produces taper. Check knife alignment before every major jointing session.
Apply steady, consistent pressure throughout your cut. Many operators reduce pressure as the board exits, which allows the outfeed table to remove extra material. This creates taper at the end of your board. Maintain even pressure from start to finish.
Feed your board straight and true. Angled feeds change how knives contact the surface. Keep your board perpendicular to the fence and parallel to the knives.
Make these habits automatic. Prevention takes less time than troubleshooting taper problems after they appear.
Final Thoughts
Tapered boards happen for one simple reason. Your jointer removes material unevenly across the board’s surface.
This uneven removal traces back to a few key factors. Table height, knife position, and board condition all play a role.
Once you understand this principle, fixing taper becomes much easier. You stop guessing and start diagnosing.
Check your tables often. Even small changes in your shop’s temperature can shift alignment over time.
Wood moves too. A board that sat flat yesterday might warp slightly overnight due to humidity changes.
Regular maintenance prevents most tapering problems before they start. Set a schedule and stick to it.
Test your setup with scrap wood before committing good lumber. This simple habit saves material and frustration.
Your hands also matter here. Consistent pressure and steady feeding work together with proper machine setup.
Neither factor alone solves tapering. You need both a well tuned machine and good technique.
Think of your jointer as a partner, not a magic tool. It only does what your setup allows it to do.
Take time to understand your specific machine. Every jointer has quirks based on age, brand, and wear patterns.
Keep notes on adjustments you make. This record helps you spot patterns and fix issues faster next time.
Woodworking rewards patience over speed. Rushing through setup checks often creates the very problems you want to avoid.
Flat, straight boards come from careful attention to detail. Your tables, knives, and technique must work as one system.
With practice, checking your jointer becomes second nature. You will spot problems before they show up in your cuts.
Trust the process. Consistent habits lead to consistent results, board after board.
Frequently Asked Questions
Why does my jointer taper boards on one end?
Your jointer removes material based on what it encounters. If your board has uneven defects across its surface, the machine removes more from some areas than others. This creates taper.
The real culprit is usually your outfeed table height. When it sits too high compared to your knife peak, the back of your board gets less support. Your board tips slightly, and you get a thinner end.
How do I check if my tables are level?
Place a straightedge across your infeed and outfeed tables. They should sit perfectly flat and even with each other. Wood dust or debris can throw off this alignment, so clean first.
Check when your machine is cold and hasn’t run recently. Temperature changes affect metal, so timing matters. This single check stops most taper problems.
What if my board was already tapered before jointing?
Many woodworkers assume their boards are flat when they’re not. Check your board with a straightedge before you joint it. If it’s already tapered, your jointer will simply follow that shape and make it worse.
Start with truly flat stock. Your jointer works best on boards that don’t have existing defects.
Can my knife height cause taper?
Yes. Your knives must reach the same peak height as your outfeed table. If one knife sits lower, that side of the board gets less material removed. You end up with uneven surfaces.
Align all knives carefully. They should touch a straightedge at the exact same point across the entire head.

Hi, I’m Leah Ray — the voice behind CraftBench Vault. I’m a passionate woodworking enthusiast dedicated to reviewing the best wood cutting tools and woodworking products. Through honest research and hands-on experience, I help fellow crafters make smarter buying decisions. Welcome to my workshop!