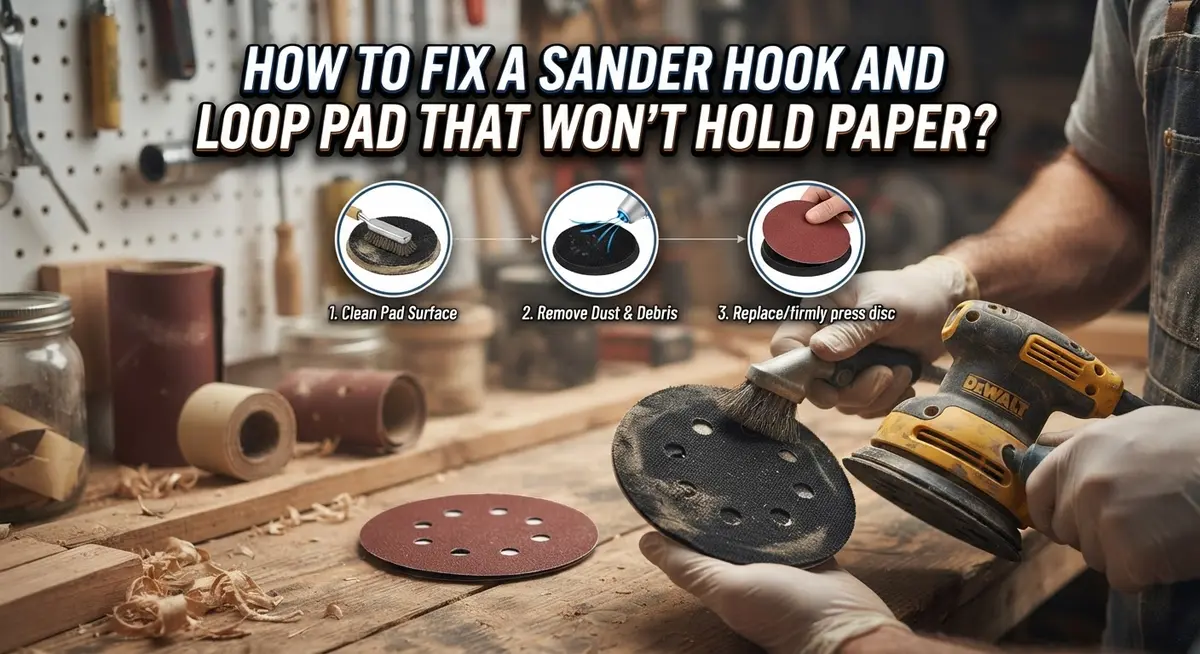
How To Fix A Sander Hook And Loop Pad That Won’t Hold Paper?
Your sander should hold sandpaper tight. But sometimes the disc slips or flies off mid job.
This happens when the hook and loop pad stops gripping well. It’s a common problem for many sanders.
The good news is that you can fix this issue yourself. You don’t need to buy a whole new tool.
In most cases, the pad itself has worn out. The tiny hooks lose their grip over time. Heat, pressure, and heavy use all play a part.
In a Nutshell
- The pad is usually the issue. Worn hooks stop gripping sandpaper, not bad discs.
- Unplug your sander first. Always disconnect power before you touch the pad.
- Remove the old pad completely. Peel it off and clean away any leftover adhesive residue.
- Install a fresh pad correctly. Line it up evenly and press it down firmly on the base.
- Let the adhesive cure fully. Give it time to set before you start sanding again.
- Avoid heat damage during use. Too much friction can melt the hooks and ruin a new pad quickly.
Why Hook And Loop Pads Stop Gripping Sandpaper
Hook and loop pads stop gripping sandpaper for several clear reasons. Understanding these causes helps you prevent future problems and fix the issue faster.
Dust and debris buildup is the most common culprit. When you sand, fine particles get trapped in the hook loops. These particles act like a cushion between the pad and sandpaper disc. The hooks can’t grip through this layer of dust, so the disc slides around or falls off during use.
Hook degradation happens over time with normal use. The tiny hooks on the pad surface break down gradually. Heavy sanding sessions speed up this wear. Once the hooks flatten or break, they lose their gripping power completely. No amount of cleaning will restore worn hooks.
Heat damage melts the hook surface when friction gets too high. Aggressive sanding or using the wrong grit creates excessive heat. The plastic hooks literally melt and fuse together. This destroys the pad permanently and requires full replacement.
Adhesive failure causes pads to lose contact with the sander base. The glue holding the pad down weakens over time. Moisture, temperature changes, and vibration all contribute to adhesive breakdown. When the pad lifts slightly, it can’t maintain proper grip on sandpaper.
Incompatible sandpaper can also cause problems. Using discs with different backing materials or sizes creates poor contact. The pad surface won’t seat evenly against mismatched discs.
Age and storage conditions matter too. Old pads stored in hot or humid areas deteriorate faster. The hook material becomes brittle and loses flexibility.
The good news is that replacement is simple and affordable. You don’t need special tools or skills. Most people can swap out a worn pad in just a few minutes. This single fix solves 90 percent of gripping problems immediately.
Tools And Materials You’ll Need Before Starting
Before you start fixing your sander, gather the right tools and materials. Having everything ready makes the job faster and easier.
You’ll need a replacement hook and loop pad that matches your sander’s size and shape. Check your sander’s manual or the base plate to find the correct dimensions. The pad should fit perfectly on the circular or orbital base.
Get a scraper or plastic putty knife to remove the old pad and clean away adhesive residue. Avoid metal scrapers because they can damage the sander base. A plastic tool works just as well without causing harm.
You should have rubbing alcohol or a degreaser on hand. This cleans the sander base thoroughly before you install the new pad. A clean surface helps the fresh adhesive stick properly.
Grab some clean, lint free cloths for wiping down the base. Dust and debris prevent good contact between the pad and sander, so cleaning matters.
A heat gun or hair dryer helps soften old adhesive if it’s stubborn. Low heat loosens the pad without damaging the sander’s plastic components.
Keep sandpaper of various grits nearby so you can test the new pad once it’s installed. You’ll want to confirm the pad grips properly before tackling your actual project.
Have a work surface or bench ready where you can set the sander safely. You need space to work without the sander rolling around.
Finally, wear safety glasses during the removal process. Small pieces of adhesive or pad material can fly off, and protecting your eyes matters.
Most of these items are common household supplies. You probably own several already. The only item you’ll definitely need to purchase is the replacement pad itself.
Step-by-Step: Removing The Old Worn Pad
Start by unplugging your sander from the electrical outlet. Safety comes first, and you need power disconnected before touching any parts of the machine.
Look at how the old pad attaches to the sander base. Most pads use strong adhesive, so you’ll need to peel it away carefully. Start at one corner and work your way around, pulling slowly and steadily. If the pad resists, don’t force it. Let it come off at its own pace to avoid damaging the base underneath.
Once the pad is off, you’ll see adhesive residue left behind on the sander base. This old adhesive must be completely removed. Use a plastic scraper or putty knife to gently scrape away the sticky material. Work in small sections and take your time. If the adhesive is particularly stubborn, apply a small amount of rubbing alcohol or degreaser to soften it first.
After scraping, wipe down the entire base with a clean, lint free cloth. Make sure no adhesive pieces or dust remain. A completely clean surface is essential for your new pad to stick properly and hold sandpaper effectively.
Inspect the base for any damage or rough spots. If you find gouges or deep scratches, sand them smooth with fine grit sandpaper. A smooth, flat surface helps the new pad make full contact with the base.
Let the base dry completely if you used any liquid cleaners. You want zero moisture before installing the replacement pad. This drying time prevents adhesive problems later.
Take a moment to measure your sander base. Note the exact size and shape so you get the correct replacement pad. Different sander models use different pad sizes, and getting the right one matters for proper fit and performance.
Your sander base is now ready for a fresh hook and loop pad installation.
Step-by-Step: Cleaning And Prepping The Sander Surface
Start with power completely disconnected. Your sander should be unplugged and cool to the touch before you begin any work.
Examine the sander base closely. Look for dust, debris, or old adhesive stuck to the surface. Even small particles prevent a new pad from gripping properly.
Use a plastic scraper or putty knife to remove any remaining adhesive. Work gently to avoid gouging the base. Scrape in one direction rather than scratching back and forth. Take your time here because leftover adhesive creates gaps between the pad and base.
Wipe the entire surface with a clean, lint free cloth. You want the base absolutely clean. Any dust or residue will interfere with adhesion.
For stubborn adhesive, apply rubbing alcohol or a degreaser to soften it first. Let the liquid sit for a minute or two. Then scrape away the softened material. Wipe again with a fresh cloth to remove all chemical residue.
Inspect the sander base for damage or rough spots. Run your hand across it to feel for irregularities. A damaged base prevents proper pad contact and causes the new pad to fail quickly.
Sand any rough areas smooth using fine grit sandpaper. A light touch works best. You’re not trying to reshape the base, just smooth out imperfections that prevent contact.
Allow the base to dry completely if you used any liquids during cleaning. Wait at least 15 to 20 minutes for full drying.
Check that the base is flat and level. A warped base won’t hold a new pad effectively.
Your sander base is now properly prepped. The surface is clean, smooth, and ready to accept a fresh hook and loop pad. This preparation step directly determines how well your new pad will perform and how long it will last during use.
Step-by-Step: Attaching A New Pad Correctly
Now that your sander base is clean and ready, it’s time to install the new hook and loop pad correctly. This step determines whether your sandpaper will stay secure during operation.
Start by checking the adhesive backing on your new pad. Most pads come with a pre applied adhesive layer. If yours doesn’t have one, you’ll need to apply a contact adhesive or pressure sensitive adhesive to the back of the pad. Read the pad instructions to confirm what type of adhesive is appropriate.
Peel back a small corner of the adhesive backing to expose the sticky surface. Position the new pad on your sander base, starting with one edge. Press that edge down firmly onto the base. Slowly peel away the rest of the backing while pressing the pad down gradually across the entire surface.
Use firm, even pressure as you work from one end to the other. This removes air bubbles and ensures full contact between the pad and the base. Air pockets weaken the bond and cause the pad to lift during use. Press down with your hand or a roller for at least 30 seconds across the entire pad.
Check all edges and corners to make sure they’re completely adhered. Press down extra hard on the perimeter since these areas experience the most stress during sanding. The corners are especially prone to peeling if not secured properly.
Allow the adhesive to cure completely before using your sander. Most adhesives need between 24 and 48 hours to reach full strength. Check your specific pad’s instructions for the exact cure time. Using the sander too soon weakens the bond and causes the pad to fail prematurely.
Once the adhesive has fully set, your new pad is ready for sandpaper discs. The hook surface should feel firm and slightly fuzzy. Your sander is now prepared for reliable paper holding.
Mistakes That Cause Repeat Pad Failure
Repeat pad failure happens when you make the same mistakes over and over. Understanding these errors helps you avoid wasting time and money on replacements.
Overheating the hook surface is one of the biggest culprits. When you apply too much pressure during sanding, friction builds up heat. This heat melts the tiny hooks on your pad, destroying their gripping ability. The pad looks fine at first, but the hooks lose their shape and can’t hold sandpaper anymore. Always use moderate, consistent pressure instead of forcing the sander into the material.
Heavy use without breaks wears out new pads far too quickly. The hook fibers break down faster when you sand continuously without letting the pad cool. Space out your sanding sessions and give your equipment time to rest between projects.
Incompatible sandpaper and pad combinations cause premature failure too. Using the wrong grit size or paper type for your specific pad can damage the hooks faster than normal. Always check that your sandpaper matches your pad specifications.
Rushing the adhesive cure time creates a weak bond that fails during use. If you start sanding before the adhesive fully sets, the pad can shift or separate from the base. Wait the full recommended time before powering on your sander.
Not allowing proper cooling between uses also damages pads. Heat weakens the adhesive backing and melts hook fibers. Let your sander cool completely before starting another job.
Choosing low quality replacement pads sets you up for failure from the start. Cheap pads have weaker hooks that wear out quickly. Investing in quality pads reduces repeat failures significantly.
These mistakes compound over time. Each failure makes the next replacement fail faster. Break the cycle by addressing one mistake at a time. Your pad replacement will last much longer when you avoid these common errors.
Extending The Life Of Your New Pad
A new hook and loop pad will perform well only if you treat it correctly from day one. The first few uses set the tone for how long your pad will last before the hooks wear down and stop gripping sandpaper discs.
Start with light pressure when you first use your new pad. Many people push hard thinking faster work is better, but this actually damages the hooks faster. Let the sander do the work. Apply only gentle downward force and let the machine’s natural motion handle the sanding.
Take regular breaks during use. Heat builds up when you sand continuously, and excessive heat melts the hook fibers. This causes them to lose their grip on sandpaper. A 10 or 15 minute break every hour keeps your pad cooler and extends its life significantly.
Match your sandpaper grit to your project. Using overly aggressive grits creates unnecessary friction and wears hooks faster than needed. Choose the right grit for your specific task, and your pad will last longer.
Keep your work area clean and free from dust buildup. Fine dust particles can clog the hooks and reduce grip strength. Wipe down your sander pad occasionally with a dry brush or cloth to remove accumulated particles.
Store your sander in a dry location when not in use. Moisture and humidity can weaken the adhesive bond between the pad and the sander base. This causes the pad to lift at edges or corners, leading to premature failure.
Inspect your pad regularly for signs of wear. Look for flattened or matted hook fibers. If you catch wear early and replace the pad before complete failure, you’ll avoid safety issues like discs flying off during operation.
These simple habits keep your new pad working effectively for months longer than careless use would allow.
Final Thoughts
A hook and loop pad that won’t hold paper is frustrating, but it’s rarely a hard problem to solve. In most cases, the pad itself has worn out. This happens naturally with regular use.
The good news is that replacing a worn pad is simple. You don’t need special tools or advanced skills. A few basic steps bring your sander back to full working order.
Remember that prevention matters just as much as the fix. Once you install a new pad, treat it with care from the very first use. This small effort pays off with a much longer pad life.
Watch out for heat buildup during sanding. This is one of the fastest ways to damage the hook surface. Take short breaks to let your sander cool down.
Always match your sandpaper grit to the task at hand. The wrong grit puts extra strain on the hooks and speeds up wear. This simple check saves you time and money later.
Keep an eye on your pad’s condition over time. Catching early signs of wear lets you act before a full failure happens mid project.
Store your sander properly when you’re done. A clean, dry storage spot protects the pad from dust and moisture damage.
Quality matters when choosing a replacement pad too. A well made pad holds up better under regular use and grips sandpaper more reliably.
At the end of the day, a sander is only as good as the pad attached to it. Taking a few extra minutes to fix and maintain your pad keeps your tool working the way it should.
With the right care, your new pad should serve you well for a long time. Simple habits make all the difference between constant frustration and smooth, reliable sanding sessions.
Frequently Asked Questions
Why does my hook and loop pad suddenly lose grip during a project?
The hook surface wears down faster than you might expect. When friction builds up, the tiny hooks flatten out and stop gripping the sandpaper disc. This happens even quicker if you press too hard while sanding or skip breaks between uses.
Heat is another culprit. Excessive friction melts the hook material, making it slippery. Once melted, those hooks cannot grip anything anymore.
Is the problem with my sandpaper or my sander pad?
Almost always, it’s the pad itself. The sandpaper disc is usually fine. Your pad’s hook surface simply wears out over time with regular use.
You can test this easily. Try a brand new sandpaper disc on your current pad. If the new disc still won’t stay put, your pad needs replacement. If the new disc holds fine, your old sandpaper was worn out instead.
How long should a hook and loop pad actually last?
This depends on how much you use your sander. Light occasional use means your pad lasts many months. Heavy daily use wears hooks down much faster, sometimes in weeks.
The key is watching for signs of wear. If discs slip or fall off during normal pressure, your pad is done. Don’t wait until it completely fails.
Can I repair or restore an old hook and loop pad?
No. Pads cannot be repaired or restored. Once the hooks flatten or melt, replacement is your only option.
Some people try cleaning old pads with brushes or vacuums. This removes dust but does not restore worn hooks. Replacement is always the standard solution.

Hi, I’m Leah Ray — the voice behind CraftBench Vault. I’m a passionate woodworking enthusiast dedicated to reviewing the best wood cutting tools and woodworking products. Through honest research and hands-on experience, I help fellow crafters make smarter buying decisions. Welcome to my workshop!