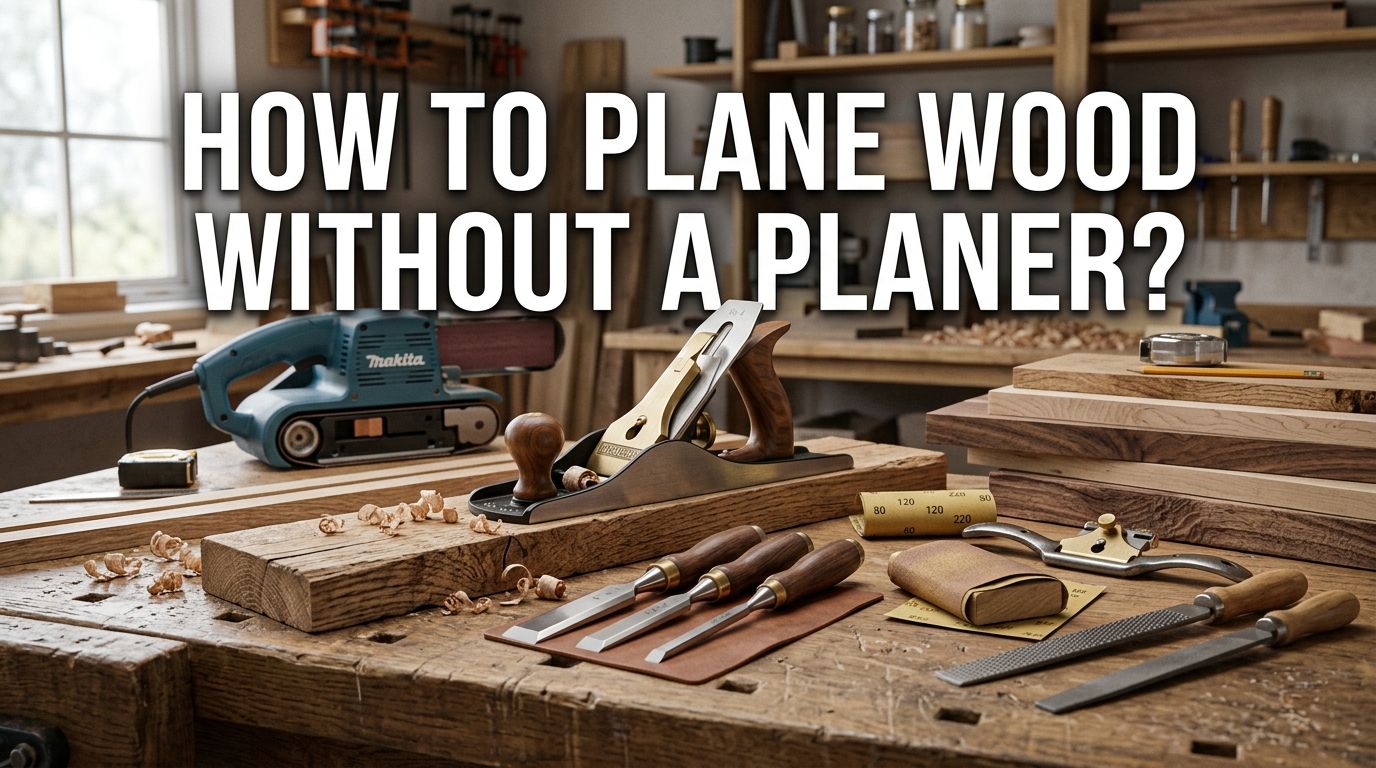
How to Plane Wood Without a Planer? 9 Proven Methods
You just picked up a beautiful piece of rough lumber. It has character, grain, and potential. But there is one problem. You do not own a thickness planer. Maybe it is too expensive. Maybe you lack the shop space. Either way, you need a flat, smooth board, and you need a plan.
Here is the good news. Thousands of woodworkers flatten boards every day without a planer. They use hand tools, routers, sanders, and clever jigs to get professional results.
Some of these methods are centuries old. Others use modern power tools you might already own. The key is choosing the right method for your project, your budget, and your skill level.
Key Takeaways
- Hand planes are the most traditional and affordable option. A jack plane and a jointer plane can flatten almost any board. This method requires practice, but it gives you full control over the wood and produces excellent results with minimal dust.
- A router sled is the best power tool alternative for wide boards and slabs. You can build a simple sled from plywood and aluminum angle stock. Pair it with a flattening bit, and your router becomes a surface planer. This method is accurate and repeatable.
- A belt sander can remove material and level surfaces, but it works best for final smoothing rather than heavy stock removal. Use it after you rough out the shape with another tool. It creates a lot of dust, so wear proper protection.
- An electric hand planer offers fast stock removal for rough lumber. It is aggressive and loud, but it can save hours of work on large, uneven boards. Follow up with a finer tool for a smooth finish.
- A table saw can help you achieve consistent thickness on narrower boards. With the right jig, you can resaw or shave boards to a uniform size. This method has limits on board width but works well for smaller stock.
- Sandpaper on a flat reference surface is a simple, low cost option for small pieces. Attach coarse grit paper to a known flat surface like a granite tile or thick glass, and rub the wood across it. This method is slow but precise for thin stock and small parts.
How to Flatten Wood With a Hand Plane Step by Step
The hand plane is the oldest and most reliable way to flatten wood without a machine. You need two planes for this job. A jack plane (No. 5 or No. 5 1/2) removes material fast. A jointer plane (No. 7 or No. 8) creates a true flat surface across the full length.
Start by securing your board on a flat workbench with bench dogs or clamps. Use winding sticks to check for twist. Place them at each end and sight across them. If they are not parallel, you have a twisted board.
Begin with diagonal strokes across the high spots using the jack plane. Work at roughly 45 degrees to the grain. This removes wood quickly. Check your progress often with a straightedge. Once the surface is close to flat, switch to the jointer plane. Take long, overlapping passes along the grain. The long sole of the jointer plane bridges the low spots and shaves the high ones.
Pros: Full control, quiet, minimal dust, low cost, produces a glass smooth surface.
Cons: Requires practice, physically demanding on large boards, slow compared to power tools.
How to Build and Use a Router Sled for Flattening Boards
A router sled is the most popular power tool method for flattening wood without a planer. It works especially well for wide slabs and live edge pieces that would not fit through a standard planer anyway.
You need a router with at least 1.5 horsepower, a flattening or spoilboard bit, and a simple sled. Build two straight rails from plywood or MDF. Space them wider than your board. Place them on a flat surface and level them with shims.
Cut a flat piece of plywood or MDF larger than your router base and attach your router to its center. This sled rides on top of the two rails. The bit hangs down and cuts the wood below. Move the sled left to right in overlapping passes, then advance it forward slightly and repeat.
Set your depth of cut to about 1/16 inch per pass. Take light, consistent passes. After one full side is flat, flip the board and repeat.
Pros: Very accurate, handles wide stock, repeatable results, uses a tool most shops already own.
Cons: Creates a lot of noise and chips, requires a flattening bit, setup takes time.
How to Use a Belt Sander to Smooth and Level Wood Surfaces
A belt sander is a useful finishing tool, but it can also remove material if you are patient. It is best for boards that are already close to flat and just need a little cleanup.
Choose a coarse grit belt (60 or 80 grit) to start. Keep the sander moving at all times. Never let it sit in one spot, or it will dig a hollow into the wood. Work in long, steady strokes along the grain direction.
Use a straightedge frequently to check your progress. Mark high spots with pencil and sand them down. Once the surface is level, switch to a finer grit (120 or 150) and make final passes for smoothness.
A belt sander removes wood much slower than a planer or a hand plane. It also rounds edges and can leave cross grain scratches if you are not careful. But for light flattening and surface prep, it gets the job done.
Pros: Easy to use, good for finishing, widely available.
Cons: Slow for heavy stock removal, creates lots of dust, can leave uneven spots if used carelessly.
How to Flatten Rough Lumber With an Electric Hand Planer
An electric hand planer is a powerful option for rough lumber. These tools remove wood fast. A typical model takes off up to 1/8 inch in a single pass. That makes them ideal for quick stock removal on uneven boards.
Secure your board firmly to the workbench. Set the depth of cut to a moderate level. Start at one end and push the planer forward with steady pressure. Keep the front shoe flat on the wood at the start of each pass, and shift your pressure to the rear shoe as you reach the end.
Work systematically across the board in overlapping rows. Check for flatness with a straightedge after each round of passes. The electric hand planer will leave small ridges between passes. You will need to smooth these out with a hand plane, card scraper, or sander afterward.
Pros: Fast stock removal, affordable, portable, works on large surfaces.
Cons: Leaves ridges, loud, requires a secondary smoothing step, aggressive and hard to control for beginners.
How to Use a Table Saw to Thickness Boards Without a Planer
A table saw can act as a simple thickness planer for narrower boards. This method works by resawing the board to a target thickness or by using a sled jig to shave the surface.
For resawing, set your fence to the desired thickness. Run the board through on edge, cutting one side. Flip the board and cut the other side. This works well for boards narrower than your blade height.
For surface flattening, you can build a simple sled. Attach the board to a flat base with shims and double sided tape. Run the sled through the table saw with the blade raised just above the board’s highest point. This shaves a thin layer off the top.
This approach has limits. Wide boards are difficult to handle. The finish from a table saw blade is rougher than a planer finish. You will still need sanding or scraping to smooth the surface.
Pros: Uses a tool most shops own, good for consistent thickness on narrow stock.
Cons: Limited board width, rough surface finish, requires jig building, higher safety risk.
How to Flatten Small Wood Pieces With Sandpaper and a Flat Surface
This method is dead simple and works great for small boards, thin stock, and parts under 18 inches. You need coarse sandpaper, a spray adhesive or double sided tape, and a known flat surface.
Granite surface plates are ideal, but a thick piece of flat glass or a smooth concrete floor works too. Attach 60 or 80 grit sandpaper to the flat surface. Press the wood face down onto the paper and rub it back and forth in a figure eight pattern.
Check the surface often. Pencil marks across the face help you track your progress. The pencil lines will disappear first on the high spots. Keep rubbing until all the pencil marks are gone and the entire face touches the sandpaper evenly.
Pros: Extremely cheap, very accurate, no power tools needed, great for small work.
Cons: Very slow, only practical for small pieces, physically tiring for large surfaces.
How to Use Winding Sticks to Check for Twist Before Flattening
Before you start any flattening method, you need to know where your board is out of flat. Winding sticks are the fastest way to check for twist. They are two straight sticks, equal in length, placed across your board at each end.
You sight across the top edges of the two sticks from one end. If the tops are parallel, the board has no twist. If one side appears higher than the other, the board is twisted and you know exactly which corner to work on.
You can make winding sticks from any straight material. Hardwood strips, aluminum bars, or even straight metal rulers work. Contrasting colors help. Make one stick dark and one light, or add a strip of white tape to the far stick. This makes misalignment easier to spot.
Use winding sticks before and during flattening. They are essential for accuracy regardless of which method you choose.
How to Choose the Right Method Based on Your Board Size and Tools
Not every method works for every situation. Your choice depends on three factors: the size of the board, the tools you own, and the finish quality you need.
For wide slabs and live edge pieces, a router sled is the clear winner. It handles boards of any width and produces a flat, consistent surface. For rough lumber that needs fast stock removal, an electric hand planer saves time. Follow it with a finer tool.
For small parts and thin stock, sandpaper on a flat surface is cheap and accurate. For medium boards where you want a fine finish, hand planes deliver the best results. And for narrow stock that needs consistent thickness, a table saw with a jig is a practical option.
Think about your end goal. A rustic table top has different requirements than a jewelry box lid. Match the method to the job.
How to Avoid Common Mistakes When Flattening Wood Without a Planer
Many beginners make the same errors. The biggest mistake is removing too much material too fast. This applies to every method. Aggressive cuts with a hand plane, deep passes with a router, or heavy pressure on a belt sander all lead to problems.
Always take light passes and check your progress frequently. Use a straightedge, winding sticks, and pencil marks to track what is happening. Another common mistake is ignoring grain direction. Planing or sanding against the grain causes tearout, rough patches, and extra work.
Secure your workpiece properly. A board that shifts during work produces uneven results and creates a safety hazard. Use clamps, bench dogs, or a vise. Lastly, do not skip the final smoothing step. Every method except a finely tuned hand plane will leave marks that need cleanup.
How to Get a Smooth Finish After Flattening Without a Planer
Flattening gives you a level surface. Smoothing gives you a finished one. These are two different steps, and most methods require both.
After flattening with a router sled, you will see scallop marks from the bit. Sand these out starting with 120 grit and working up to 220. A card scraper also works beautifully here and creates less dust.
After using an electric hand planer, you will have ridges. A smoothing plane (No. 4) set to a fine cut removes these quickly. Alternatively, sand with 100 grit first, then step up through 150 and 220.
After belt sanding, inspect the surface under a low angle light. Look for cross grain scratches and swirl marks. Finish sand with 220 grit by hand, moving along the grain only. A final pass with a damp cloth raises the grain, and one more light sanding at 220 produces a surface ready for finish.
How to Maintain Your Tools for Better Flattening Results
Sharp tools make every method easier and more accurate. A dull hand plane tears the wood instead of slicing it. A worn router bit burns the surface. A clogged sanding belt glazes over and stops cutting.
Sharpen your hand planes regularly. Use a honing guide and sharpening stones to maintain a keen edge. Most woodworkers sharpen every 20 to 30 minutes of active planing. Replace router bits when you notice burn marks or rough cuts. Clean belt sander belts with a rubber cleaning stick to remove dust buildup.
Store your hand planes on their sides or with the blade retracted. Never set a plane down on its sole with the blade exposed. Keep winding sticks straight by storing them flat. A warped winding stick gives you false readings and ruins your flattening work.
How to Decide If You Should Buy a Planer or Use Alternative Methods
A thickness planer is a wonderful tool, but it is not required for good woodworking. Professional furniture was built for centuries using only hand tools. The question is whether the time savings justify the cost and space.
If you flatten boards frequently and work with rough lumber regularly, a planer will save you hours every week. If you build a few projects per year or work mostly with pre surfaced lumber, the alternative methods in this post will serve you well.
Consider your shop space too. A benchtop planer needs a dedicated spot and room for long boards to feed through. A hand plane fits in a drawer. A router sled stores flat against a wall.
There is no wrong answer here. Many experienced woodworkers use a combination of methods. They own a planer but still reach for a hand plane for fine work, or build a router sled for pieces too wide for the machine.
Frequently Asked Questions
How can I flatten a warped board without a planer?
Start by identifying the type of warp. Use winding sticks for twist and a straightedge for bow or cup. For twist and cup, a hand plane is the most effective tool because you can target specific high spots. For severe warps, a router sled gives you a level reference plane that ignores the board’s irregularities. Secure the board firmly with shims under the low spots so it does not rock during work. Take light passes and check often.
What is the cheapest way to plane wood at home?
Sandpaper on a flat surface is the cheapest option. A sheet of 80 grit paper and a flat reference surface cost very little. For larger boards, a used hand plane from a flea market or estate sale is the next most affordable choice. Many vintage hand planes work just as well as new ones after sharpening and a basic tune up. You can get started with hand planing for under $30 if you shop secondhand.
Can I use a router instead of a planer?
Yes. A router with a flattening bit and a simple sled does an excellent job of planing wood. This method is especially useful for wide slabs that would not fit through a standard thickness planer. The setup takes some time, but the results are accurate and repeatable. You will need to sand or scrape the surface afterward to remove the scallop marks left by the router bit.
How do I get a smooth finish without a planer?
Use a combination of tools. A card scraper is one of the best smoothing tools available. It removes thin shavings, leaves no dust, and produces a surface that often needs no sanding. A smoothing plane set to a fine cut also delivers excellent results. If you prefer sanding, work through progressive grits from 120 to 220, always moving along the grain. A final hand sanding step at 220 grit removes any remaining machine marks.
Is a hand plane better than a belt sander for flattening wood?
A hand plane is generally more accurate for flattening because its long sole bridges low spots. A belt sander follows the surface contour, so it can make dips and hollows worse. A hand plane also gives you a finer finish with less dust. However, a belt sander is easier to learn and requires less technique. For rough flattening, a hand plane wins. For final smoothing of an already flat surface, a belt sander works fine.

Hi, I’m Leah Ray — the voice behind CraftBench Vault. I’m a passionate woodworking enthusiast dedicated to reviewing the best wood cutting tools and woodworking products. Through honest research and hands-on experience, I help fellow crafters make smarter buying decisions. Welcome to my workshop!