How to Stop a Heavy Duty Router Table Fence From Shifting During Operation?
You just set your router table fence to the perfect measurement. You lock it down, start routing your workpiece, and then it happens. The fence shifts. Your cut is ruined. Your material is wasted. Your patience is gone.
A shifting router table fence is one of the most common and annoying problems woodworkers face. It does not matter if you are a weekend hobbyist or a seasoned professional.
A fence that moves during operation leads to inaccurate cuts, wasted materials, and safety risks. The vibration from the spinning router bit, the lateral pressure from pushing stock along the fence, and a weak clamping system can all contribute to this problem.
Key Takeaways
- A shifting fence is usually caused by weak clamps, vibration, a worn T track system, or an uneven table surface. Identifying the root cause is the first step to finding the right fix.
- Upgrading your clamping system is the single most effective solution. Heavy duty toggle clamps, cam clamps, or star knobs with proper washers can dramatically improve fence stability during routing operations.
- T track systems work well but must be paired with the correct bolts and locking hardware. A loose T bolt in an oversized track will never hold a fence steady under vibration.
- Adding a micro adjuster to your fence setup allows fine tuning without loosening the entire fence. This prevents the common mistake of shifting the fence while trying to lock it into position.
- Vibration dampening measures such as rubber pads, a heavier table base, and balanced router bits reduce the forces that cause fence drift. These are low cost fixes that many woodworkers overlook.
- Regular maintenance of your fence, table surface, and locking hardware prevents gradual loosening over time. Clean your T tracks, replace worn knobs, and check your fence face for warping at least once a month.
Why Does a Router Table Fence Shift During Operation
Understanding the root cause saves you time and money. Router table fences shift for several reasons. The most common cause is vibration from the spinning router bit. A router motor running at 20,000 RPM or more creates significant vibration that travels through the table and into the fence.
Lateral force is another major cause. As you push a workpiece along the fence, the rotating bit pushes the stock away from the fence. Your hands push back. This creates lateral pressure on the fence that can cause it to creep over time, especially with aggressive cuts or large diameter bits.
Worn or undersized clamping hardware is the third big factor. Knobs that once held tight can lose their grip after months of use. T track slots can widen slightly from repeated tightening. Even a fraction of a millimeter of play in your clamping system can translate to noticeable fence movement during a cut.
Check Your Table Surface for Flatness First
Before you upgrade any hardware, check your table surface. A warped or uneven router table top makes it impossible for any fence to sit flat and stay locked. Place a reliable straightedge across the table in multiple directions. Look for gaps between the straightedge and the surface.
MDF tops can sag over time, especially if they were not properly supported or sealed on all sides. Cast iron and aluminum tops hold their flatness much better. If your table has a dip or a hump, your fence will rock on that uneven surface. No clamp in the world will hold a fence steady on a warped table.
Pros of checking flatness first: This is free to do and eliminates the most basic cause of fence shifting. Cons: If your table is warped, fixing it may require resurfacing or replacing the top, which can be costly and time consuming.
Upgrade Your Clamping System
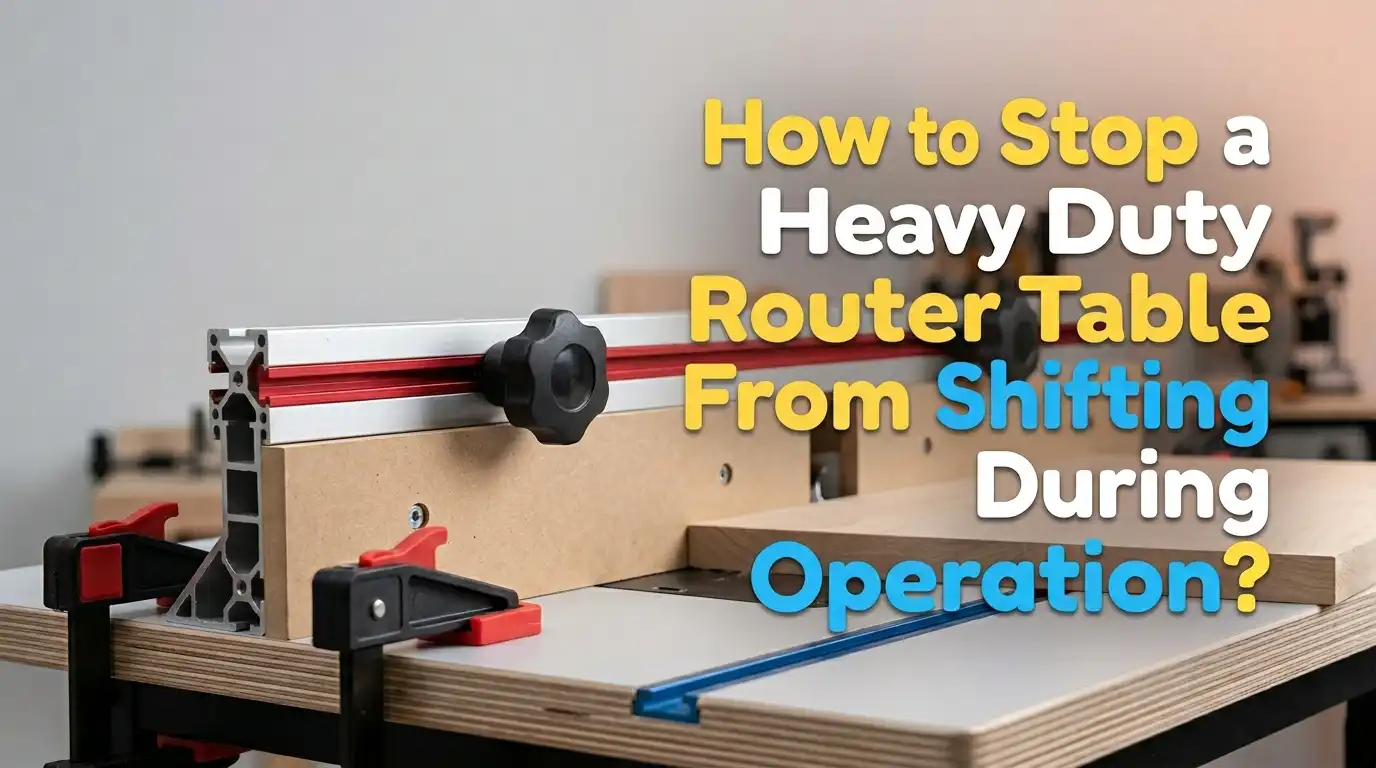
The clamping system is usually the weakest link. Many factory fences come with small plastic knobs and thin T bolts. These work fine for light cuts but fail under heavy routing. Replacing plastic knobs with metal star knobs or hand wheels adds significant clamping force.
Use 5/16 inch or 3/8 inch T bolts with flat washers and lock washers under the knob. The flat washer spreads the clamping force over a wider area. The lock washer prevents the knob from backing off due to vibration. This simple hardware swap costs very little and makes a noticeable difference.
For even more holding power, consider adding toggle clamps at each end of the fence. Toggle clamps apply strong, consistent downward force and lock mechanically into position. They will not vibrate loose.
Pros of upgrading clamps: Low cost, easy to install, and immediately effective. Cons: Toggle clamps require mounting holes in your table or fence, which may not work with every setup.
Use T Track the Right Way
T track is a popular method for attaching and adjusting a router table fence. It lets you slide the fence forward and back, then lock it in position. However, many woodworkers use T track incorrectly or use the wrong size hardware in their tracks.
The T bolt must fit snugly in the track. If the bolt head is too small for the track, the bolt will tilt and lose clamping pressure. Always match your T bolt size to your specific track profile. Standard T tracks come in 3/8 inch and 3/4 inch widths. Use the correct bolt for your track size.
Install your T tracks parallel to each other and perpendicular to the fence. Use at least two T track slots, one near each end of the fence. This dual point clamping prevents the fence from pivoting. Screwing or epoxying the T track into a routed channel keeps it flush with the table surface and prevents the fence from catching on raised edges.
Pros of T track systems: Allow quick fence adjustments and repositioning. Cons: T track adds complexity and can develop play over time if the channel widens.
Clamp the Fence at the Table Edges Instead
Some experienced woodworkers skip T tracks entirely and clamp the fence at the edges of the table. Edge clamping provides the strongest hold because the clamp force presses the fence base directly against the flat table surface with no hardware in between.
Use heavy duty F clamps or parallel jaw clamps at both ends of the fence. The clamp pads should contact the fence base squarely without tilting. This method also lets you remove the fence completely in seconds, which is useful if you switch between freehand routing and fence guided work.
The downside is that the clamps extend beyond the table edges. This takes up shop space and can get in the way of workpiece handling. You also lose the ability to make quick micro adjustments since you must loosen, reposition, and retighten the clamps each time.
Pros of edge clamping: Maximum holding force, no table modifications needed. Cons: Clamps stick out from the table, and adjustments are slower compared to T track systems.
Add a Micro Adjuster to Your Fence
One of the sneakiest causes of fence shifting is human error during adjustment. You set the fence to your measurement, but the fence moves slightly as you tighten the knobs. This is extremely common and very frustrating.
A micro adjuster solves this problem. It attaches to one end of your fence and uses a fine threaded screw to move the fence in tiny increments. You lock one end of the fence loosely, dial in the exact position with the micro adjuster, and then fully tighten both ends. Each mark on a typical micro adjuster thumb wheel represents about 1/128 of an inch. This level of precision eliminates the guesswork.
Many aftermarket micro adjusters mount directly to existing fence systems. You can also build a simple version using a bolt, a coupling nut, and a fixed bracket attached to the table.
Pros of micro adjusters: Extremely precise positioning, reduces human error. Cons: Adds cost and one more component to maintain.
Reduce Vibration at the Source
Vibration is a constant enemy of fence stability. The router motor, the spinning bit, and the cutting action all generate vibration that loosens hardware over time. Reducing vibration at the source helps every other fix work better.
Start with your router bit. A dull or damaged bit creates more vibration than a sharp one. Bits with chipped carbide or bent shanks should be replaced immediately. Large diameter bits like raised panel cutters should be run at lower speeds to reduce vibration.
Check your router collet for wear. A worn collet does not grip the bit shank evenly, which causes the bit to wobble and vibrate. Clean the collet regularly and replace it when the inner surfaces show signs of scoring or flaring.
Pros of vibration reduction: Improves cut quality, extends tool life, and helps all fence locking methods work better. Cons: Requires ongoing attention and occasional replacement of bits and collets.
Increase the Mass of Your Router Table
Heavier tables vibrate less. This is basic physics. A lightweight benchtop router table will always be more prone to vibration and fence shifting than a heavy cabinet style table.
If you use a benchtop model, bolt it down to a sturdy workbench or build a dedicated cabinet base. Fill the cabinet with bags of sand or attach concrete pavers to the bottom shelf. The added weight absorbs vibration energy and keeps everything more stable.
For shop built tables, use a double layer of 3/4 inch MDF for the top. Laminate both sides to prevent warping. A solid, heavy table gives your fence a stable foundation. This is one of the most overlooked solutions, but it makes a real difference.
Pros of adding mass: Simple, effective, and permanent. Cons: Makes the table harder to move. Not ideal if you need a portable setup.
Install Rubber or Silicone Pads Under the Fence
A thin strip of rubber or silicone along the bottom edge of your fence base adds friction and dampens vibration at the same time. This prevents the fence from sliding along the table surface even if the clamps loosen slightly.
Use a strip of rubber shelf liner, a thin silicone pad, or even adhesive backed rubber tape. The material should be thin enough that it does not raise the fence or affect cut height. About 1/16 inch thick material works well for most setups.
Make sure the rubber does not cover your T track slots. Cut openings where the T bolts pass through so the fence still sits flat. This is a quick, inexpensive fix that works alongside any clamping method.
Pros of rubber pads: Very cheap, easy to apply, adds friction and vibration dampening. Cons: Pads wear out over time and need replacement. May slightly compress under clamping force, which can affect precision.
Build or Buy a Fence With a Wider Base
Many stock fences have a narrow base, sometimes only 2 to 3 inches deep. A wider fence base provides more surface contact with the table, which increases friction and makes the fence harder to push out of alignment.
A base width of 4 to 6 inches gives you a much more stable platform. If you are building your own fence, use 3/4 inch MDF with plastic laminate on both faces. The laminate makes the fence slide smoothly during adjustment but grips firmly once clamped. Two layers of MDF create a stiffer, heavier fence that resists movement.
You can also add triangular gussets between the fence face and the base for extra rigidity. These gussets prevent the fence from flexing when workpieces are pressed against it.
Pros of a wider base: More stability, more clamping surface, stiffer fence. Cons: Takes up more table space and may limit how close the fence can get to the bit on smaller tables.
Use Featherboards to Support Your Workpiece
Featherboards do not directly lock the fence in place, but they reduce the lateral forces that push the fence out of position. By holding the workpiece firmly against the fence and down against the table, featherboards ensure consistent pressure during the cut.
Mount one featherboard on the infeed side of the fence and another on the table surface pressing the stock down. This reduces the amount of hand pressure you need to apply, which means less force pushing and pulling on the fence.
T track mounted featherboards are easy to adjust and reposition. Magnetic featherboards work on cast iron tops and offer quick setup. Using featherboards is a best practice for safety and accuracy, and they have the added benefit of reducing fence stress.
Pros of featherboards: Safer cuts, reduced fence stress, consistent workpiece pressure. Cons: Require setup time for each operation. May not fit every routing scenario.
Perform Regular Maintenance on Your Fence System
Even the best fence setup will eventually shift if you ignore maintenance. Dust buildup inside T track channels is a common cause of reduced clamping force. Fine wood dust packs into the track and prevents T bolts from seating fully.
Clean your T tracks with a shop vacuum and a stiff brush after each session. Apply a thin coat of paste wax to the table surface and the bottom of the fence base. This reduces friction during adjustment but does not affect clamping grip. Check all knobs and bolts for tightness before each use.
Inspect the fence face for warping or damage. MDF can swell if it absorbs moisture. Laminated faces resist this, but exposed edges are vulnerable. Seal all exposed MDF edges with paint or shellac to prevent moisture damage.
Pros of regular maintenance: Keeps your system working at peak performance, prevents gradual degradation. Cons: Requires discipline and a few minutes of time after each work session.
A Quick Summary of the Best Methods
The best approach is to combine multiple methods for maximum stability. Start by making sure your table is flat and your hardware is in good condition. Upgrade your clamping system with metal knobs, lock washers, and properly sized T bolts. Add a micro adjuster for precise positioning. Reduce vibration with sharp bits and a heavy, stable table. Use featherboards to minimize lateral forces on the fence.
No single fix is perfect for every shop. A hobbyist with a benchtop table needs different solutions than a professional with a full size cabinet router station. Evaluate your specific setup, identify where the weakness is, and apply the fixes that match your situation. The total cost of all these upgrades is usually far less than the cost of wasted materials from inaccurate cuts.
Frequently Asked Questions
Why does my router table fence move even when the clamps feel tight?
The most likely cause is that your T bolts are too small for the T track slot. A loose fitting bolt tilts under pressure instead of clamping flat. Also check for dust packed inside the track that prevents the bolt from seating properly. Worn plastic knobs lose their grip over time and may feel tight but deliver less force than when they were new. Replace plastic knobs with metal star knobs and add flat washers under them for better clamping.
Can I use C clamps to hold my router table fence?
Yes, C clamps can hold a router table fence, but they are not ideal. C clamps apply point pressure rather than distributed pressure, and they can mar the table or fence surface. Heavy duty F clamps or parallel jaw clamps are a better choice for edge clamping because they distribute force more evenly and offer a wider jaw opening.
How often should I check my router table fence for alignment?
You should verify your fence alignment at the start of each work session and after any major adjustment. A quick check with a combination square or a ruler takes only a few seconds and can prevent wasted materials and poor quality cuts. If you notice the fence shifting during operation, stop immediately and retighten before continuing.
Will adding rubber pads under the fence affect my cut accuracy?
Thin rubber pads of about 1/16 inch thickness should not affect cut accuracy. They compress slightly under clamping force but remain consistent once the fence is locked. Avoid thick or spongy materials that can compress unevenly. Firm rubber shelf liner or adhesive silicone strips are the best choices for this application.
Is a T track system better than edge clamping for a router table fence?
Both methods work well, but they serve different needs. T track systems offer faster adjustments and cleaner table edges with no clamps sticking out. Edge clamping provides the strongest holding force and requires no modifications to the table. Many woodworkers use T track for daily work and switch to edge clamps for heavy cuts with large bits where maximum fence stability is critical.

Hi, I’m Leah Ray — the voice behind CraftBench Vault. I’m a passionate woodworking enthusiast dedicated to reviewing the best wood cutting tools and woodworking products. Through honest research and hands-on experience, I help fellow crafters make smarter buying decisions. Welcome to my workshop!