Why Is My Belt Sander Digging Gouges Into The Wood Surface?
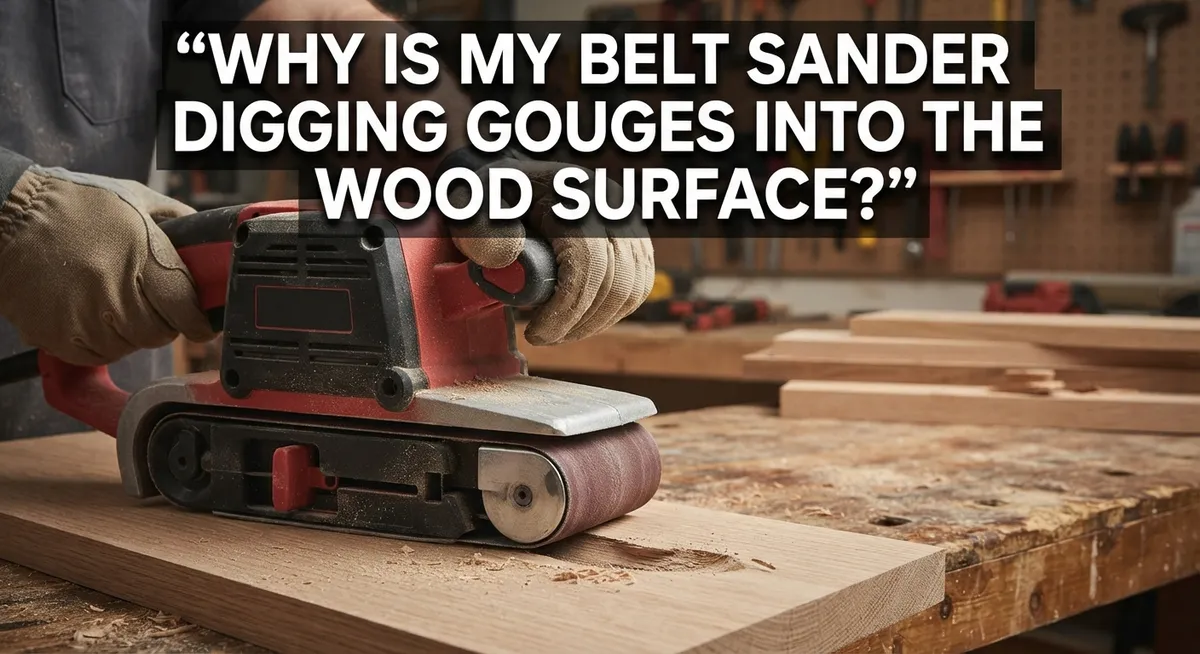
You grab your belt sander, ready to smooth out a rough board. Instead, you end up with deep gouges that ruin the wood surface.
This problem frustrates many woodworkers, from beginners to seasoned pros. The good news? You can fix this issue and prevent it from happening again.
Belt sanders are powerful tools. That power can work against you if you don’t use the right technique.
Most gouging happens for a few simple reasons. You might be holding the sander in one spot too long. You could be pressing down too hard. Or maybe your sandpaper grit is too coarse for the job.
In a Nutshell
- Stationary sanding causes gouges. If you hold the sander in one spot, it digs deep into the wood. Always keep it moving.
- Too much pressure makes things worse. Let the sander’s weight do the work. Pushing down hard creates uneven, deep marks.
- Wrong grit leads to trouble. Coarse grit removes wood fast, but it also gouges fast. Match your grit to the task at hand.
- Smooth motion prevents damage. Move the sander front to back and side to side. This keeps pressure even across the surface.
- Gouges are fixable. Mix sawdust from the same wood with CA glue. Fill the gouge and let it set for a clean repair.
- Practice builds confidence. Try your technique on scrap wood first. A relaxed, loose grip helps you avoid future mistakes.
The Main Reasons Your Belt Sander Gouges Wood
Your belt sander gouges wood because of four main issues. Understanding each one helps you stop the problem before it starts.
Keeping the sander stationary is the biggest culprit. When you hold the sander in one spot, the moving belt digs deeper and deeper into the wood. The friction creates a hole or groove that ruins your surface. This happens fast, sometimes in just a few seconds.
Pressing too hard makes gouging worse. Many woodworkers think more pressure equals better results. The opposite is true. Your belt sander weighs enough to do the work on its own. Extra downward force just pushes the grit deeper into the wood fibers.
Using grit that is too coarse removes wood too aggressively. Coarse grit cuts fast, but it also leaves visible scratches and gouges. The larger particles dig into the surface rather than smooth it. You need to match your grit to the task at hand.
Moving the sander unevenly also causes problems. If you move it slowly in one direction, then stop, then move again, you create uneven wear patterns. Some spots get more sanding than others. This inconsistency leads to visible gouges and dips.
The good news is that all four issues are completely preventable. You simply need to keep the sander moving in smooth, continuous motions. Move it front to back, then side to side. Keep your touch light and relaxed. Let the tool do what it was designed to do.
Your sander works best when you treat it like a gliding motion, not a pressing motion. Think of it as floating across the wood surface. Maintain steady speed and consistent pressure throughout. This approach protects your wood and gives you the smooth finish you want.
How Stationary Sanding Motion Causes Deep Holes
When you hold your belt sander in one spot, the abrasive belt spins continuously against the wood. This creates a deep, localized gouge because the same area gets abraded over and over. The wood surface cannot escape the sanding action, so it gets worn away faster and faster.
Stationary motion is the primary cause of gouging. The longer you keep the sander still, the deeper the hole becomes. Even just a few seconds in one location can leave a visible depression. Your wood fibers get pulverized rather than smoothly sanded away.
The problem gets worse when you combine stationary motion with pressure. Pressing down hard on a sander that is not moving creates extreme friction and heat. The wood surface breaks down quickly, leaving a rough, uneven gouge that is hard to repair.
Movement prevents this damage. When you keep the sander moving in multiple directions, no single spot receives continuous abrasion. The tool glides across the surface instead of drilling into it. The wood gets smoothed evenly because different areas get equal sanding time.
Think of the difference between rubbing your hand back and forth on a surface versus pressing it down in one spot. The back and forth motion feels smooth. The stationary pressure feels like it is wearing through. Your belt sander works the same way.
The key is continuous, flowing motion. Move your sander front to back, then side to side, and even in diagonal patterns. Keep the tool floating across the wood with light, even pressure. Let the sander’s own weight do most of the work. Your hands should guide it, not force it down.
This simple change in technique eliminates most gouging problems immediately. You will notice your sanded surfaces become smooth and even instead of scarred and pitted.
The Role of Pressure and Grit Selection in Gouging
Pressure and grit selection work together to determine whether your belt sander smooths wood or creates ugly gouges. Understanding how these two factors interact helps you prevent damage before it happens.
Excessive pressure is a common mistake. Many people assume that pressing harder speeds up the sanding process. In reality, the belt sander’s weight already provides enough force to cut through wood. When you add extra pressure, you’re forcing the abrasive belt deeper into the surface. This concentrated force creates gouges instead of even sanding.
Let the sander do the work for you. Your job is to guide it, not push it. Use a relaxed grip and let gravity handle most of the effort. Think of it as floating the sander across the wood rather than forcing it down.
Grit selection matters just as much as pressure. Coarse grit removes material quickly, which sounds good until you realize it also cuts aggressively into the wood. If your grit is too coarse for your project, each pass digs deeper. Fine grit works more gently and produces smoother results.
Match your grit to your task. Heavy stock removal needs coarser grit, but finish sanding requires finer grit. Starting with coarse grit and progressing to finer grit gives you the best results.
The real secret is combining light pressure with appropriate grit. When you use moderate pressure with the right grit for your job, the sander glides smoothly. The abrasive belt cuts evenly across the entire surface instead of digging into specific spots.
Practice on scrap wood first. This teaches you how much pressure feels right and helps you develop a smooth, flowing technique. You’ll quickly discover that less pressure actually produces better results than heavy-handed sanding.
Proper Technique: Moving Your Belt Sander to Prevent Gouges
Your belt sander creates gouges when you stop moving it. The moment you pause in one spot, the spinning belt continues grinding away at that exact location. This is why continuous motion is your best defense.
The key is treating your sander like it’s floating across the wood surface. Move it smoothly in multiple directions. Start by sanding front to back, then shift to side to side movements. You can even add diagonal patterns. This constant motion ensures no single area receives too much attention from the abrasive belt.
Keep your movements flowing and relaxed. Jerky or hesitant motions create uneven pressure points. Think of it like painting with a brush. You wouldn’t stop the brush in one spot. Your sander works the same way. The moment you pause, damage begins.
Pressure and motion work together to prevent gouges. Light, even pressure combined with continuous movement gives you smooth results. Heavy pressure while stationary creates deep holes. Heavy pressure while moving creates uneven surfaces. Neither works well. Instead, let the sander do its job without forcing it downward.
Practice on scrap wood before working on your actual project. This teaches you what proper pressure feels like. You’ll develop muscle memory for smooth, flowing motions. Scrap wood also shows you how different grit levels behave when you move at various speeds.
The secret is consistency. Move at a steady pace. Apply the same gentle pressure throughout. Never stop in one location, even for a second. If you need to pause, lift the sander completely off the wood. This simple habit prevents most gouging problems.
Your technique matters more than your equipment. A relaxed, confident approach with proper motion beats aggressive sanding every time. Once you master smooth, continuous movement, gouges become a thing of the past.
Common Mistakes That Lead to Uneven Sanding Results
Many woodworkers make simple mistakes that lead to uneven sanding results and gouges. Understanding these errors helps you avoid them and achieve smooth, professional finishes.
Applying uneven pressure is one of the biggest culprits. Your hand naturally wants to push harder in some areas than others. This creates high and low spots on your wood surface. The solution is to keep your pressure light and consistent across the entire work area. Let the sander do the work instead of forcing it.
Using grit that’s too coarse for your task causes problems quickly. Coarse grit removes material fast, but it also leaves deep scratches and gouges. Always match your grit to what you’re trying to accomplish. Start with appropriate grit levels and work your way to finer grits as needed.
Hesitant or jerky motions create uneven results. When you move the sander in a stop and start pattern, you apply different pressure at different moments. This causes some areas to sand more than others. Keep your movements smooth and flowing instead.
Failing to change directions regularly leaves visible patterns in your wood. Sand front to back, then side to side, and even diagonally. This multi directional approach ensures even material removal across the entire surface.
Skipping practice on scrap wood means you learn on your actual project. Scrap wood teaches you how the sander feels, how much pressure works best, and what speed feels natural. This practice builds muscle memory and confidence.
Rushing the process leads to mistakes. Take your time and focus on maintaining consistent motion and pressure. Your technique matters far more than your equipment quality.
The common thread in all these mistakes is lack of attention to smooth, controlled technique. Master these basics, and gouging becomes rare.
How to Repair Existing Gouges in the Wood Surface
Once gouges appear in your wood, you need a repair strategy that works. The good news is that small to medium gouges respond well to a simple filling method using wood dust and glue.
Start by creating matching sawdust from the same wood species you’re sanding. You can do this by sanding a scrap piece of the same wood with your belt sander. This dust matches your project perfectly, which matters for the final appearance.
Clean out the gouged area first. Use a brush or compressed air to remove any loose dust or debris from the gouge. You want a clean surface so the filler material bonds properly.
Mix your sawdust with cyanoacrylate glue (CA glue). The ratio matters here. You want a paste consistency, not a wet mixture. Add sawdust gradually to the glue until you reach a thick, workable paste that holds together.
Press the mixture firmly into the gouge using a putty knife or scraper. Fill it slightly higher than the surrounding surface. The glue hardens quickly, so work fast but carefully.
Once the glue sets completely (usually within minutes), sand the filled area smooth. Start with medium grit sandpaper and work toward finer grits. Sand gently to level the repair with the surrounding wood surface.
For deeper gouges, you may need to apply the filler in layers. Let each layer harden completely before adding more. This prevents the mixture from sinking as it cures.
Test your repair by running your hand across it. The surface should feel smooth and level. If you still feel a depression, apply another thin layer of filler and sand again.
This method works because the sawdust and glue combination creates a repair that sands like the surrounding wood. The result blends naturally into your project.
Pro Tips for Smooth, Consistent Sanding Every Time
Getting smooth, consistent results with your belt sander takes focus and the right approach. The foundation of success is understanding how pressure and motion interact during the sanding process.
Your sander works best when you apply light to moderate pressure consistently. Heavy pressure is the enemy. Think of it as guiding the sander rather than forcing it into the wood. Let the tool do the work while your hands stay relaxed and loose. Tension in your arms transfers directly to uneven pressure on the wood surface.
Motion direction matters just as much as pressure. Move your sander in multiple directions to avoid creating patterns or lines in the wood. Start by moving front to back, then shift to side to side, and finally use diagonal strokes. This varied approach helps you sand evenly across the entire surface.
Keep your movements smooth and flowing. Avoid stopping, hesitating, or changing speed suddenly. Your sander should glide across the wood like it’s floating. Abrupt changes in speed or direction create pressure points that dig into the surface.
Grit selection prevents many problems before they start. Using grit that’s too coarse for your task causes aggressive cutting that’s hard to control. Match your grit to your specific goal. Finer grits give you better control and smoother results.
Practice on scrap wood first before moving to your actual project. This helps you develop muscle memory and find the right pressure and speed for your technique. Spend time on practice pieces until your movements feel natural and automatic.
Check your sander’s base regularly. A worn or damaged base creates uneven contact with the wood. A flat, clean base ensures even pressure across the entire sanding surface. Keep your equipment maintained so it performs consistently every time you use it.
Final Thoughts
Belt sander gouges happen for simple reasons. Your sander sits too long in one spot. You press too hard. Your grit choice does not match the job.
The good news is that you control all three factors. Every gouge you create comes from technique, not bad luck.
Think of your belt sander as a tool that needs constant motion. Keep it moving at all times. The moment it stops on wood, it starts cutting deeper than you want.
Pressure matters just as much as motion. Let the sander’s weight do the work. Your hands should guide it, not force it into the wood.
Grit selection rounds out the equation. Start coarse only when needed. Move to finer grits as you get closer to your final surface.
Mistakes will happen, especially when you are learning. That is normal and expected. The key is catching them early and fixing them properly.
Sawdust and CA glue give you a reliable repair method. This fix works because it matches your wood’s color and texture. Your repaired area sands smooth alongside the rest of your project.
Remember that practice builds skill over time. Each project teaches you something new about pressure and motion. Your muscle memory improves with every board you sand.
Woodworking rewards patience and attention. Rushing through a sanding job almost guarantees gouges. Slowing down gives you control over the outcome.
Consistency separates smooth results from gouged surfaces. Keep your sander moving. Apply even pressure. Choose the right grit for your task.
These three habits prevent most problems before they start. When gouges do appear, you now know how to fix them.
Your confidence with a belt sander grows through practice. Take your time on scrap wood first. Then apply these lessons to your real projects with steady hands and a clear plan.
Frequently Asked Questions
Why does my belt sander keep digging into the wood even when I’m careful?
Your sander digs gouges when it stays in one spot too long. The belt continues rotating in that same area, creating a depression. Stationary motion is the main culprit. You must keep the sander moving constantly across the surface. Think of it like painting. You wouldn’t hold a paintbrush in one place. Your belt sander works the same way.
What pressure should I use to avoid gouges?
Apply light to moderate pressure only. Many people push down hard thinking it speeds up the job. This actually causes gouges and damages your wood. Let the sander do the work. Your hands should guide the tool, not force it.
Keep your grip relaxed and loose. A tight grip often leads to pressing too hard without realizing it.
Does grit size matter for gouging problems?
Yes, grit selection matters significantly. Using grit that’s too coarse for your task creates deeper marks. Choose the right grit for your specific project needs. Coarser grits remove material faster but leave more aggressive marks. Finer grits produce smoother results.
How should I move my sander to prevent gouges?
Move your sander in multiple directions. Sand front to back, then sideways, then diagonally. Use smooth, flowing motions without stopping. Keep the sander gliding across the surface like it’s floating.
Never let the belt sit still, even for a second.
Should I practice before working on my actual project?
Absolutely. Practice on scrap wood first. This builds your feel for proper pressure and motion. You’ll develop muscle memory for smooth, consistent movements. Mistakes on scrap material teach you without ruining your project.

Hi, I’m Leah Ray — the voice behind CraftBench Vault. I’m a passionate woodworking enthusiast dedicated to reviewing the best wood cutting tools and woodworking products. Through honest research and hands-on experience, I help fellow crafters make smarter buying decisions. Welcome to my workshop!