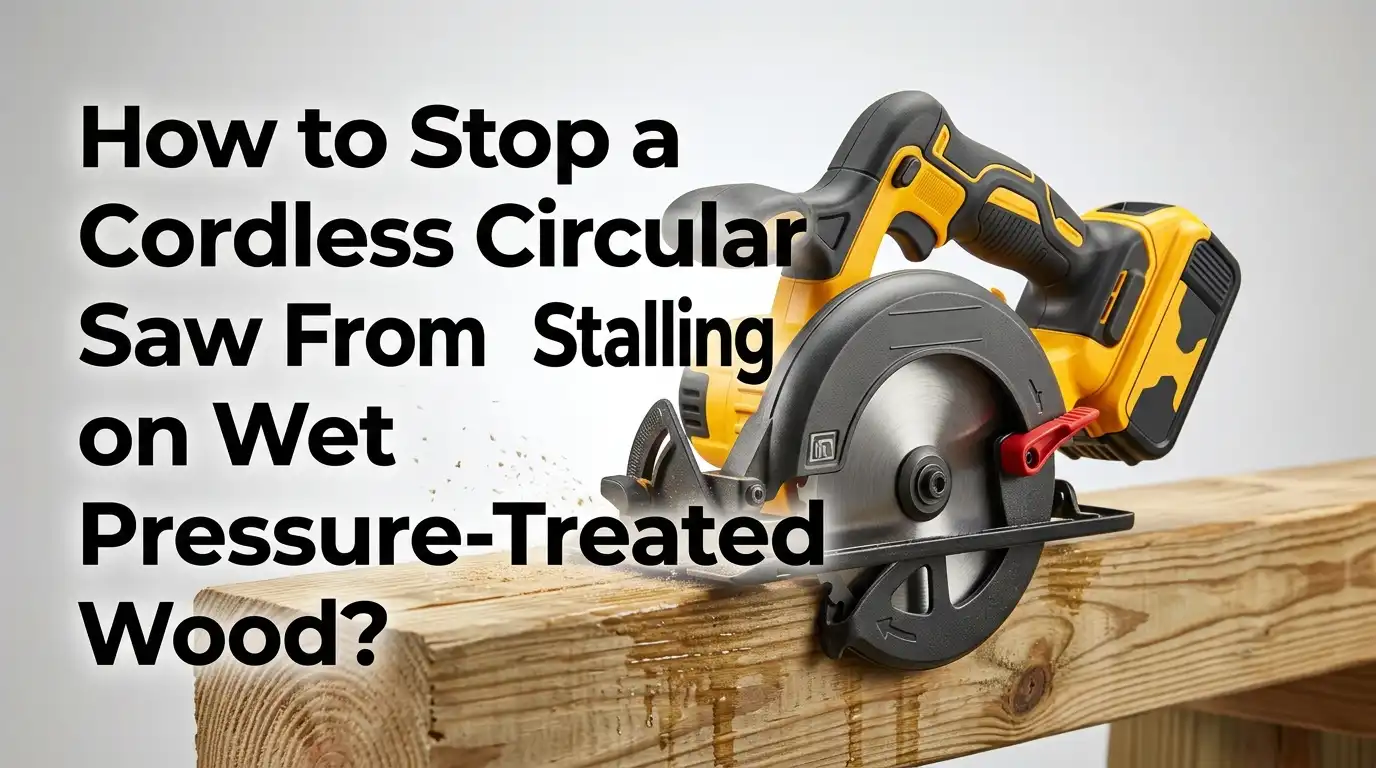
How to Stop a Cordless Circular Saw From Stalling on Wet Pressure-Treated Wood?
You pull the trigger on your cordless circular saw. You line up the cut on a fresh pressure-treated board. Three inches in, the motor whines.
The blade slows to a crawl. Then it stops completely. You back it out, try again, and the same thing happens. You check the battery. It is full. You wonder if your saw is broken.
It is not broken. You are fighting the unique challenge of wet pressure-treated wood. This lumber holds a lot of moisture from the chemical treatment process.
Key Takeaways
- The main cause of stalling is wood pinch, not a lack of saw power. Wet pressure-treated lumber releases internal tension as you cut. The kerf closes behind the blade and grabs it. Fix the pinch before you blame the saw.
- A thin-kerf blade with 18 to 24 teeth solves most stalling problems instantly. Wide-spaced teeth clear wet sawdust fast. A thin kerf removes less material so the motor works less. An anti-stick coating prevents gummy buildup from the chemical treatment.
- Proper lumber support is just as important as the blade itself. If your board sags between two sawhorses, the cut closes on your blade. Support the board near the cut line on both sides so the kerf stays open.
- Shallow passes and the wedge trick beat forcing a single deep cut. Set your blade depth to half the board thickness. Make the first pass. Then insert a small wood wedge into the kerf to hold it open. Finish with a second pass. Your saw will never bind.
- A high-output battery makes a real difference on demanding cuts. Standard compact batteries sag under heavy load. A larger amp-hour high-output battery delivers more sustained current and prevents the motor from bogging down mid-cut.
Why Wet Pressure-Treated Wood Causes Your Saw to Stall
Pressure-treated lumber starts its life soaking in a chemical bath. The treatment forces preservatives deep into the wood cells. When you buy that board at the store, it is often still heavy with moisture. This wetness creates two problems for your cordless saw.
First, the wet fibers are soft and spongy. They do not cut cleanly like dry pine. Instead, they tear and produce stringy, gummy sawdust.
This sawdust packs into the gullets of your blade. When the gullets fill up, the blade cannot clear debris. Friction builds. The motor struggles and eventually stalls.
The second problem is the internal tension inside every board. A tree grows under stress. That stress stays locked in the lumber. When you run a saw blade through a wet pressure-treated board, you release that tension. The wood moves.
The two sides of the cut can close inward and pinch the blade like a clamp. This is the most common reason a cordless saw stalls. You are not underpowered. You are fighting physics. Understanding this helps you target the right solution instead of buying a tool you may not need.
Choose the Right Blade for Wet Pressure-Treated Lumber
The factory blade that came with your cordless saw is not designed for wet treated wood. It usually has 40 to 60 teeth and a thick kerf. That blade is meant for clean crosscuts in dry plywood or finish lumber. Wet treated wood demands a completely different blade design.
You want a blade with 18 to 24 teeth. Fewer teeth mean larger gullets between them. Large gullets clear wet sawdust fast and prevent clogging. You also want a thin-kerf blade. The kerf is the width of the cut.
A thin kerf removes less material with each pass. Your cordless motor works less hard. Many users report that switching to a thin-kerf blade gave their saw up to 30 percent more runtime and far fewer stalls.
Finally, look for blades with an anti-stick or non-stick coating. The chemicals in pressure-treated wood are slightly corrosive. They also leave a gummy residue. A coated blade resists that buildup and stays cleaner through dozens of cuts.
Pros: Much less stalling. Faster cuts. Longer battery life. Cleaner cut edges with less tear-out. Blades are affordable and available at any hardware store.
Cons: You must buy a separate blade. The thin kerf can wander more if you push too fast. Anti-stick coatings wear off over months of heavy use.
Upgrade to a High-Output Battery for Consistent Power Delivery
Cordless saws pull a lot of current during a heavy cut. A standard 2.0 amp-hour compact battery may deliver enough voltage at first but sag quickly under sustained load. When the voltage sags, the motor slows and the blade stalls. This happens even though the battery still shows a full charge.
A high-output battery solves this. These batteries use larger cells that can deliver more current without voltage drop. A 4.0Ah, 5.0Ah, or 6.0Ah high-output pack keeps the motor spinning at full speed even when the blade meets heavy resistance.
Many modern cordless platforms also have batteries with advanced cell technology that communicates with the tool to prevent overheating and shutdown.
You will notice the difference immediately. The saw spins faster. It recovers quicker after a near-stall. The battery also runs cooler because it is not being pushed beyond its limits. If you have a lot of pressure-treated lumber to cut for a deck or fence project, this upgrade alone can save you hours of frustration.
Pros: More sustained power. Less voltage sag. Longer runtime per charge. Battery stays cooler and lasts more charge cycles over its life.
Cons: High-output batteries cost more. They are heavier and add weight to the saw. Not all older cordless tools are compatible with the newest high-output packs.
Set the Correct Blade Depth Before You Start the Cut
Many people never adjust the blade depth on their circular saw. They leave it at maximum depth for every cut. This habit works against you when cutting wet pressure-treated wood. The more blade that is buried in the material, the more friction you create. More friction means more heat, more resistance, and a higher chance of stalling.
Set your blade depth so the teeth extend about a quarter inch below the bottom of the board. For a standard one-and-a-half-inch thick board, this means your blade should protrude roughly one and three-quarter inches below the shoe. This setting exposes the minimum amount of blade needed to complete the cut.
Why does this help? With less blade in the wood, there is less surface area creating friction. The motor faces less resistance. The blade also runs cooler. Cooler blades stay sharper longer.
Plus, with less blade exposed beneath the board, you reduce the risk of kickback if something goes wrong. Take ten seconds before each cut to check your depth setting. Your saw will thank you.
Pros: Less friction and heat. Lower motor load. Extended blade life. Improved safety with less exposed blade.
Cons: You must adjust the depth for different board thicknesses. Forgetting to reset it can leave an incomplete cut on the next board.
Support Your Lumber Properly to Prevent Kerf Pinch
Imagine a long two-by-eight pressure-treated board resting on two sawhorses set eight feet apart. You stand in the middle and start a crosscut.
As the blade enters the wood, the weight of the board causes it to sag slightly at the cut point. That sag closes the kerf and pinches your blade. Your saw stalls instantly.
The fix is simple. Move your supports closer together or add a third support point. For crosscuts, place a sawhorse or a scrap block under the board within a foot of your cut line. The board must stay flat and stable through the entire cut. For rip cuts along the length of a board, support the piece along its full length so it does not droop or twist.
Also think about what happens to the offcut. If the piece you are cutting off is unsupported, it can drop and tear away from the main board. This sudden movement can bind the blade too.
Support both sides of the cut. A second sawhorse, a stack of scrap lumber, or even a foam insulation board laid on the ground works well. The goal is zero movement in the board during the cut.
Pros: Eliminates the most common cause of stalling. Costs nothing if you use scrap wood. Makes cutting safer and more accurate.
Cons: Takes extra time to set up supports. Requires clear ground space. Foam boards wear out and need replacement over time.
Use the Multiple Shallow Pass Technique for Thick Stock
One deep pass through a wet two-by-twelve is a recipe for a stalled saw. The motor simply cannot clear that much wet debris from a deep kerf. Instead, break the cut into two or three shallow passes. This is one of the most effective techniques for cordless saws.
Start by setting your blade depth to about half the thickness of the board. Make your first pass along the cut line. The saw will glide through with almost no resistance because it is removing only half the material.
After the first pass, adjust the blade depth to full thickness. Make the second pass. Since most of the material is already gone, the blade faces half the friction. It cuts clean and fast.
Some users take this further. They set the depth to a third of the board thickness for the first pass, two-thirds for the second, and full depth for the third.
This is extra helpful on knotty or heavily tensioned boards. Yes, it takes more time. But it takes far less time than backing out a stalled blade, resetting the saw, and fighting through the cut over and over.
Pros: Dramatically reduces motor load. Prevents stalling entirely on thick lumber. Works with any cordless saw regardless of power level.
Cons: More passes mean more time per cut. You must reset blade depth between passes. Dust extraction is less effective on shallow passes.
Insert a Wood Wedge to Hold the Kerf Open
Even with proper support and shallow passes, some boards have so much internal tension that they clamp shut the moment the blade passes through. When this happens, you hear the motor pitch drop and the saw begins to struggle. The solution is a small wood wedge tapped into the kerf behind the saw.
Cut a few small wedges from scrap wood before you start the project. A wedge about three inches long and tapering from a quarter inch to a sharp point works perfectly. As soon as you have cut six inches into the board, pause the saw.
Slide the thin end of the wedge into the kerf and tap it gently with a hammer. The wedge holds the cut open and prevents the wood from pinching the blade. Resume cutting. If the board tries to close again further along, add a second wedge.
This trick is borrowed from chainsaw users who deal with log tension every day. It works beautifully on pressure-treated lumber. The wedge does not need to be driven deep. Just enough to keep the kerf spread by a tiny amount so the blade body does not contact the wood.
Pros: Instantly stops blade pinching. Costs nothing. Works on the most stubborn boards. No special tools needed.
Cons: You must pause mid-cut to insert the wedge. Adds a step to your workflow. The wedge can fall out if the board shifts.
Cut Relief Kerfs Before Making Your Final Cut
Relief cuts are shallow saw passes made next to your intended cut line. They release the internal tension in the board before your main cut reaches those areas. This technique is especially useful for rip cuts, angled cuts, or any cut where the blade follows the grain.
Mark your final cut line. Then mark a second line about a quarter inch away from it on the waste side. Set your blade depth to about a third of the board thickness.
Run the saw along this second line first. This shallow relief cut releases some of the tension in the wood. When you make your final cut along the correct line, the board is much less likely to close up and grab the blade.
For stair stringers, where you cut a series of triangles out of a two-by-twelve, always cut the short sides of each triangle first. These are the cross-grain cuts. They act as relief cuts. Then make the long rip cut last. The board will move less because the tension has already been released by the crosscuts.
Pros: Prevents binding on long cuts. Reduces blade pinch from internal wood tension. Improves cut accuracy on final passes.
Cons: Takes extra time. You must plan your cut sequence. Creates an extra kerf that leaves a small waste strip to clean up.
Keep Your Blade Clean and Sharp Throughout the Project
Pressure-treated lumber leaves a sticky residue on saw blades. The copper-based preservatives mix with wet wood sap and form a gummy coating on the carbide teeth.
This coating increases friction. A dirty blade acts like a dull blade even if the teeth are still sharp. After twenty or thirty cuts, you may notice the saw working harder and stalling more often.
Clean your blade regularly during a big project. Remove the blade from the saw. Soak it in a blade cleaning solution or simple household degreaser for about ten minutes.
Scrub the teeth and the blade body gently with a nylon brush. Rinse with water and dry completely before reinstalling. You will see a dramatic improvement in cutting performance.
Also inspect the carbide teeth for dullness or chips. A chipped tooth does not cut. It tears. That tearing action creates more resistance and heat. If the blade has seen several large projects, it may be time for a fresh one. A sharp, clean blade is the cheapest performance upgrade you can give your cordless saw.
Pros: Restores cutting speed without buying a new blade. Extends blade life. Reduces motor strain and battery drain.
Cons: Requires removing and reinstalling the blade. Blade cleaners have a cost. Dull blades cannot be cleaned back to sharp.
Let Wet Lumber Dry Slightly Before Cutting If Time Allows
This tip does not always fit a tight schedule. But if you can plan ahead, let your pressure-treated lumber sit for a few days before cutting. Stack the boards with spacers between them so air circulates on all sides. Even two or three days of drying in a covered area reduces the surface moisture significantly.
Drier wood cuts more cleanly. The fibers are less spongy. The sawdust is less gummy. The internal tension in the board also starts to equalize as some moisture leaves. You will notice the saw glides through the wood with less effort and the blade stays cleaner longer.
There is a tradeoff. As pressure-treated lumber dries, it can twist, cup, or bow. This is why many builders prefer to cut and install it wet. The fasteners hold it straight as it dries in place.
If you choose to dry your lumber before cutting, inspect each board for warping after it has dried. Discard or rework any boards that have moved too much to use.
Pros: Easier cutting with less stalling. Cleaner blade stays sharp longer. Less chemical residue spray during cutting.
Cons: Requires extra time before starting the project. Drying can cause boards to warp or twist. Not practical for same-day builds.
Check Your Saw’s Base Plate and Blade Alignment
A circular saw that has been dropped or knocked around a job site may have a misaligned base plate. When the base plate is not parallel to the blade, the blade cuts at a slight angle to the direction of travel.
This creates side friction along the entire length of the cut. Side friction is a major cause of binding and stalling, especially in wet wood.
Place your saw on a flat surface. Retract the blade guard. Use a combination square to check that the blade is exactly 90 degrees to the base plate.
Also check that the base plate itself is not bent or warped. A bent shoe will rock during the cut and cause the blade to bind. Most cordless saws have adjustment screws or levers that let you square the blade to the base.
Also check the blade arbor for any wobble. With the saw unplugged or battery removed, grab the blade and try to wiggle it side to side. There should be no play. If the arbor bearing is worn, the blade can tilt under load and cause binding. This is a sign the saw needs service.
Pros: Fixes binding caused by saw geometry. Costs nothing if you just need to adjust. Extends the life of the saw.
Cons: Requires patience and a square to check accurately. A bent base plate may need replacement. Bearing wear requires professional repair.
Match Your Cutting Speed to the Material Resistance
A common mistake is pushing the saw through wet wood at the same speed you use for dry plywood. Wet pressure-treated lumber creates much more resistance. Pushing too fast overloads the motor. The saw bogs down and stalls.
The correct approach is to listen to the saw. Start the cut at full speed with the blade spinning freely before it touches the wood. Enter the material gently. Let the saw tell you how fast to push.
If you hear the motor pitch dropping, you are pushing too hard. Ease off. Let the blade clear the debris from the gullets. The saw should maintain a consistent high-pitched whine through the entire cut.
Think of it like driving a car up a steep hill. You do not floor the accelerator and hope for the best. You downshift and maintain steady RPMs. Treat your cordless saw the same way. A steady, moderate feed rate gets the cut done faster than a rushed attempt that stalls halfway through.
Pros: Prevents motor overload. Reduces heat buildup. Extends battery runtime. Produces cleaner cut edges.
Cons: Requires practice to develop the feel. Slower on paper compared to a powerful corded saw. Hard to maintain consistent speed on long rip cuts.
Know When to Switch to a Corded Saw for the Toughest Jobs
Cordless saws have come a long way. Modern brushless motors with high-output batteries can handle most tasks on a deck or fence build. But there are limits. If you are cutting dozens of two-by-twelve stringers, ripping thick posts, or working with wood that is absolutely saturated, a corded saw may be the smarter choice.
A 15 amp corded circular saw delivers consistent, unlimited power. It does not care about battery state of charge or thermal protection circuits. It spins faster and has more torque than any cordless model on the market. For heavy production cutting, the cord is a worthwhile tradeoff.
You do not need to abandon your cordless saw entirely. Use it for most cuts. Keep a corded saw nearby for the cuts that make the cordless struggle. This two-saw strategy lets you enjoy the convenience of cordless for 80 percent of the work while having a reliable backup for the tough 20 percent.
Pros: Unlimited runtime. Higher torque handles any lumber. No battery anxiety. Often cheaper than a premium cordless saw.
Cons: Requires access to power. Cord management on a job site. Heavier than most cordless models. Less convenient for quick cuts.
Safety Precautions When Cutting Wet Pressure-Treated Wood
Wet pressure-treated wood introduces safety concerns beyond stalling and binding. The chemical preservatives in the wood become aerosolized during cutting.
You are breathing in copper compounds and other treatment chemicals with every cut. Always wear a properly fitted N95 respirator or better when cutting this material. A simple dust mask is not enough.
Eye protection is equally critical. Wet sawdust sprays more heavily than dry dust. It can carry chemical residue directly into your eyes. Wear safety glasses with side shields or a full face shield for extended cutting sessions.
Kickback risk is higher with wet wood because of the binding we have discussed throughout this post. Never stand directly behind the saw. Position your body to the side so that if the saw kicks back, it travels past you instead of into you.
Keep both hands on the saw with a firm grip. Make sure the blade guard operates freely and snaps back into place when you release the trigger. Finally, wear gloves to protect your hands from splinters and chemical contact. Pressure-treated splinters can cause painful infections.
Pros: Prevents serious injury. Reduces chemical exposure. Builds safe habits for every project.
Cons: Respirators can be uncomfortable in hot weather. Safety glasses may fog up. Gloves reduce tactile feel of the saw trigger.
Frequently Asked Questions
Why does my cordless circular saw only stall on pressure-treated wood and not on regular lumber?
Pressure-treated wood retains a high moisture content from the chemical treatment process. Those wet, swollen fibers create more friction against the blade. The chemicals also produce gummy sawdust that clogs blade gullets faster than dry pine dust. On top of that, internal wood tension releases more aggressively in wet treated boards.
Can I use WD-40 or another lubricant on my blade to reduce binding?
Some experienced woodworkers do spray a light dry lubricant on their blades when cutting wet pressure-treated lumber. It can help reduce friction and prevent gummy buildup on the carbide teeth. However, this comes with a caution. Wet lubricants can attract sawdust and create an even thicker paste on the blade.
How many teeth should my blade have for cutting wet pressure-treated wood?
A blade with 18 to 24 teeth works best for wet pressure-treated framing lumber. The low tooth count creates large gullets between the teeth. These gullets act like scoops that carry wet sawdust out of the kerf. A blade with 40 or more teeth has small gullets that pack full almost instantly in wet wood.
My saw still stalls even with a new blade and a full battery. What else could be wrong?
Check three things. First, inspect your lumber support. If the board sags between sawhorses, the kerf will pinch. Move supports closer to the cut. Second, check your blade depth. Running at full depth in wet wood creates unnecessary friction. Set the blade to just clear the board thickness. Third, examine the saw itself.
Is it better to let pressure-treated wood dry before cutting it?
If your schedule allows, yes. Let the lumber sit for three to seven days in a covered area with spacers between boards for airflow. Surface moisture will drop noticeably. The wood will cut with less resistance and produce less gummy sawdust. However, be aware that as treated lumber dries, it can warp, twist, or cup.

Hi, I’m Leah Ray — the voice behind CraftBench Vault. I’m a passionate woodworking enthusiast dedicated to reviewing the best wood cutting tools and woodworking products. Through honest research and hands-on experience, I help fellow crafters make smarter buying decisions. Welcome to my workshop!