Why Does My Scroll Saw Vibrate So Much and How to Bolt It Down Properly?
Your scroll saw shakes, the table rattles, and your cuts wander off the line. Sound familiar? A vibrating scroll saw is one of the most common headaches woodworkers face, and it can ruin your patterns, tire your hands, and even damage your machine over time.
In this guide, you will learn why your scroll saw shakes, how to bolt it down the right way, and which mounting methods give the smoothest results.
Whether you own a budget benchtop saw or a heavier model, these steps will help you cut cleaner, quieter, and safer. Keep reading to turn that jumpy machine into a calm, accurate cutting tool.
Key Takeaways
- Vibration usually comes from a loose base, worn bearings, an unbalanced motor, or a poor blade setup. Most issues start with how the saw sits on its surface, not the saw itself.
- Bolting your scroll saw down is the single best fix. A saw that is bolted to a heavy bench or stand transfers shake into the mass below, instead of bouncing on the tabletop.
- Use the right hardware. Carriage bolts, washers, lock washers, and rubber isolation pads work together to hold the saw firm while soaking up motor hum.
- Heavier is better. A flimsy folding table will always shake. A solid hardwood bench, a sandbag weighted stand, or a concrete anchored cabinet gives you a rock steady base.
- Tune the saw too. Square the blade, balance the tension, check the bearings, and clean the motor housing. Mounting alone will not fix a worn machine.
- Test before you cut. Run the saw at full speed with no wood. If a coin stays upright on the table, your setup is solid.
Common Reasons Your Scroll Saw Vibrates Too Much
Scroll saws move a blade up and down hundreds of times per minute. That motion creates natural vibration, but excessive shaking points to a real problem.
The most common causes include a lightweight base, loose mounting bolts, worn arm bearings, an unbalanced flywheel, a dull or wrong blade, and improper blade tension.
Many beginners blame the saw itself. In truth, the surface under the saw matters just as much as the machine. A 30 pound benchtop saw sitting on a hollow particleboard table will shake far more than the same saw bolted to a 200 pound hardwood bench.
Identify the source first. Run the saw with the blade removed. If it still shakes hard, the issue is mechanical. If it runs smooth without a blade but jumps with one in, the issue is blade related or mounting related.
How to Diagnose the Source of the Shake
Diagnosis saves you hours of guesswork. Start by placing your hand on the motor housing while the saw runs. A steady hum is normal. A rough, knocking pulse means worn bearings or a loose flywheel.
Next, watch the table edge. If it bounces up and down, your base is too light or the bolts are loose. If the blade itself wobbles side to side, the upper or lower arm bearings are worn out.
Finally, check the floor. Place a level on your bench. An uneven floor under a stand will twist the frame and create a wobble that no amount of bolting can stop. Shim the legs until the saw sits flat. Once you know the cause, you can pick the right fix instead of buying parts you do not need.
Why a Heavy Base Matters So Much
Physics is on your side here. Vibration is energy looking for somewhere to go. When you bolt your saw to a heavy mass, that energy gets absorbed instead of bouncing back into the blade.
A scroll saw weighing 40 pounds bolted to a 250 pound workbench acts like a small bird sitting on an elephant. The elephant barely notices. Lighter benches just bounce along with the saw.
Pros of using a heavy base: dramatic vibration reduction, cleaner cuts, less arm fatigue, longer tool life, and quieter operation.
Cons of using a heavy base: the bench is harder to move, takes up permanent shop space, and may need reinforcement on second floor workshops. Still, the trade off is worth it for any serious scroll sawing work. If your bench weighs less than your saw plus 100 pounds, add weight before you do anything else.
Step by Step Guide to Bolting Your Scroll Saw Down
Bolting down your saw is a 30 minute job. Here is the simple process.
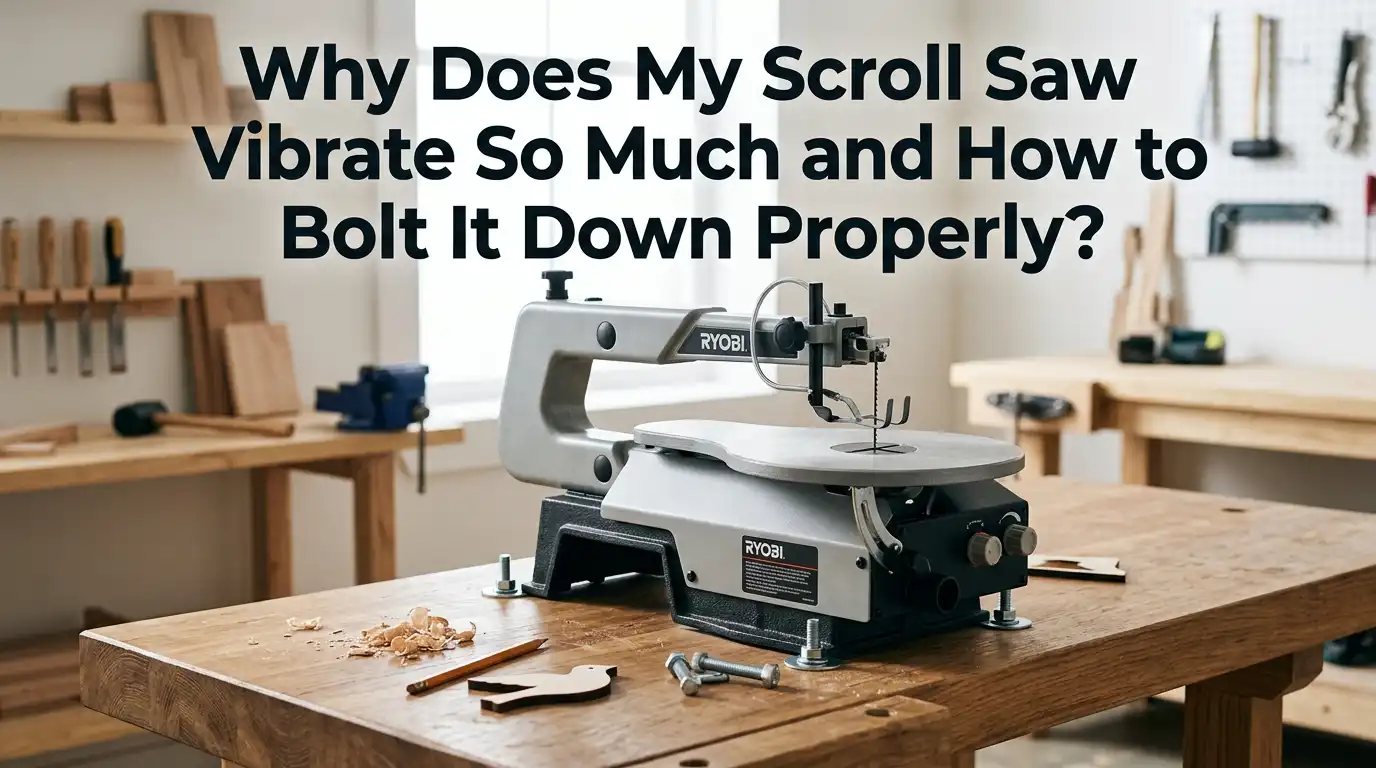
First, find the four mounting holes on the base of your scroll saw. Most models have them pre drilled at the corners. Place the saw where you want it on the bench. Mark each hole with a pencil through the opening.
Second, remove the saw. Drill a hole through the bench at each mark using a bit slightly larger than your bolt diameter. A quarter inch bolt works for most benchtop scroll saws.
Third, place a rubber isolation pad on the bench. Set the saw on top, lining up the holes. Drop a carriage bolt through each hole from the top, with a washer.
Fourth, go under the bench. Add a flat washer, a lock washer, and a nut. Tighten until snug, then give a quarter turn more. Do not overtighten or you will crack the saw base.
Choosing the Right Bolts and Hardware
The hardware matters more than people think. Cheap bolts strip, bend, and loosen over time. Use grade 5 or grade 8 carriage bolts for the strongest hold.
For most benchtop scroll saws, a quarter inch by three inch carriage bolt works. Larger floor model saws may need three eighths inch bolts. Always pair each bolt with a flat washer on top, a flat washer on the bottom, a lock washer, and a nylon insert lock nut.
The lock washer and nylon nut prevent the bolt from backing out as the saw vibrates. Without them, you will be retightening every week. Stainless steel hardware costs a little more but resists rust in humid shops. A small investment in good bolts saves hours of frustration later.
Using Rubber Pads and Vibration Dampeners
Rubber pads are your secret weapon against vibration. They sit between the saw base and the bench, soaking up high frequency shake before it reaches the wood.
The best options include neoprene anti vibration pads, gym floor mats cut to size, and dense rubber horse stall mats. A pad about half an inch thick gives the right balance of grip and dampening. Thinner pads compress too much and thicker ones let the saw rock.
Pros of rubber pads: cheap, easy to install, reduce noise, protect the bench surface, and work with any saw model.
Cons of rubber pads: they can slowly compress over a year of heavy use, may shift if not bolted through, and some cheap foam pads break down quickly. Always bolt through the pad rather than just resting the saw on it. This combines the grip of bolts with the cushion of rubber for the best result.
Building or Buying a Dedicated Scroll Saw Stand
A dedicated stand keeps your scroll saw at the perfect height and weight. Most factory stands weigh 30 to 50 pounds. That is often too light on its own.
You can build a simple stand from two by four lumber and three quarter inch plywood for under fifty dollars. Add a bottom shelf and load it with sandbags, paving stones, or a toolbox for extra mass. This trick alone can cut vibration in half.
Pros of a dedicated stand: correct ergonomic height, mobility if you add casters, dedicated storage below, and easy access to the saw.
Cons of a dedicated stand: factory stands cost extra, take up floor space, and lightweight stands actually make vibration worse than a heavy bench. If you buy a stand, look for one with bolt down feet so you can secure it to the floor.
How to Anchor a Stand to a Concrete Floor
If you have a concrete shop floor, you can take stability to the next level. Concrete anchors lock your stand in place so it cannot shift even a hair.
Start by positioning the stand exactly where you want it. Mark the bolt holes on the concrete with a pencil. Move the stand aside. Use a hammer drill with a masonry bit to drill holes about two and a half inches deep.
Drop in three eighths inch concrete wedge anchors. Place the stand back over the holes, add washers, and tighten the nuts with a wrench. The anchors expand inside the concrete and grip hard.
Pros: maximum stability, zero movement, lasts decades.
Cons: permanent installation, requires a hammer drill, and not suitable for renters or shared spaces. For dedicated shops, this is the gold standard fix.
Balancing the Blade and Checking Tension
Even a perfectly bolted saw will shake if the blade is wrong. Blade tension is one of the most overlooked causes of vibration.
A blade that is too loose flexes side to side, causing the arms to rock. A blade that is too tight stresses the bearings and creates a high pitched buzz. The right tension lets the blade ping like a guitar string when plucked.
Use the right blade size for the wood. Thick hardwood needs a wider blade. Thin plywood needs a fine tooth blade. The wrong blade fights the wood and transfers that fight into vibration.
Check the blade clamps too. Sawdust builds up inside them and prevents a square hold. Clean the clamps with compressed air every few hours of use. A clean, square, properly tensioned blade runs noticeably smoother.
Maintaining Bearings and Internal Parts
Worn bearings are a top cause of vibration in older scroll saws. They sit inside the upper and lower arms and let the blade move smoothly. After a few hundred hours, they wear out and start to rattle.
To check them, unplug the saw and remove the blade. Wiggle each arm by hand. Any clicking, grinding, or play means a bearing needs replacing. Replacement bearings cost only a few dollars each.
Lubricate the pivot points every six months with a light machine oil. Wipe out sawdust from the motor vents and arm linkage with compressed air. A clogged motor runs hotter and shakes more.
If your saw is more than ten years old and has never been serviced, a full bearing rebuild can make it feel brand new. The job takes about an hour with basic hand tools.
Setting Up the Workspace Around the Saw
Your shop layout affects vibration too. A saw tucked into a corner with no airflow runs hotter and vibrates more from heat expansion in the motor.
Place your saw on a level, solid floor. Concrete is ideal. Wood subfloors flex and amplify shake, especially on second floors. If you must work upstairs, put the saw over a load bearing wall or floor joist.
Keep at least two feet of clear space around the saw. This stops you from bumping the bench mid cut, which sends vibration straight through the wood.
Good lighting helps too. When you can see the line clearly, you push the wood gently and steadily. Forcing wood through the blade increases vibration and makes the saw jump. A calm, clear workspace produces calm, clear cuts.
Final Test to Confirm a Solid Setup
After bolting down and tuning your saw, run a final test. This proves your work paid off.
Place a small coin, like a nickel, on the saw table near the blade. Start the saw with no wood and run it through the full speed range. If the coin stays standing, your setup is excellent. If it falls flat, you still have vibration to chase.
Next, do a cut test. Take a piece of quarter inch plywood and cut a slow curve. The blade should track the line without hopping. The wood should not bounce against the table.
If both tests pass, you are ready for serious scroll saw work. If not, recheck the bolts, blade tension, and bearings in that order. Most problems trace back to one of these three. A well bolted, well tuned scroll saw is a joy to use for decades.
Frequently Asked Questions
Is some vibration on a scroll saw normal?
Yes, a small amount of vibration is normal because the blade moves up and down rapidly. You should feel a gentle hum, not a strong shake. If your coin test fails or the table bounces visibly, the vibration is too much and needs fixing.
Can I use wood screws instead of bolts to mount my scroll saw?
Wood screws can work for light duty saws, but bolts hold far better. Screws loosen as the saw vibrates and the wood fibers compress. Bolts with lock washers stay tight for years. For any saw over 25 pounds, use bolts.
What thickness of rubber pad works best under a scroll saw?
A pad between three eighths and three quarters of an inch thick gives the best results. Thinner pads do not absorb enough vibration. Thicker pads let the saw rock. Half inch neoprene or dense rubber is the sweet spot for most saws.
Will bolting my saw down void the warranty?
No, bolting your saw down does not void any warranty. Manufacturers actually recommend secure mounting in their manuals. The pre drilled holes in the base are made for exactly this purpose. Just avoid drilling new holes in the saw body itself.
How often should I retighten the mounting bolts?
Check the bolts every three months for the first year, then once a year after that. With lock washers and nylon insert nuts, they should stay tight. A quick check with a wrench takes only a minute and prevents loosening before it becomes a problem.
Can I bolt my scroll saw to a folding table?
It is not recommended. Folding tables are too light and flex under the saw. Even a bolted saw will shake on a flimsy surface. Use a solid workbench, a weighted stand, or build a simple plywood and two by four base for much better results.

Hi, I’m Leah Ray — the voice behind CraftBench Vault. I’m a passionate woodworking enthusiast dedicated to reviewing the best wood cutting tools and woodworking products. Through honest research and hands-on experience, I help fellow crafters make smarter buying decisions. Welcome to my workshop!