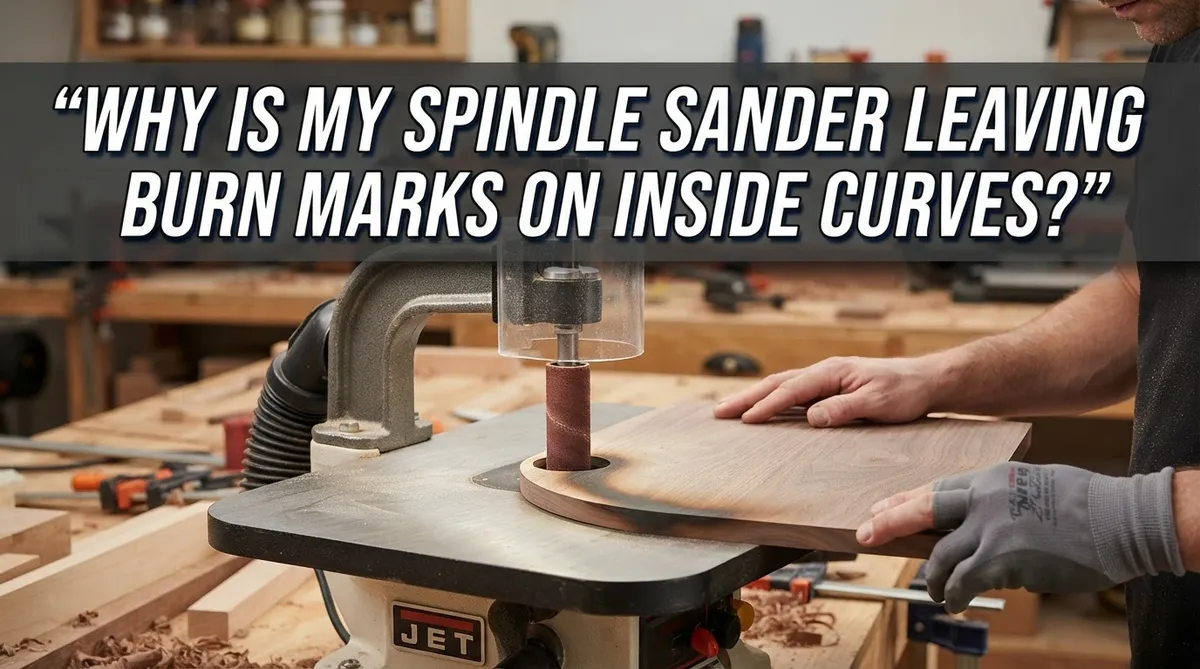
Why Is My Spindle Sander Leaving Burn Marks On Inside Curves?
You sand a curve on your spindle sander. You expect a smooth finish. Instead, you see dark scorch marks on the wood.
This problem frustrates many woodworkers. Burn marks on inside curves happen more often than on flat edges. The tight radius creates extra friction and heat.
Your abrasive rubs against the same spot longer on curves than on straight cuts. That friction builds heat fast. Heat scorches the wood fibers before you even notice it happening.
Several factors cause this issue. A dull abrasive stops cutting and starts rubbing. Too much pressure adds more friction. Old finish can gum up your sandpaper too.
In a Nutshell
- Heat buildup is the main culprit. Friction between the abrasive and wood creates extreme heat, especially on tight inside curves where contact time is longer.
- Dull abrasives make it worse. Worn grits rub the wood instead of cutting it. This rubbing action generates more heat and leaves dark marks.
- Pressure matters a lot. Pushing too hard forces the workpiece against the spindle longer. Light, steady pressure helps the abrasive cut cleanly without scorching.
- Keep the workpiece moving. Holding it still in one spot lets heat concentrate. Continuous motion spreads the friction evenly across the curve.
- Finish buildup clogs your grits. Shellac and other finishes gum up the abrasive surface. This buildup traps heat and reduces cutting efficiency.
- Tool selection counts too. Using the wrong spindle size for your curve geometry increases contact pressure and heat.
What Causes Burn Marks on Inside Curves
Heat buildup is the primary reason your spindle sander leaves burn marks on inside curves. Friction between the abrasive and wood surface generates extreme temperatures, especially when the abrasive stays in contact with the same spot for too long.
Dull abrasives intensify this problem. When your grits wear down, they rub the wood instead of cutting it cleanly. This rubbing action creates more friction and heat than a sharp abrasive would. The wood fibers scorch from the prolonged contact and temperature, leaving dark marks behind.
Pressure plays a critical role in burn mark formation. Excessive downforce pushes the workpiece harder against the spindle, concentrating contact pressure in a small area. This concentrated pressure traps heat and prevents air circulation that would normally cool the wood.
Movement speed matters significantly. When you hold the workpiece too long in one spot, heat accumulates faster than it can dissipate. Continuous, steady movement distributes the sanding action across a larger area, preventing heat concentration.
Finish buildup on your abrasive surface worsens heat problems. Shellac, stain, and other finishes gum up the grits, reducing cutting efficiency. The abrasive then rubs more than it cuts, generating additional heat and friction.
Tool selection also contributes to this issue. Using an incorrect spindle size for your curve geometry increases contact pressure. A spindle that’s too large or too small for your specific inside curve won’t distribute pressure evenly, creating hot spots.
Understanding these causes helps you prevent burn marks. The combination of dull abrasives, excessive pressure, slow movement, and finish buildup creates the perfect conditions for scorching your wood. Addressing even one of these factors can significantly reduce burn marks on your next project.
How Heat Builds Up Between Abrasive and Workpiece
Heat builds up rapidly between your abrasive and the wood surface. Friction is the enemy here. When the abrasive grit contacts the wood, it generates friction that converts to thermal energy.
On inside curves, this heat concentrates in a smaller contact area. Your spindle sander presses the abrasive against the curved surface with significant force. The rubber spindle itself absorbs and transfers this heat directly to your workpiece. This creates a localized hot spot that can scorch the wood fibers.
Dull abrasives make heat buildup much worse. Sharp grits cut wood cleanly and efficiently. Worn grits don’t cut—they rub instead. Rubbing produces far more heat than cutting does. The wood fibers resist the dull abrasive, generating extra friction and thermal energy at the contact point.
Your sanding speed also affects heat generation. If you hold the workpiece against the spinning spindle too long, heat accumulates faster than it can dissipate. The wood surface reaches temperatures that scorch the fibers, leaving dark burn marks behind.
Pressure compounds the problem significantly. Excessive downforce pushes the workpiece harder against the abrasive. This increases friction and heat production. It also slows the wood’s movement across the abrasive surface, allowing heat to concentrate longer in one spot.
Finish buildup accelerates heat problems too. Shellac, lacquer, and other finishes can gum up your abrasive grits. Clogged grits don’t cut effectively. They create more friction, which means more heat. The combination of clogged grits and increased friction becomes a recipe for burn marks.
The rubber spindle itself conducts heat into your workpiece. As friction heats the abrasive, that thermal energy transfers through the rubber core directly to the wood. This is why inside curves suffer more—the curved geometry concentrates contact pressure in a tight area, intensifying heat transfer through the spindle material.
Matching Spindle Size and Tool Choice to Curve Geometry
Choosing the right spindle size for your curve is essential. Your spindle diameter should match the radius of the inside curve you’re sanding. A spindle that’s too large creates excessive contact pressure in a concentrated area. This pressure forces the wood harder against the abrasive, generating intense heat quickly.
A smaller spindle works better for tight curves. It distributes contact pressure over a smaller footprint, reducing friction and heat buildup. However, a spindle that’s too small can cause chattering or create uneven surfaces. You need the largest spindle that still fits your curve comfortably.
Your abrasive grit selection also matters for curve geometry. Start with a coarser grit if you have heavy finish buildup or deep scratches. Coarser grits cut more aggressively and don’t clog as easily. Progress to finer grits once you’ve removed the initial material. This systematic approach prevents you from forcing a fine grit to do heavy work.
Spindle length affects your control too. A longer spindle can flex under pressure, creating uneven contact. Shorter spindles provide better rigidity and more consistent results on inside curves. Your tool should feel stable when you apply light to moderate pressure.
Replace your abrasive sleeves regularly. Worn grits generate more heat because they rub instead of cut. Check your spindle and abrasive for buildup between projects. Sawdust and finish residue trap heat and reduce cutting efficiency.
The key is matching your entire setup to the specific curve you’re sanding. A tight curve on a decorative piece needs different tool selection than a gradual curve on furniture. Take time to select the right spindle diameter and grit combination before you start. This preparation prevents burn marks and saves you from having to sand through damage later.
Step-by-Step Technique to Sand Inside Curves Without Burning
Start by keeping your workpiece moving constantly across the spindle. Never hold it in one spot, even for a second. Continuous motion prevents heat from concentrating in a single area. Move your piece smoothly and steadily, as if you’re guiding it rather than pressing it.
Apply light to moderate pressure only. Your hand should guide the wood, not force it against the abrasive. Heavy downforce creates friction that generates excessive heat. Let the abrasive do the work instead of muscling the piece through.
Check your abrasive sleeve before each project. Run your hand over it gently to feel for dull spots or clogged grit. A worn abrasive produces heat instead of clean cuts. Replace sleeves that feel glazed or smooth.
Work through your grit sequence systematically. Start with a coarser grit and progress to finer ones. Skipping grits forces finer abrasives to remove material they’re not designed for, which causes heat buildup and burning.
Clean your abrasive regularly during sanding. Dust and finish residue clog the grits and reduce cutting efficiency. Use a brush or compressed air to clear the spindle surface every few minutes.
Reduce your spindle speed if burning persists. Slower speeds generate less friction and heat. Most spindle sanders allow speed adjustment, so experiment to find your optimal setting for inside curves.
Take breaks between projects. Let your spindle cool down, especially if you’ve been sanding tightly curved pieces. A hot spindle transfers more heat to your workpiece than a cool one.
Sand with the grain direction whenever possible on your curves. This reduces resistance and heat generation. If your curve changes grain direction, slow your movement speed through those sections.
Finally, test your technique on scrap wood first. Practice maintaining steady pressure and consistent movement before working on your actual project.
Common Mistakes That Lead to Scorched Wood
Burn marks happen when friction generates excessive heat that scorches your wood surface. Understanding the specific mistakes you’re making helps you fix the problem quickly.
Holding your workpiece too long in one spot is the most common error. When you keep the wood pressed against the spinning spindle without moving it, heat concentrates in that small area. The friction builds rapidly, and your wood burns before you realize what’s happening. Keep your workpiece moving smoothly across the spindle at all times.
Applying excessive pressure compounds the heat issue dramatically. Many woodworkers believe more pressure means faster sanding. This is wrong. Heavy pressure forces the abrasive into the wood fiercely, creating intense friction and heat. Use only light to moderate pressure. Let the abrasive do the work for you.
Using worn out abrasives makes burning almost inevitable. Dull grits don’t cut wood cleanly. Instead, they rub and generate tremendous heat through friction. Replace your abrasive sleeves regularly, especially before tackling inside curves where heat concentrates anyway.
Finish buildup accelerates burn marks significantly. If you’re sanding over shellac, lacquer, or other finishes, these materials gum up your grits. The clogged abrasive can’t cut properly and creates more friction. Clean your abrasive sleeve frequently during sanding to prevent this gumming.
Skipping grit progressions also causes problems. Jumping from coarse to fine grits leaves scratches that require more aggressive sanding. This extra work generates unnecessary heat. Progress through your grits systematically.
Finally, choosing the wrong spindle size for your curve geometry creates concentrated pressure points. A spindle too large for a tight curve presses harder in one spot. Select a spindle diameter that matches your curve smoothly and distributes contact pressure evenly.
Troubleshooting Persistent Burn Marks
Burn marks on inside curves happen when friction creates heat faster than your wood can handle it. The problem intensifies because curved surfaces concentrate pressure into a smaller contact area. Understanding what’s actually happening helps you fix it.
Dull abrasives are a primary culprit. When your sanding sleeve loses its cutting ability, it rubs instead of slices through the wood surface. This rubbing action generates tremendous heat. You’ll notice this especially on tight curves where contact pressure naturally concentrates. Replace your abrasive sleeves regularly, even if they look okay visually.
The rubber spindle itself conducts heat directly into your workpiece. As friction builds up, the spindle becomes a heat conductor rather than a sanding tool. This is why burn marks appear so suddenly on inside curves. The rubber transfers thermal energy right into the wood fibers.
Finish buildup accelerates this problem significantly. Shellac, lacquer, and other coatings gum up your abrasive grits, creating a glazed surface that generates more heat through friction. Clean your abrasive sleeve frequently during sanding sessions. Stop and wipe away dust and finish particles every few minutes.
Your technique matters more than your equipment. Keep your workpiece moving constantly across the spindle. Never hold it stationary, even for a second. Apply only light to moderate pressure. Let the abrasive do the work rather than forcing it.
If burning persists after checking these factors, reduce your spindle speed. Many sanders run faster than necessary for inside curves. A slower speed gives you more control and reduces frictional heat generation.
Test your approach on scrap wood first. This lets you practice your technique without risking finished pieces. Pay attention to how long contact takes and how much pressure feels right. Your hands will develop the feel for proper technique quickly.
Fixing Existing Burn Marks and Restoring the Surface
Burn marks on wood are heat damage that you can fix with the right approach. The good news is that these marks are removable through proper sanding technique. You’ll need to sand through the damaged layer to restore your surface.
Start by identifying how deep the burn goes. Light surface scorching requires less aggressive action than dark, charred wood. Run your finger across the burned area to feel the depth of damage. Deeper burns need more sanding passes to remove completely.
Begin with a coarser grit than normal to cut through the damaged wood faster. This removes the scorched layer without spending excessive time on one spot. Once you’ve eliminated the dark discoloration, progress to your standard grit sequence. Move progressively finer to restore smoothness and prepare for finishing.
Keep your workpiece moving constantly during this restoration process. Stationary contact will simply create new burn marks. Use light pressure and let the abrasive do the work. Heavy pressure generates the same heat buildup that caused your original problem.
Pay attention to your spindle speed during restoration. You may need to reduce it slightly to prevent new burns while removing old ones. This gives you better control and reduces friction heat. Test your approach on a scrap piece first to confirm your settings work.
Clean your abrasive frequently as you sand through the damaged wood. Charred particles clog the grit and reduce cutting efficiency. This clogging causes rubbing instead of cutting, which creates more heat. A clean abrasive cuts faster and cooler.
After removing all visible burn marks, sand with your normal grit progression. This ensures consistent surface quality and proper finish preparation. The restored area should feel smooth and look uniform with surrounding wood. Your wood is now ready for stain or finish application.
Final Thoughts
Burn marks on inside curves are frustrating, but they are never permanent damage. Understanding why they happen puts you back in control.
Heat buildup, dull grits, and static contact are the real enemies here. Once you know this, prevention becomes simple.
Your sanding technique matters more than the tool itself. Moderate pressure and steady movement solve most burning problems before they start.
Think of your spindle sander as a partner, not a machine that does all the work alone. It responds to how you guide the workpiece across its surface.
Fresh abrasives make a huge difference too. A sharp grit cuts wood fibers cleanly, while a dull one just creates friction and heat.
Pay attention to how your material feels as you sand. Warm wood is a warning sign that tells you to adjust your approach immediately.
Every wood species behaves differently under a spindle sander. Softer woods scorch faster, so they need lighter touches and quicker passes.
Practice on scrap pieces until your movements feel natural. This builds muscle memory that protects your actual project pieces later.
Remember that curve geometry plays a big role in burn risk. Tighter curves concentrate pressure, so they demand extra care and attention.
Small adjustments often fix persistent issues. Try a different spindle size, slow your feed rate, or clean your grits more often.
Patience pays off when working with curves. Rushing through a shape almost always leads to scorched edges and wasted sanding time.
With the right habits, burn marks become rare instead of routine. Your projects will show cleaner curves and smoother finishes overall.
Keep these lessons in mind for every future project. Good technique combined with fresh abrasives keeps your inside curves burn free every single time.
Frequently Asked Questions
Why do burn marks appear even when I use light pressure?
Light pressure alone won’t stop burns if your abrasive is dull. Worn grits rub instead of cut, creating friction that generates heat. The rubber spindle then transfers that heat directly into your wood. Even gentle contact with a dull sleeve produces the same problem as heavy pressure with a sharp one.
Replace your abrasive sleeve regularly. A fresh grit cuts cleanly and produces minimal heat. If you’re still seeing burns with new abrasives and light pressure, your spindle speed might be too high for inside curves.
Can I prevent burns by moving faster through the curve?
Yes. Constant movement is your best defense against heat buildup. Holding your workpiece in one spot concentrates pressure and friction in that area. Move steadily and smoothly along the curve without pausing.
Never let the spindle sit against the wood. Think of it like petting a cat in one direction versus rubbing back and forth in the same spot. One creates smooth results; the other creates heat damage.
Does the size of my spindle matter for burn prevention?
Absolutely. A spindle that’s too large for your curve creates a concentrated pressure point at the deepest part of the contact. This pressure spike generates excessive heat exactly where you don’t want it.
Match your spindle diameter to your curve geometry. A smaller spindle distributes pressure more evenly across tighter inside curves. Using the wrong size is one of the easiest mistakes to make.
What should I do if my finish keeps gumming up the abrasive?
Shellac and other finishes can clog your sanding sleeve, which causes the same rubbing action as dull grits. Clean your abrasive frequently while working. Stop periodically and brush away the buildup.
If gumming is severe, start with a coarser grit to cut through the finish faster. This removes the problematic layer before switching to finer grits.

Hi, I’m Leah Ray — the voice behind CraftBench Vault. I’m a passionate woodworking enthusiast dedicated to reviewing the best wood cutting tools and woodworking products. Through honest research and hands-on experience, I help fellow crafters make smarter buying decisions. Welcome to my workshop!