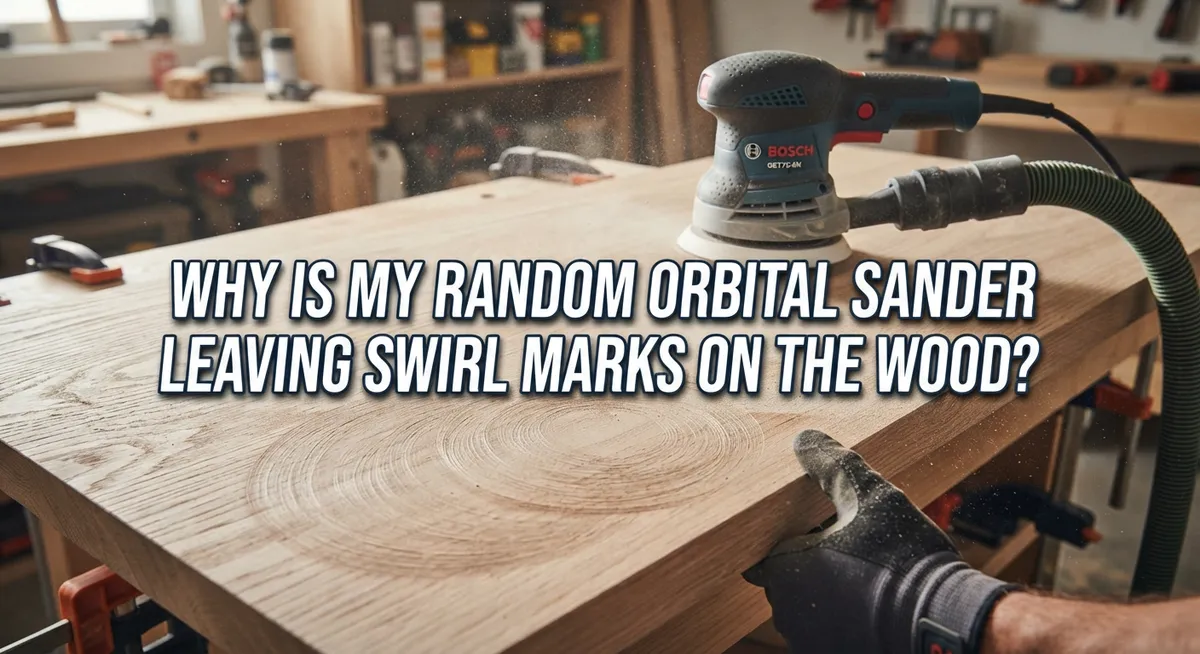
Why Is My Random Orbital Sander Leaving Swirl Marks On The Wood?
You sand a wooden board with care. You expect a smooth, flawless finish. Instead, you see tiny circular scratches all over the surface.
These are swirl marks. They show up even when you use a random orbital sander. This can feel frustrating, especially after spending time on the project.
The good news is that swirl marks are common. Most woodworkers face this problem at some point. It usually comes down to a few simple habits.
Excessive pressure is often the main culprit. Skipping grit stages also causes trouble. Dirty or clogged discs make things worse too.
In a Nutshell
- Too much pressure creates deep swirl marks. Let the sander glide with a light touch instead of pushing down hard.
- Skipping grit stages leaves visible scratches. Always move through each grit step, starting around 120 and working up to 320.
- Dirty or clogged discs drag debris across the wood. This creates fresh swirls even if your technique is perfect.
- Trapped dust under the pad acts like sandpaper gone wrong. It scratches the surface in random patterns as you sand.
- Setting the sander face-down picks up dirt and grit from the table. This dirt transfers straight to your wood on the next pass.
Understanding How Random Orbital Sanders Work
A random orbital sander moves in two ways at once. The sanding disc spins in a circle while also moving in a random orbit pattern. This combination helps sand wood evenly and avoid leaving visible patterns.
The spinning motion creates the main cutting action. The random orbital motion prevents the sander from following the same path twice. Together, these movements should produce a smooth surface without obvious scratches or marks.
However, swirl marks happen when something interrupts this balanced action. Excessive pressure is the biggest problem. When you push down too hard, the sander digs deeper into the wood. The random orbit pattern becomes less effective because the spinning motion dominates. The result is visible circular or spiral marks on the surface.
The sanding disc itself matters too. A clogged or dirty disc loses its cutting ability. It then drags across the wood instead of cutting cleanly. Dust and debris trapped under the sanding pad work the same way. They act like extra grit particles that scratch the surface unpredictably.
Grit progression also affects your results. If you skip from very coarse grit directly to fine grit, you leave deep scratches behind. The finer grit cannot remove those deeper marks. Each grit stage should remove the scratches from the previous stage.
Dust collection plays a supporting role. Poor suction allows debris to accumulate under the pad. This trapped material causes the sander to bounce and skip across the wood. A clean pad with good dust extraction keeps the sanding disc in consistent contact with the wood surface.
Understanding these mechanics helps you identify what causes your specific swirl marks. Each cause has its own solution.
Top Causes of Swirl Marks on Wood
Swirl marks appear on wood when your sander’s motion gets disrupted or the abrasive surface becomes compromised. Understanding the root causes helps you fix the problem quickly.
Excessive pressure is the leading cause of visible swirl marks. When you press down hard on the sander, you force the disc to cut deeper and leave circular patterns. Soft woods like pine and cedar are especially vulnerable to this problem. Let the tool do the work instead of pushing it into the surface.
Skipped grit progression creates another common issue. If you jump from 80 grit directly to 220 grit, you leave deep scratches that show up as marks. Each grit stage removes the scratches from the previous one. Skipping stages means those initial scratches remain visible underneath.
Clogged or dirty discs drag debris across the wood surface. When your sanding disc gets packed with dust and wood particles, it stops cutting cleanly. The buildup creates friction that causes visible marks instead of smooth sanding.
Debris trapped under the pad acts like extra grit that shouldn’t be there. Even small particles of dust or wood chips underneath the sanding plate can create unwanted patterns. This debris essentially adds an extra layer of abrasive material that your sander wasn’t designed to handle.
Setting the sander face down on your work table picks up dirt and grit from the surface. When you place the sander with its disc facing down, it collects contaminants that transfer directly to your wood.
Poor dust collection systems also allow particles to recirculate and settle back under the pad. Each of these causes works differently, but they all interrupt the sander’s ability to create a smooth, even finish.
The Role of Pressure and Technique in Creating Swirls
How hard you press your sander against the wood makes a huge difference in your final finish. Light pressure is your best friend when using a random orbital sander. Many woodworkers push down firmly, thinking this speeds up the work. Instead, it creates deeper swirl marks and actually damages the wood surface.
Let the sander do its own work. The machine is already powerful enough to cut through wood with just its own weight. When you add extra force, you’re forcing the abrasive disc to dig in unevenly. This disrupts the sander’s natural random motion and creates those circular patterns you see.
Your technique matters just as much as pressure. Move the sander smoothly across the wood in overlapping passes. Don’t hold it in one spot or press it into corners. Keep your hand steady and let the tool glide across the surface. Change your direction slightly with each pass to avoid creating lines that all run the same way.
Soft woods like pine and cedar are especially prone to swirl marks when you apply heavy pressure. These woods compress easily under force, making the problem worse. Hard woods tolerate a bit more pressure, but light pressure still gives better results.
The key is consistency. Apply the same gentle pressure throughout your entire project. This keeps the sanding action uniform and prevents the random orbital motion from becoming disrupted. When you practice this technique across multiple projects, you’ll notice your swirl marks disappear almost completely.
Why Grit Progression Matters for a Smooth Finish
Grit progression is how you move through different sandpaper grades from coarse to fine. This process directly controls whether swirl marks stay visible or disappear completely.
When you skip grit stages, you leave deep scratches in the wood. A random orbital sander creates scratches with every pass. If you jump from 80 grit straight to 220 grit, those coarse scratches remain underneath. The finer grit cannot erase what the coarser grit created.
The proper sequence matters more than speed. Start with 120 grit minimum to address initial surface issues. Move to 150 or 180 grit next. Then progress to 220 grit for a smooth finish. Each stage removes the scratches from the previous one.
Soft woods like pine demand extra care with grit progression. These materials show every scratch more obviously than hardwoods. Rushing through fewer grit stages on soft wood almost guarantees visible swirls remain.
Think of each grit level as a cleaning step. Coarse grits do heavy work. Medium grits refine that work. Fine grits create the smooth surface you want. Skipping any stage leaves evidence behind.
Many woodworkers try to save time by using fewer grits. This approach backfires because you spend more time fixing swirl marks later. Proper progression actually saves time overall.
The dust collection system works better when you follow correct grit progression too. Finer grits produce finer dust that your collection system handles more easily. Coarse grits create larger particles that can escape and settle under your pad.
Your final finish quality depends heavily on respecting this progression. Commit to the full sequence, and swirl marks become rare.
How Dust Collection and Clogged Discs Affect Results
Dust collection and clogged discs work together to create swirl marks on your wood. When your dust collection system fails to capture particles effectively, debris settles back under the sanding pad during use.
This trapped debris acts like extra abrasive material that shouldn’t be there. It scratches the wood surface in random patterns, leaving visible swirls across your project. The problem gets worse as dust builds up over time.
Clogged sanding discs are a major culprit. As you sand, particles fill the spaces between abrasive grains on your disc. A full disc no longer cuts cleanly. Instead, it glazes over the wood and pushes debris around rather than removing it.
Your disc clogs faster when dust collection is weak. Poor airflow means more particles stay on the disc surface instead of being pulled away. You end up with a double problem: both inadequate collection and increasingly clogged abrasives.
To prevent this issue, check your dust collection system before each project. Make sure hoses connect properly and filters are clean. A blocked filter reduces suction dramatically, even if the system appears to be running.
Inspect your sanding discs regularly during work. When you notice the disc feels less aggressive or leaves residue on the wood, it’s time to replace it. Clogged discs won’t produce smooth results no matter how good your technique is.
Keep your work area clean too. Never set your sander face down on dusty surfaces. Particles stick to the pad and get trapped underneath, causing immediate swirl marks on your next project.
Clean equipment and proper airflow create the foundation for swirl free results.
Step-by-Step Process to Prevent and Fix Swirl Marks
Start by checking your sanding disc for clogs and debris. A clogged disc cannot cut smoothly and will leave circular marks on your wood surface. Run your finger gently across the disc to feel for buildup. If particles stick to it, the disc needs cleaning or replacement.
Next, inspect what sits under your sanding pad. Debris trapped underneath acts like extra grit that scratches your wood unevenly. Flip your sander over and look for dust, dirt, or wood particles stuck to the pad. Clean this area thoroughly before your next pass.
Apply only light pressure when you sand. Let the sander’s weight do most of the work. Heavy pressure forces the disc into the wood and creates deeper, more visible swirl marks. This problem gets worse on soft woods like pine.
Follow proper grit progression to eliminate existing swirls. Start with 120 grit minimum to address rough surfaces. Then move to 150 grit, then 180 grit, and finally 220 to 320 grit for your final finish. Never skip grit stages because you’ll leave deep scratches that show up later.
Check your dust collection system before each project. A weak system allows particles to float back down and settle under your pad. Make sure hoses connect properly and filters stay clean.
Never place your sander face down on your work table between uses. This picks up dirt from the surface. Always set it on its side or back.
Work slowly and steadily across the wood. Rush jobs lead to uneven pressure and visible marks. Take your time with each grit stage to achieve a smooth, swirl free finish.
Common Mistakes That Make Swirl Marks Worse
Pressing too hard is the fastest way to create deeper swirl marks on your wood. Many people believe more pressure equals better results, but this is wrong. Light pressure lets the sander do its job naturally while the abrasive does the cutting work.
Soft woods like pine suffer most from heavy pressure. The wood fibers compress and tear unevenly, which locks in swirl patterns that are hard to remove later. You should use just enough pressure to keep the sander moving smoothly across the surface.
Skipping grit stages is another common mistake that makes swirls worse. When you jump from 120 grit directly to 220 grit, you leave deeper scratches behind. These scratches catch light and look like swirls even after you finish sanding. Each grit level removes the marks from the previous one. Rushing this process guarantees visible swirl marks.
Using clogged or dirty discs creates extra scratches on the wood. A clogged disc doesn’t sand effectively, so you press harder to compensate. This combination triples your swirl mark problems. Replace discs when they feel clogged or look discolored.
Allowing debris to accumulate under your sanding pad is easy to overlook. Bits of wood, dust, and old abrasive particles get trapped there and gouge the surface. Check underneath your pad frequently during work.
Setting your sander face down on your work table between uses picks up dirt and debris. This material gets pressed into the disc and scratches your wood on the next pass. Always place your sander on its side or hang it on a hook instead.
Troubleshooting Persistent Swirl Marks
Swirl marks on wood happen when your sander leaves circular scratches instead of smooth surfaces. These marks are frustrating, but you can fix them by understanding what causes them and taking action.
Excessive pressure is the biggest problem. When you push down hard on your sander, you force the abrasive disc deeper into the wood. This creates visible scratches that follow the sander’s circular motion. Light pressure works better than force. Let the sander do the work for you.
Debris trapped under your sanding pad creates fake swirl marks too. Before you start, flip your sander over and check the pad. Remove any wood chips, dust, or dirt stuck underneath. Even small particles cause problems.
Your sanding disc itself might be the issue. Clogged discs can’t cut properly, so they skip across the wood instead of sanding smoothly. Inspect your disc during work. If it looks packed with dust, replace it or clean it with a stiff brush.
Dust collection matters more than most people think. When your collection system works poorly, debris floats around and settles under the pad. Check your dust collection before each project. Make sure hoses aren’t blocked and bags aren’t full.
Skipping grit stages creates stubborn swirls too. If you jump from 80 grit straight to 220 grit, the coarse scratches remain visible. Work through each grit level progressively. This removes previous scratches and prevents new ones.
Finally, never set your sander face down on your work table between uses. The pad picks up dirt and debris that transfer to your next project. Store it on its side or hang it up instead.
Final Thoughts
Swirl marks feel frustrating, but they are easy to fix once you know the cause. Most problems come down to pressure, grit progression, or dirty equipment. Fix these three things, and your wood will turn out smooth every time.
Remember to let your sander do the work. Your arms should guide the tool, not push it into the wood. Light pressure always beats heavy pressure.
Grit progression matters just as much as pressure control. Jumping from a low grit to a high grit leaves scratches that later stages cannot fix. Move through each grit stage in order for the best results.
Clean equipment plays a bigger role than most people realize. A clogged disc scratches wood instead of smoothing it. Check your discs often and swap them out when they look worn or packed with dust.
Your dust collection system also deserves attention. Weak suction lets debris sit on your wood and sneak under the pad. This creates marks that look like sander swirls but come from trapped particles instead.
Simple habits make a real difference too. Never set your sander face down between passes. This tiny mistake picks up debris and transfers it right back onto your workpiece.
Building these habits takes little effort once you start. Check your discs, keep pressure light, and follow proper grit order. Your projects will look cleaner, and you will spend less time fixing avoidable mistakes.
Swirl marks are common, but they are not permanent problems. With patience and the right steps, any woodworker can get a smooth, professional finish. Slow down, stay consistent, and let good technique do the heavy lifting for you.
Frequently Asked Questions
Why does my sander leave swirl marks even when I use light pressure?
Light pressure alone won’t fix swirl marks. You also need proper grit progression. Many people skip from 80 grit straight to 220 grit, which leaves scratches behind. Start with 120 grit minimum, then move to 150, 180, 220, and finally 320 grit. Each step removes the scratches from the previous one.
Clogged sanding discs also cause this problem. Dust builds up on the abrasive surface and creates extra scratches instead of smoothing wood.
Can debris under my sanding pad create swirl marks?
Yes, absolutely. Debris trapped under your pad acts like extra abrasive material. It scratches your wood surface in random patterns that look like swirl marks.
Check under your pad before each use. Remove any dust, wood chips, or dirt you find. This simple step prevents many swirl mark problems.
What happens if I skip grit stages?
Skipping grits leaves deeper scratches that are hard to remove. Your sander can’t smooth out the rough spots from the previous stage.
Work through each grit level even if it feels slow. This progressive approach eliminates swirls completely rather than just covering them up.
How does dust collection affect swirl marks?
Poor dust collection lets debris float around your work area. This debris can land under your sanding pad or stick to the abrasive disc.
A working dust collection system keeps your pad clean and your wood protected. Check your collection hose and filter before starting any project.
Should I store my sander face down?
Never store your sander face down on your work table. The pad picks up dirt, dust, and debris from the surface. When you start sanding again, all that debris scratches your wood and creates swirl marks.
Always store your sander with the pad facing up or mounted on a hook.

Hi, I’m Leah Ray — the voice behind CraftBench Vault. I’m a passionate woodworking enthusiast dedicated to reviewing the best wood cutting tools and woodworking products. Through honest research and hands-on experience, I help fellow crafters make smarter buying decisions. Welcome to my workshop!