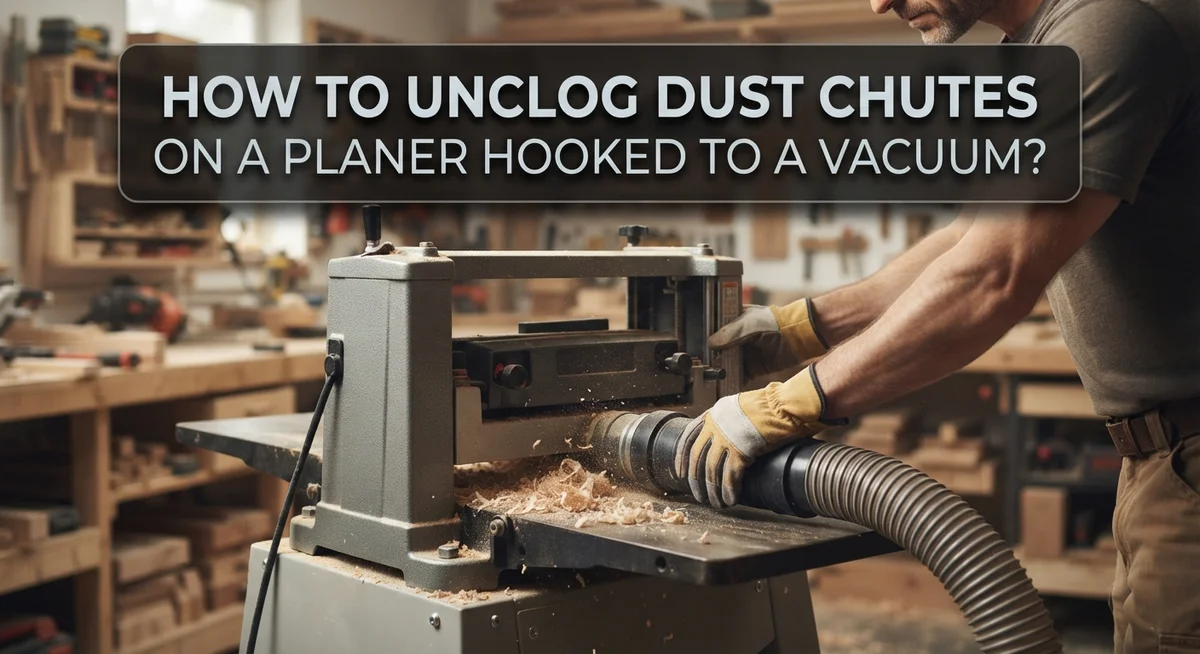
How To Unclog Dust Chutes On A Planer Hooked To A Vacuum?
Does your planer clog up every few minutes, even with a vacuum attached? You are not alone. Many woodworkers face this frustrating problem, especially with high output machines.
Wood chips build up fast inside dust chutes. They pack tight and block airflow. This stops your vacuum from doing its job.
The good news? You can fix this issue quickly. Most clogs happen because of simple setup mistakes. Wrong hose size, poor grain direction, or weak suction all play a part.
This guide walks you through practical fixes. You will learn how to clear stuck chips fast and safely. We cover the best tools for the job, like screwdrivers for scraping gears.
In a Nutshell
- Add a cyclone separator between your planer and shop vac. This pre-filters chips before they reach the vacuum.
- Use a 4 inch dust hose with a proper 90 degree connection. Undersized ductwork causes fast clogging.
- Feed wood along the grain. This simple habit reduces dust production right at the source.
- Clean often. Vacuum out chutes and scrape sawdust from gears with a screwdriver. Regular checks stop buildup before it starts.
- Try direct venting. Some woodworkers remove the filter and hook the vacuum straight to the planer outlet for better airflow.
- Check your setup first. If suction feels weak, look for a clogged hose or a full vacuum canister before blaming the planer.
Why Planer Dust Chutes Clog When Connected To A Vacuum
Planer dust chutes clog when connected to a vacuum because of how wood chips and sawdust move through the system. The problem starts with air speed inside your hose.
When air moves too slowly, heavy chips fall and stick inside the chute instead of traveling to your vacuum. This happens most often when you use undersized ductwork. A hose that is too narrow creates a bottleneck. Air cannot push the material fast enough.
Improper hose routing makes clogging worse. If your hose has sharp bends or slopes downward, chips collect at those low points. Gravity works against your airflow. Chips settle and pack together, blocking the path completely.
The type of wood you plane also matters. Softwoods produce fluffy shavings that clump easily. Hardwoods create denser chips. Grain direction affects dust production too. When you feed wood against the grain, your planer creates fine dust instead of clean shavings. This fine dust coats the inside of your chute and hardens into a stubborn clog.
Vacuum filter condition plays a major role as well. A dirty or clogged filter reduces suction power dramatically. Without strong airflow, even properly sized hoses cannot pull material through. Your vacuum canister filling up has the same effect. A full container means no room for air pressure to build.
Many planers have dual dust ports or collection bags that were never designed for shop vac suction. These ports work better with passive collection than active vacuum pull. Connecting a powerful vacuum to a weak port creates pressure imbalances inside your machine.
Regular maintenance intervals get skipped too. Sawdust builds up gradually around gears and inside corners. This buildup narrows the effective chute opening. Over time, a partially clogged chute becomes completely blocked.
Understanding these causes helps you prevent clogs before they start. The key is maintaining proper airflow speed, correct hose sizing, and consistent cleaning habits.
Tools And Materials Needed For Unclogging
You need several basic items to unclog your planer dust chute. Start by gathering hand tools you probably already own.
A screwdriver works well for scraping dried sawdust from tight spots and gears. Pick one with a flat blade that fits into small crevices. A brush with stiff bristles helps loosen packed dust without scratching metal surfaces. An old toothbrush or wire brush both work fine.
Next, collect your vacuum supplies. You will need a shop vacuum with enough power to pull chips through the system. Check that your vacuum hose fits your planer outlet. Most planers work best with a 4 inch diameter hose for proper airflow. Smaller hoses create weak suction and cause faster clogging.
A flashlight or headlamp helps you see inside dark chutes. You cannot unclog what you cannot see. Position the light so you spot blockages easily.
Consider having a collection container nearby for the sawdust you remove. This keeps your workspace cleaner and lets you reuse the material if needed.
Optional upgrades make the job easier. A cyclone separator sits between your planer and shop vac to catch heavy chips before they reach your vacuum filter. This simple device dramatically reduces clogging. A 90 degree ductwork connector helps you route your hose properly without sharp bends that trap chips.
Finally, grab a measuring tape to check your hose diameter and ensure proper connections. Many people use undersized hoses without realizing it, which causes constant problems.
Keep all these tools in one spot near your planer. When clogs happen, you will have everything ready to fix them fast. Regular maintenance takes only minutes when your supplies are organized and accessible.
Step-By-Step Guide To Clearing A Clogged Dust Chute
Start by unplugging your planer from the electrical outlet. Safety comes first when working inside the machine.
Open the dust chute access panel or remove any covers blocking your view. Most planers have a removable section that gives you clear access to the interior passages.
Use your flashlight to look inside the chute. You will likely see a buildup of compacted sawdust and wood chips clinging to the walls. This packed material is what blocks airflow and stops your vacuum from working properly.
Grab your screwdriver and gently scrape along the interior walls of the chute. Work slowly and carefully to avoid damaging the metal or plastic surfaces. Push the loosened material toward the opening where it can fall out.
For stubborn deposits, tap the outside of the chute with a rubber mallet. Gentle tapping from the outside helps break up hard packed sawdust without scratching the interior. The vibration loosens material that your scraper missed.
Use a handheld vacuum or your shop vac with a hose attachment to suck up all the loose debris. Make sure the vacuum has good suction before you start. A weak vacuum won’t pull out all the material you just loosened.
Check the connection points where your hose attaches to the planer. Disconnect and inspect these areas for clogs. Sawdust often accumulates right at these joints where airflow changes direction.
Once the main chute is clear, inspect the gears and moving parts nearby. Dried sawdust can stick to gear teeth and cause problems. Use your screwdriver to carefully remove any buildup from these areas.
Before reassembling, verify that your hose diameter matches your planer’s outlet size. A hose that is too small creates a bottleneck and causes future clogs.
Reconnect all components securely. Plug in your planer and test it briefly with the vacuum running to confirm airflow is restored.
Optimizing Your Vacuum And Ductwork Setup For Better Airflow
Your vacuum and ductwork setup directly controls how well dust moves through your system. Poor airflow means chips pile up inside the chute instead of traveling to your collection tank.
Start by checking your hose diameter. Most planers work best with 4 inch diameter hose. Undersized hose creates bottlenecks that trap sawdust. Measure your planer outlet and match it to your hose size exactly.
Next, examine your hose routing. Hoses should slope upward toward your vacuum whenever possible. Downward slopes trap chips at low points. Avoid sharp 90 degree bends that slow air movement. Instead, use angled ductwork that guides chips smoothly without forcing them to change direction abruptly.
Your vacuum filter condition matters enormously. A clogged filter chokes airflow and causes chips to back up into the planer chute. Check your filter regularly and clean it according to your vacuum manual. A clean filter creates stronger suction that pulls chips away from the chute.
Consider installing a cyclone separator between your planer and shop vac. This device spins incoming air and separates heavy chips before they reach your vacuum. Chips fall into a collection bin while clean air continues to your vacuum filter. This setup dramatically reduces filter clogging and keeps your system running longer between cleanings.
Connect your shop vac hose directly to the planer outlet when possible. Skip the filter attachment if your vacuum allows it. This removes one barrier that can slow airflow.
Check all connection points where hose meets planer. Loose connections leak suction and reduce collection power. Tighten clamps firmly but do not over tighten. Seal small gaps with duct tape if needed.
Finally, maintain your system regularly. Empty your collection container frequently. A full bin reduces suction dramatically. Clean or replace vacuum filters on schedule. These simple steps keep your airflow strong and prevent future clogs.
Best Practices To Prevent Future Clogging
Preventing future clogs starts with understanding what causes them. Dust and chips accumulate faster when airflow is restricted. Regular maintenance stops small problems from becoming big ones.
Feed your wood with the grain whenever possible. Wood grain direction significantly affects how much dust your planer produces. Feeding against the grain creates more fine particles that stick to chute walls. This simple habit reduces clogging frequency dramatically.
Clean your dust collection system on a schedule. Don’t wait until the chute is completely blocked. Empty your vacuum bag or canister when it reaches half full. A full filter reduces suction power, which allows chips to settle inside the chute instead of moving through.
Check your hose connections regularly. Loose connections create air leaks that weaken suction. Inspect where your hose meets the planer and where it connects to your vacuum. Tighten any loose fittings you find.
Proper ductwork design prevents chips from getting trapped. Use hose diameter that matches your planer’s outlet size. Avoid sharp bends or steep angles that catch debris. Route your hose so it slopes downward toward your vacuum whenever possible.
Consider the airflow path through your entire system. A cyclone separator sits between your planer and shop vac. It pre filters large chips before they reach your vacuum filter. This keeps your filter cleaner and maintains better suction over time.
Inspect your vacuum filter monthly. A clogged filter reduces airflow just as much as a blocked chute does. Clean or replace your filter according to the manufacturer’s guidelines.
Keep your planer area organized and clear. Sawdust accumulation around the planer can get sucked back into the chute. Sweep regularly to minimize stray debris.
Finally, run your vacuum for a few minutes after you finish planing. This clears any remaining chips from the system before they have time to settle and harden.
Common Mistakes That Lead To Recurring Clogs
Many woodworkers repeat the same mistakes that cause dust chutes to clog over and over again. Understanding these errors helps you break the cycle and keep your system running smoothly.
Undersized ductwork is the biggest culprit. Most planers have specific outlet sizes, but people connect smaller hoses to save money. When your hose diameter is too small, chips move slowly through the line. They settle inside the hose instead of flowing to your vacuum. This creates blockages that happen frequently. Always match your hose size to your planer’s outlet specifications.
Improper hose routing traps debris in low spots. If your hose has sagging sections or runs downward before going up, chips collect in those valleys. Gravity works against airflow in these areas. Your vacuum cannot pull chips out of these pockets easily. Route your hose in a way that slopes upward toward your vacuum whenever possible.
Neglecting regular maintenance intervals causes buildup. Many people wait until the system stops working before they clean anything. By then, multiple layers of dust have packed inside the chute and hose. Clean your system frequently based on how much you use your planer. Light users might clean weekly. Heavy users should vacuum out dust after every few projects.
Feeding wood against the grain increases dust production significantly. Grain direction affects how much fine dust your planer creates. When you feed wood the wrong direction, the cutterhead tears fibers instead of slicing them cleanly. This produces more dust that clogs your system faster than normal grain feeding.
Skipping cyclone separator installation is another common error. Many people connect their planer directly to their shop vac filter. The filter clogs rapidly because it captures all the fine dust. A cyclone separator pre-filters chips before they reach your vacuum. This simple addition prevents most recurring clog problems.
Troubleshooting Persistent Dust Collection Problems
When your planer dust chute clogs persistently, the problem usually stems from one of several key issues. Understanding what causes these blockages helps you fix them quickly.
The most common culprit is insufficient airflow through your collection system. Your vacuum may not be pulling hard enough to move heavy chips and sawdust. Check if your vacuum filter is clogged with fine dust. A dirty filter reduces suction power dramatically. Clean or replace your filter before troubleshooting other areas.
Your hose diameter matters more than you might think. If your planer outlet is 4 inches but you connected a smaller hose, chips cannot flow freely. Chips back up and jam inside the chute. Always match your hose size to your planer’s outlet specifications.
Hose routing creates another major problem. Sagging sections trap sawdust in low spots. Chips settle there and build up over time. Your hose should run upward toward your vacuum whenever possible. Avoid creating valleys or dips in the line.
The grain direction of your wood affects dust production. Feeding wood against the grain creates significantly more fine dust. This dust clogs filters faster and builds up in chutes. Always feed your wood with the grain to minimize dust generation.
Neglecting regular cleaning allows small clogs to become big ones. Sawdust accumulates gradually in your chute, gears, and hose. Weekly or bi-weekly vacuuming prevents this buildup. Use a screwdriver to scrape away stubborn sawdust from gears and tight corners.
Finally, check all connection points where your hose meets the planer. Loose connections create air leaks. Air leaks reduce suction force throughout your system. Tighten clamps and ensure every joint is secure. These simple fixes address most persistent clogging problems effectively.
Final Thoughts
Keeping your planer’s dust chute clear does not need to be complicated. A little attention and the right setup make a huge difference over time.
Cyclone separators remain one of the smartest additions you can make. They catch heavy chips before they ever reach your vacuum, which means fewer clogs and less strain on your filter.
Your ductwork matters just as much as your equipment choice. A 4 inch hose with smooth angled fittings keeps airflow strong and chips moving freely.
Remember that planers like the DeWalt 735 tend to clog faster than others. If you own one, plan for more frequent checks and quicker cleanouts.
Simple habits go a long way too. Vacuum out built up dust often, and scrape stubborn sawdust from gears with a screwdriver when needed.
Feeding wood with the grain instead of against it also cuts down on the fine dust that causes blockages in the first place.
Some woodworkers find success by skipping the filter entirely and hooking their shop vac straight to the planer outlet. Others prefer dedicated dust collection bags that vent through flexible tubing for easy disposal.
If your setup includes dual ports, connecting your vacuum there can reduce how often the filter clogs. It is a small change that saves a lot of cleanup time later.
At the end of the day, your dust collection system works best when every part matches up. The hose, the ductwork, the vacuum power, and even how you feed the wood all play a role.
Stay consistent with your maintenance routine, and your planer will reward you with smoother cuts and far fewer interruptions. A clog free system is not about luck. It comes down to good habits and a setup built to handle the job.
Frequently Asked Questions
Why does my planer dust chute clog even with a vacuum attached?
Clogs happen when airflow cannot move dust fast enough through your system. Your hose diameter plays a big role here. Most planers work best with 4 inch hoses, but smaller sizes restrict airflow and trap chips. Low spots in your hose routing also trap debris. If your hose sags or runs downward before going back up, sawdust settles there and builds up over time.
A full vacuum bag or filter stops airflow completely. Check your vacuum regularly and empty it often. You should also inspect all connection points where your hose meets the planer outlet.
How often should I clean my planer dust collection system?
Cleaning frequency depends on how much you use your planer. Heavy users need to clean every few hours. Light users might go longer between cleanings.
The best approach is to vacuum out dust before you notice a problem. Small clogs are easy to fix. Large blockages take much more effort. Many woodworkers scrape sawdust from internal gears with a screwdriver every few weeks to prevent buildup.
What setup works best for reducing clogs?
A cyclone separator between your planer and shop vac filters chips before they reach your vacuum. This keeps your filter cleaner and maintains better airflow. Use 4 inch diameter hose with proper 90 degree angled ductwork to move air smoothly.
Some woodworkers skip the filter entirely and hook their shop vac straight to the planer outlet. This works because nothing blocks the airflow path.
Does wood grain direction affect dust collection?
Yes. Feeding wood with the grain produces less fine dust than feeding against the grain. Less fine dust means fewer clogs in your hose and filter. This simple habit makes a real difference in how often you need to clean your system.

Hi, I’m Leah Ray — the voice behind CraftBench Vault. I’m a passionate woodworking enthusiast dedicated to reviewing the best wood cutting tools and woodworking products. Through honest research and hands-on experience, I help fellow crafters make smarter buying decisions. Welcome to my workshop!