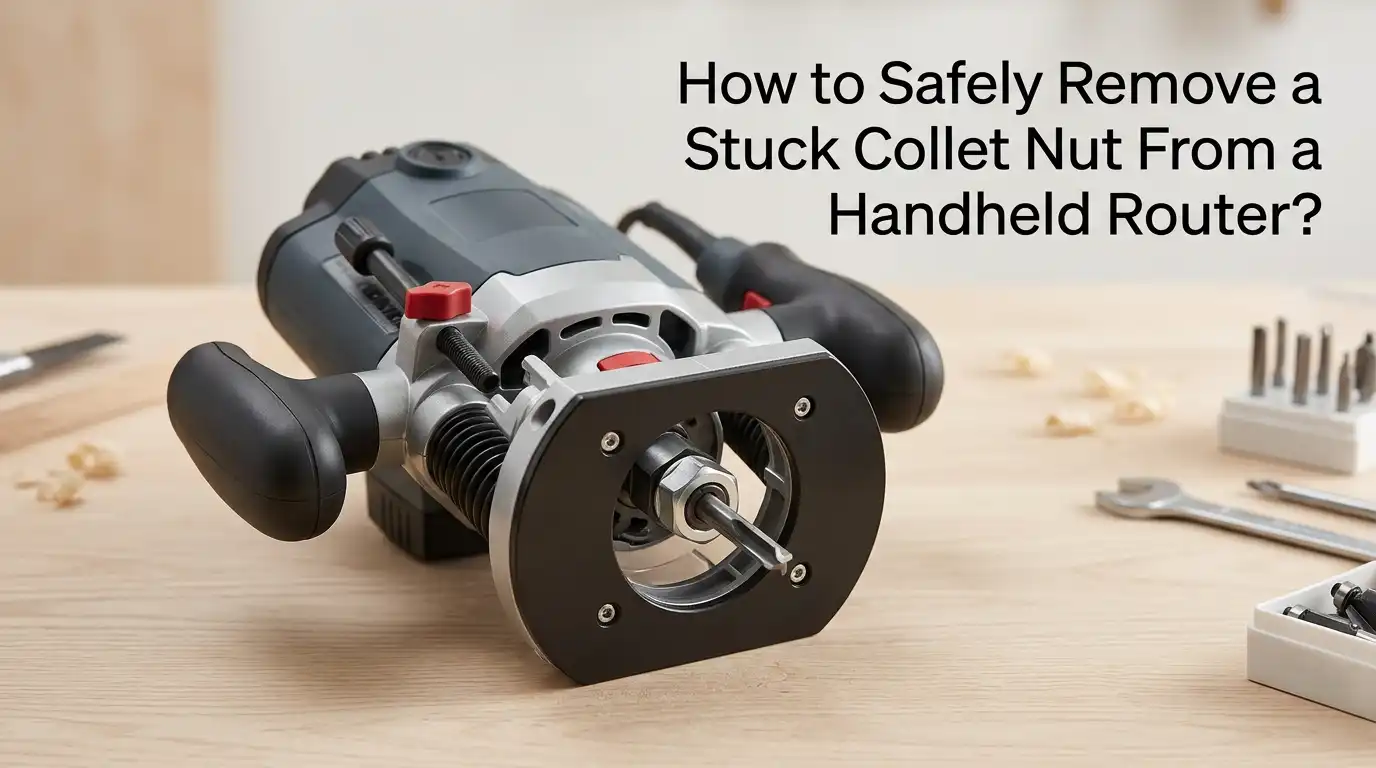
How to Safely Remove a Stuck Collet Nut From a Handheld Router?
Has your router bit refused to budge, leaving you stuck with a frozen collet nut and a stalled project? You are not alone.
Thousands of woodworkers face this frustrating problem every year, and many end up damaging their tools by using the wrong fix. The good news is that you can solve this issue at home with simple tools and a little patience.
This guide walks you through the safest methods to free a stuck collet nut from a handheld router. You will learn what causes the problem, which tools work best, and how to avoid making the situation worse.
Key Takeaways
- Always unplug the router first. Safety comes before everything else. A spinning bit or accidental power surge can cause serious injury, so disconnect the power source before you touch any part of the tool.
- Apply gentle force before heavy force. Start with a standard wrench and steady pressure. Most stuck collet nuts come loose with the right grip and a firm but careful pull.
- Use penetrating oil for rust or pitch buildup. Sticky resin and rust are common causes. Let the oil soak for several hours or overnight before trying again.
- Tap, do not smash. Light taps with a brass or rubber mallet break the bond without bending the spindle or cracking the housing.
- Clean the collet after every job. Routine cleaning is the simplest way to prevent future seizing. A wire brush, mineral spirits, and a dry cloth go a long way.
- Know when to stop and call a pro. If the nut still will not move after several attempts, take the router to a repair shop before you damage the spindle or threads.
What Causes a Router Collet Nut to Get Stuck
A collet nut gets stuck for a few clear reasons, and knowing the cause helps you pick the right fix. The most common reason is resin and pitch buildup from cutting wood. This sticky residue hardens around the threads and inside the collet, gluing everything together over time.
Rust is another big cause, especially if you store your router in a damp shop or basement. Moisture creeps into the threads and creates corrosion that locks the nut in place. Heat from heavy use can also cause metal to expand and seize, particularly when you push the router hard through dense hardwood.
Sometimes the problem is just user error. Overtightening the nut, using the wrong wrench, or letting a bit slip deeper into the collet during use can all lead to a stuck nut. Identifying the cause tells you whether to reach for cleaner, oil, or a tapping tool.
Safety First: Prepare Your Workspace
Before you start any repair, clear your workbench and set up a safe space. Unplug the router from the wall and remove any battery if it is a cordless model. This single step prevents the most common shop injuries linked to power tools.
Put on safety glasses because metal chips can fly when you tap or scrape stuck parts. Wear snug fitting gloves that protect your hands but still let you grip wrenches firmly. Loose gloves can catch on tools and cause slips.
Lay down a soft towel or rubber mat to catch dropped parts and protect your bench. Make sure you have good lighting so you can see the threads clearly. A small inspection mirror or flashlight helps you spot rust, gunk, or damage hidden in tight spaces. A clean, well lit area cuts repair time in half.
Method 1: The Double Wrench Technique
The double wrench method is the first thing every woodworker should try. Most routers come with two wrenches for a reason. One wrench holds the spindle steady while the other turns the collet nut. Trying to do this with one wrench rarely works on a stuck nut.
Place the spindle wrench on the flat spot above the collet nut. Then fit the second wrench on the nut itself. Push both wrenches toward each other in a squeezing motion. This balanced force breaks the bond without twisting the spindle or stressing the motor.
Pros: This method uses tools that came with your router. It is safe, simple, and works on most lightly stuck nuts. It puts no stress on the bearings or housing.
Cons: It will not free a heavily rusted or resin coated nut. You also need both factory wrenches, and many people lose one over time.
Method 2: Loosen, Retighten, and Loosen Again
Many routers use a self releasing collet design. This means the nut tightens once during loosening to push the bit free. If you stop turning at the first resistance, you will think the nut is stuck when it is actually working as designed.
Start by loosening the nut a turn or two. You will feel it get tight again. Keep turning past this point with steady pressure. The nut will release the bit and continue to spin off freely. This trick fools many beginners and even some experienced users.
Pros: No extra tools needed. It works on every self releasing collet router. It also protects the bit and collet from damage.
Cons: It only works if the nut is functioning normally. Heavily seized nuts will not respond. Some older routers do not use a self releasing design, so check your manual first.
Method 3: Apply Penetrating Oil
When rust or pitch is the cause, penetrating oil is your best friend. Products like WD-40, Liquid Wrench, or PB Blaster work their way into tight threads and break down corrosion. This method takes patience but rarely fails.
Spray a small amount around the base of the collet nut where it meets the spindle. Let it soak for at least four hours, or overnight for stubborn cases. Tip the router so the oil flows into the threads using gravity. Add another spray after a few hours to keep the oil active.
After soaking, wipe away the excess and try the double wrench method again. The nut should turn with much less effort.
Pros: Very effective on rust and old resin. Cheap and easy to use. Will not damage metal parts.
Cons: Takes hours to work. Oil can drip onto your bench or into the motor if you are not careful. You must clean the collet thoroughly afterward to avoid bit slippage.
Method 4: Light Tapping With a Brass or Rubber Mallet
A few gentle taps can shock a stuck nut loose when oil and wrenches alone fail. The key word here is gentle. You are trying to break the bond between metal surfaces, not crack the casting.
Use a brass hammer, a rubber mallet, or a piece of soft wood as a buffer. Hold the wrench on the collet nut in the loosening direction. Tap the wrench handle lightly with the mallet while applying steady pressure. The vibration helps break rust and resin bonds.
You can also tap the side of the nut directly with a brass punch. Never use a steel hammer straight on the nut, since this will deform the metal and ruin your collet.
Pros: Very effective for stubborn nuts. Works well combined with penetrating oil. Quick once you get the right rhythm.
Cons: Easy to overdo and cause damage. Can dent soft metal parts if you use the wrong tool. Loud and not great for small apartments.
Method 5: Heat the Collet Nut Carefully
Heat makes metal expand, which can break a stuck bond. This method works on heavily seized nuts but carries real risks. Use heat only as a last resort before taking the router to a repair shop.
A small heat gun set to low works best. Aim it at the collet nut for thirty to sixty seconds. Keep the heat moving in small circles so you do not melt plastic parts or damage the bearings inside the motor housing. Never use an open flame like a torch on a router.
After heating, the nut should turn while still warm. Use the double wrench method right away because the metal cools quickly.
Pros: Works on the most stubborn cases. Often succeeds when nothing else will.
Cons: High risk of damage to plastic housing, seals, and bearings. Can ruin the motor if heat reaches the windings. Many experts advise against this method for hobby users.
Method 6: Remove the Collet From the Nut
Sometimes the nut comes off but the collet sleeve stays stuck inside. This is a separate problem with its own fix. The collet should pop in and out of the nut freely. If it does not, it has gunked up or rusted in place.
Hold the nut steady, ideally in a soft jaw vise. Press the collet sideways with your thumb while pulling it out. Move the collet side to side as you pull. Do not yank straight up because the sleeve has a small lip that locks into the nut.
If it still will not come out, soak the assembly in mineral spirits for an hour. Then try again with gentle pressure.
Pros: Saves you from buying a new collet. Restores normal function quickly.
Cons: Easy to bend the collet fingers if you force it. A bent collet will not grip bits properly and must be replaced.
Cleaning the Collet and Threads Properly
Once you free the stuck nut, take time to clean every part before reassembly. This step alone prevents most future problems. Use a small wire brush, an old toothbrush, or a brass detail brush to scrub the threads.
Soak the collet and nut in mineral spirits or a citrus based degreaser for ten minutes. Scrub away resin and rust with the brush. Pay special attention to the inside of the collet where the bit sits. Wipe everything dry with a clean rag.
Inspect the parts for damage. Look for cracks, deep scratches, or worn threads. A damaged collet cannot grip a bit safely and should be replaced. Apply a thin coat of dry lubricant or a bit of paste wax to the threads before reassembly. Skip oil based lubricants on the gripping surface, since they cause bits to slip.
Tools and Supplies You Should Keep on Hand
Having the right tools saves you from improvising with things that can damage your router. Keep a basic repair kit near your bench so you are ready when problems show up.
The essentials include both factory wrenches that came with your router, a small bottle of penetrating oil, a brass hammer or rubber mallet, and a wire brush or brass cleaning brush. Add mineral spirits, clean rags, safety glasses, and a small flashlight to round out the kit.
For tougher jobs, consider adding a heat gun, a soft jaw vise, and a set of replacement collets in your router size. Spare collets are cheap insurance because a damaged one is the most common cause of stuck nuts. Store everything in a small toolbox or drawer right next to your router. A ready kit turns a thirty minute problem into a five minute fix.
How to Prevent the Collet Nut From Getting Stuck Again
Prevention beats repair every time. Clean your collet after every project, not just when problems show up. A two minute wipe down adds years to the life of your router and saves hours of future repair work.
Never overtighten the collet nut. Hand tight plus a quarter turn with the wrench is plenty. Too much force crushes the collet and welds the threads together over time. Always use the right size collet for your bit shank. Mixing a quarter inch bit into an eighth inch collet with a sleeve is a recipe for damage.
Store your router in a dry place away from humidity. If your shop gets damp, throw a few silica gel packs into your router case. Replace the collet every two or three years even if it looks fine. Worn collets cause vibration, slippage, and stuck nuts down the road.
When to Take Your Router to a Repair Shop
Some problems are bigger than a home fix. If you have tried oil, wrenches, tapping, and gentle heat with no success, stop before you cause real damage. A bent spindle or stripped threads costs much more to repair than the original problem.
Take your router to a shop if you see cracked metal, stripped threads, or a bent shaft. These issues need press tools and replacement parts that most home users do not own. A good repair tech can fix the problem for a fraction of the cost of a new router.
Also seek help if your router is still under warranty. Forcing the repair yourself often voids the warranty and turns a free fix into a paid one. Most major brands have authorized service centers that turn around small repairs in a week. The cost is usually worth the peace of mind.
Frequently Asked Questions
Why does my router collet nut get stuck so often?
Most stuck nuts come from resin buildup, rust, or overtightening. Cutting pitchy woods like pine without cleaning your collet leaves sticky residue that hardens. Damp storage causes rust, and squeezing the nut too hard with the wrench welds the threads. Regular cleaning and proper torque solve most of these issues for good.
Can I use WD-40 on my router collet?
Yes, but use it carefully. WD-40 works well as a penetrating oil to free stuck nuts. After freeing the nut, clean every part with mineral spirits and dry it completely. Oil left on the gripping surfaces of the collet causes bits to slip during use, which is dangerous.
Is it safe to use a torch on a stuck collet nut?
No. An open flame can melt plastic housing, damage bearings, and ruin the motor. Use a low setting heat gun instead, and only as a last resort. Even then, keep the heat moving and limit it to about a minute. If heat does not work, take the router to a shop.
How tight should I make the collet nut?
Tighten the nut snugly with the factory wrench, then add about a quarter turn more. You should feel firm resistance but not strain. Overtightening damages the collet and causes future stuck nut problems. If your bits slip at this torque, replace the collet rather than cranking harder.
How often should I replace my router collet?
Replace the collet every two to three years with regular use, or sooner if you see cracks, deep wear, or rust pits. A worn collet causes vibration, poor cuts, and stuck nuts. Collets are inexpensive compared to a new router, and fresh ones grip bits much more reliably.
Can a stuck collet nut damage my router permanently?
Yes, if you use too much force. Bent spindles, stripped threads, and cracked housings are all possible from improper repair attempts. Stop and reassess if a method is not working after a few tries. Patience and the right approach almost always win without causing damage.

Hi, I’m Leah Ray — the voice behind CraftBench Vault. I’m a passionate woodworking enthusiast dedicated to reviewing the best wood cutting tools and woodworking products. Through honest research and hands-on experience, I help fellow crafters make smarter buying decisions. Welcome to my workshop!