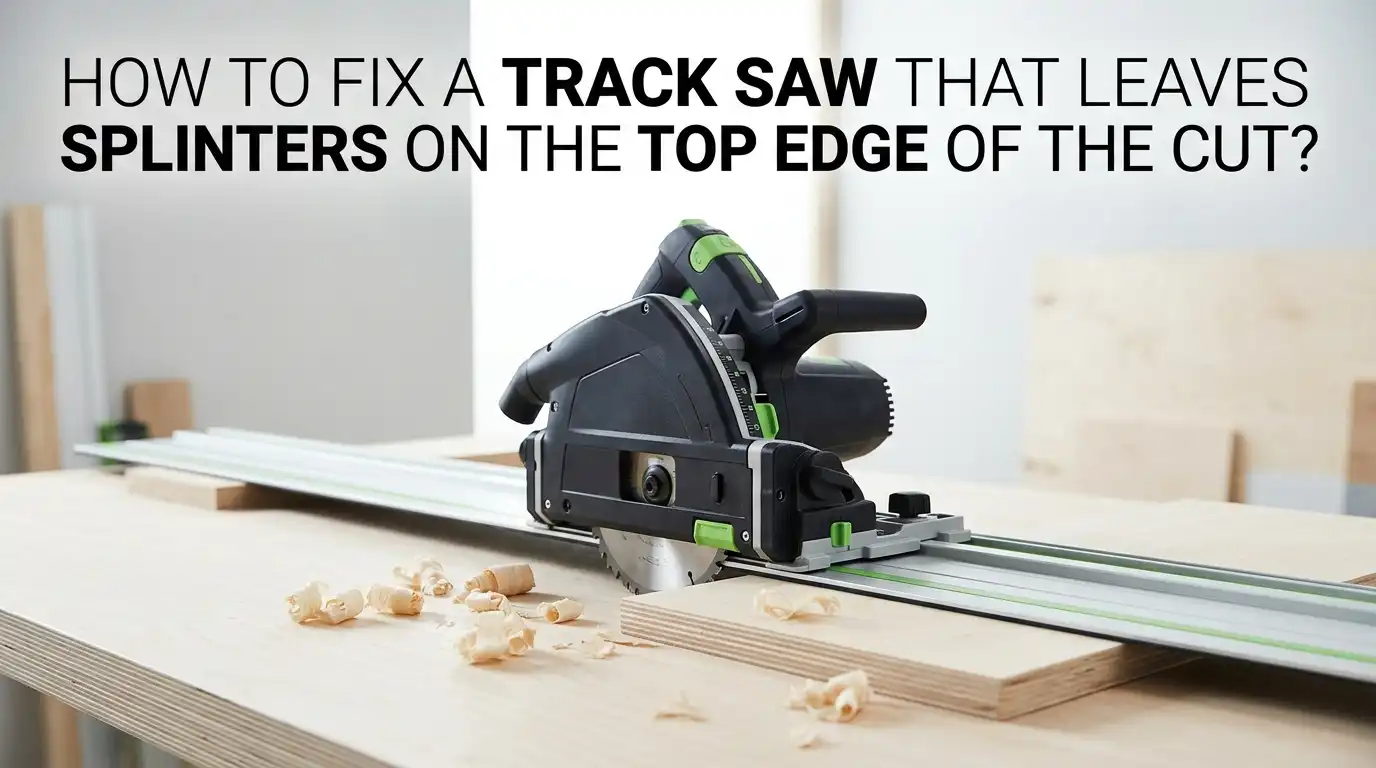
How to Fix a Track Saw That Leaves Splinters on the Top Edge of the Cut?
Track saws promise clean, glass smooth cuts that rival a table saw. So when your blade starts ripping up the top edge of your plywood or veneer, the frustration hits hard.
Splinters on the top edge ruin expensive sheet goods, waste hours of work, and leave finish faces looking shredded. The good news is that this problem has clear causes and even clearer fixes.
This guide walks you through every fix step by step, with pros and cons for each method so you can pick the one that suits your saw and your project.
In a Nutshell:
- Check your splinter guard first. A frayed, lifted, or mispositioned rubber strip on the track is the most common culprit. Replace it or reseat it before changing anything else.
- Use the right blade for the material. A 48 tooth or 60 tooth fine finish blade with a thin kerf gives clean cuts in plywood and melamine. A 24 tooth ripping blade will always tear the top edge.
- Set the cut depth correctly. Going only 2 to 5 mm past the workpiece thickness keeps the teeth slicing downward through the top fibers instead of lifting them.
- Make a scoring pass on delicate veneer. A shallow first pass at roughly 1.5 mm depth severs the top fibers cleanly, then your full depth pass finishes the job without tear out.
- Inspect track alignment and saw cams. A loose saw on the rail lets the blade wobble sideways, which chips the edge. Tighten the guide cams until the saw slides with light resistance.
Why Track Saws Leave Splinters on the Top Edge
A track saw blade spins upward at the front of the cut and downward at the back. The downward motion pushes the rubber splinter strip into the wood and slices the top fibers cleanly.
When something disrupts this action, the teeth lift the wood grain instead of cutting it. The result is a fuzzy, chipped, or splintered top edge.
Common disruptions include a worn splinter guard, a blade with the wrong tooth geometry, a deep cut that exposes too much blade, or a saw that wobbles on the track.
Veneered plywood and melamine are especially prone because their thin surface layers tear with very little force. Understanding the mechanics helps you spot the real cause instead of guessing.
Inspect and Replace the Splinter Guard Strip
The rubber or plastic strip along the edge of your track is the first line of defense against tear out. Every time you cut, the blade trims this strip so it sits flush with the kerf.
Once that edge gets frayed, chipped, or pulled away, the wood fibers near the blade lose their backing and splinter upward.
Peel the old strip off slowly using a plastic scraper or a heat gun on low. Clean the adhesive residue with mineral spirits. Press a new strip firmly along the track, then make a fresh full depth cut along a scrap board to trim it perfectly to the blade line.
Pros: Cheap fix, takes under 20 minutes, and often solves the problem completely.
Cons: Replacement strips are brand specific, and the adhesive can be tricky to remove cleanly on older tracks.
Choose the Right Blade for the Job
Tooth count and tooth geometry matter more than almost anything else. A 48 tooth blade with an alternate top bevel grind handles plywood and crosscuts beautifully.
For melamine or veneered panels, a 60 tooth blade with a triple chip grind produces near perfect edges. Low tooth blades meant for ripping solid lumber will always shred a top veneer.
Look for blades with a negative hook angle because they pull less aggressively into the wood. Thin kerf blades around 1.6 mm to 2.2 mm reduce the cutting load and the chance of lifting fibers. Match the blade arbor and diameter exactly to your saw model.
Pros: A good blade fixes splintering on most materials instantly and lasts a long time.
Cons: Quality fine finish blades cost more, and you may need a few different blades for different jobs.
Check Blade Sharpness and Clean the Teeth
Even the best blade splinters when it gets dull or coated in pitch. Resin and dust build up on the carbide teeth, making the blade act blunter than it really is. The teeth then tear fibers instead of slicing them.
Remove the blade and soak it in a blade cleaner or simple oven cleaner for about 10 minutes. Scrub each tooth with a brass brush, rinse, and dry fully before reinstalling. If the teeth still look rounded or chipped after cleaning, send the blade out for sharpening or replace it.
Pros: Cleaning restores cut quality without any new purchase and takes about 15 minutes.
Cons: Sharpening is not a DIY job for most people, and badly worn carbide tips cannot be saved.
Set the Correct Cut Depth
Many users set the blade far deeper than needed, thinking it helps the cut. The opposite is true. When the blade sits too low, more teeth engage the wood at a steeper angle and lift fibers upward at the entry point.
Adjust the depth so the blade pokes through the bottom of the workpiece by only 2 to 5 millimeters. This keeps the teeth cutting almost straight down at the top surface, which is the cleanest cutting angle. For a 19 mm sheet of plywood, set your saw to about 22 mm.
Pros: Costs nothing, takes seconds, and improves both top and bottom edge quality.
Cons: You must readjust depth for every different material thickness, which slows you down on mixed work.
Use the Scoring Cut Method
For delicate veneers, melamine, or laminated panels, a scoring pass changes everything. Set your saw to a shallow depth of around 1.5 to 2 millimeters and run it along the track at slow speed. This light pass severs the top fibers with the splinter guard pressed tight.
Then drop the saw to full depth and make your normal cut along the exact same track position. The second pass meets a pre cut top surface, so there is nothing left to splinter. This is the same principle that industrial panel saws use with their separate scoring blade.
Pros: Produces near zero tear out even on the trickiest materials.
Cons: Doubles your cutting time and requires the track to stay perfectly in place between passes.
Tighten the Guide Cams on Your Saw
Most track saws have small adjustable knobs or cams on the underside of the saw base. These press against the inside edges of the track rib and keep the saw running straight. When they loosen, the saw shifts sideways during the cut and the blade flicks fibers off the top edge.
Turn the cams clockwise in small steps until the saw slides along the track with light, even resistance. There should be no side to side play but no binding either. Recheck this adjustment every few months, especially if you transport the saw often.
Pros: Fixes wobble related splintering immediately and improves cut accuracy at the same time.
Cons: Over tightening makes the saw hard to push and can wear the track rib prematurely.
Apply Painters Tape Along the Cut Line
When you cannot replace the splinter strip right away, painters tape gives you a fast workaround. Stick a strip of low tack blue tape along the cut line on the top face of the workpiece. The tape holds the surface fibers down while the blade slices through them.
Press the tape firmly with a roller or your fingernail so it bonds well. Cut at normal speed, then peel the tape off slowly at a shallow angle to avoid lifting any wood with it. This trick works wonders on oak veneer and other splinter prone woods.
Pros: Cheap, fast, and works with any saw or blade combination.
Cons: Uses tape on every cut, leaves slight adhesive residue, and slows your workflow on big projects.
Position the Track Correctly on the Workpiece
The splinter guard side of the track always sits over the keeper piece, not the offcut. The blade cuts cleanly right next to the rubber strip, while the opposite side of the kerf can still chip slightly. If you place the track on the wrong side, your good piece gets the splintered edge.
Mark your cut line, align the edge of the splinter strip directly on the line, and clamp the track down. Double check the orientation before plunging. This simple habit saves countless sheets from getting trimmed undersized after the fact.
Pros: No extra tools needed and gives consistent results once it becomes habit.
Cons: Requires planning every cut and reorienting the track for cuts on both halves of a panel.
Support the Workpiece Fully
A panel that flexes during the cut behaves unpredictably. The wood lifts slightly as the blade passes, which changes the cutting angle of the teeth and causes the top fibers to tear. Bouncing or vibrating panels also let the track shift micro distances during the cut.
Place the panel on a flat, full surface like rigid foam insulation or a sheet of sacrificial MDF on sawhorses. Make sure both the keeper and the offcut have support so neither side drops as the cut completes. Solid support also protects your floor and makes plunge cuts safer.
Pros: Improves cut quality, accuracy, and safety all at once.
Cons: Foam sheets take up shop space, and setting up support takes a few minutes per cut session.
Slow Down Your Feed Rate
Pushing the saw too fast forces each tooth to take a bigger bite. The blade then chips or lifts the top fibers instead of slicing them cleanly. New users often think speed equals efficiency, but with track saws, slow and steady wins.
Match your feed rate to the sound of the motor. If the motor bogs down or the pitch drops noticeably, you are pushing too hard. A steady, even glide that lets the blade do the work produces the cleanest top edge. Plywood and hardwood usually need a slower feed than softwood.
Pros: Free fix that also extends blade life and reduces motor strain.
Cons: Feels unnatural at first, and very slow feeds can cause burn marks on hardwoods.
Verify Blade Alignment and Toe In
If your splinter guard cuts cleanly but the cut still chips a few millimeters away from the edge, your blade may have side to side runout or incorrect toe alignment. The blade should sit perfectly parallel to the track, with a tiny bit of toe in at the rear if your saw allows that adjustment.
Check the manufacturer service guide for your model. Loosen the relevant bolts, nudge the motor housing the recommended fraction of a millimeter, and retighten. A correctly aligned blade cuts a smooth kerf without scoring the top surface.
Pros: Solves persistent splintering that no other fix touches.
Cons: Requires patience, sometimes special tools, and can void warranty on some brands if done wrong.
When to Call in a Professional or Replace the Saw
If you have replaced the splinter guard, swapped to a fresh fine finish blade, set the depth correctly, and the saw still leaves splinters, the problem may be internal wear. Worn motor bearings, a bent arbor, or a cracked saw base can all cause persistent tear out that no adjustment will fix.
Take the saw to an authorized service center for inspection. If repairs cost more than half the price of a new saw, consider replacing the tool. A well kept track saw should give clean cuts for many years, so persistent issues point to something serious that needs expert eyes.
Pros: Restores cut quality fully and may catch safety issues before they cause injury.
Cons: Service costs add up, and a replacement saw is a big investment.
FAQs
Why does only the top edge splinter and not the bottom?
The blade rotates upward at the front of the cut and downward at the back, so the top face sees the lifting action of the teeth. The bottom face gets cut on the downstroke, which slices cleanly. The splinter guard on the track is meant to back up the top fibers, so when it fails, only the top splinters.
How often should I replace the splinter guard strip?
Replace it when the edge looks frayed, lifts off the track, or no longer sits flush with the blade kerf. Heavy users may replace it every few months, while hobbyists might get a year or more from a single strip. Inspect it before every big project for best results.
Can I use a track saw blade from another brand?
Yes, as long as the diameter, arbor size, and kerf width match your saw specifications. Many third party blades fit popular track saws and offer excellent cut quality. Always check the maximum RPM rating on the blade against your saw motor speed.
Does cutting speed really affect splintering that much?
Yes. A slower feed gives each tooth time to slice cleanly through the fibers. Pushing too fast forces the teeth to chip the wood rather than cut it. Match your speed to the sound of the motor and let the blade pull itself through.
Will a scoring cut work on solid hardwood too?
It can help on figured grain or brittle species like oak and ash. Most clean cuts on solid wood come from a sharp blade and proper depth, but a light scoring pass adds an extra margin on visible edges. Try it on a scrap first to see if it helps with your specific wood.

Hi, I’m Leah Ray — the voice behind CraftBench Vault. I’m a passionate woodworking enthusiast dedicated to reviewing the best wood cutting tools and woodworking products. Through honest research and hands-on experience, I help fellow crafters make smarter buying decisions. Welcome to my workshop!