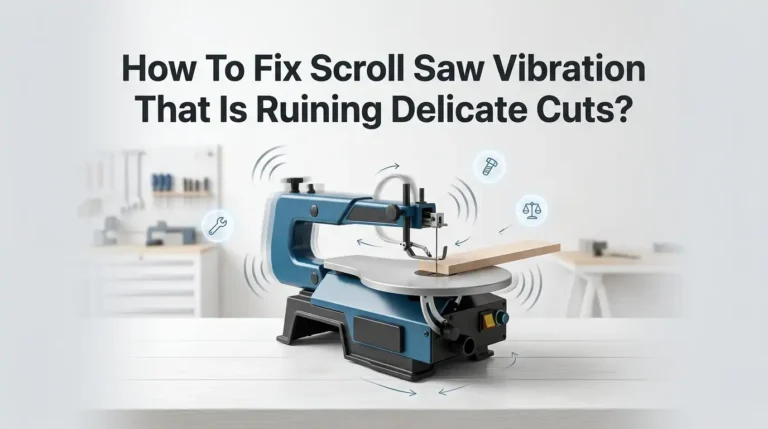
How to Fix a Scroll Saw Blade That Keeps Snapping on Tight Curves?
If your scroll saw blade keeps snapping on tight curves, you are not alone. This problem happens to many beginners and even to experienced users when one small setup detail is off.
The good news is that a snapping blade usually points to a clear cause. In most cases, the issue comes from the wrong blade size, too much feed pressure, poor turning technique, low or high tension, or extra heat in the cut.
This guide breaks the problem into simple fixes you can use right away. You will learn how to choose the right blade, set better tension, turn tight corners with less stress, and stop common mistakes before they ruin your cut.
Key Takeaways
- A blade usually snaps on curves because it twists, overheats, or binds in the cut. Tight curves put more stress on the blade than straight cuts. If you push sideways, force the wood, or turn too fast, the blade bends and fails. A straight blade likes forward cutting. It does not like being dragged through a corner.
- Small blades handle tighter curves better, but they are more delicate. A fine blade such as a 2/0, 1, or 3 can turn in a much smaller space than a larger blade. The trade off is simple. You gain better turning ability, but you lose some strength in thick or hard wood.
- Good tension matters more than many people think. A loose blade wanders and bends. A blade that is too tight can snap under stress. The goal is a firm, lively blade that stays straight in the cut. If the blade bows forward, your setup or feed pressure needs work.
- Your hands matter as much as your saw. Tight curves need light pressure, small pivots, and patience. You are guiding the wood, not forcing it. Many broken blades come from rushing the turn instead of letting the teeth clear the waste little by little.
- Heat is a silent blade killer. Friction builds fast in thick wood, hard wood, and packed sawdust. Tape, blade wax, short pauses, and the right tooth pattern can lower heat and reduce breakage. A cooler blade lasts longer and cuts cleaner.
- A simple check before every cut saves time and blades. Look at the blade size, tooth direction, clamp grip, tension, wood thickness, and your entry hole. This quick habit prevents most snapping problems before they start. It takes less than a minute and can save a full project.
Why Your Blade Snaps on Tight Curves
A scroll saw blade snaps on a tight curve because the cut asks the blade to turn in a very small space. If the blade is too large for that space, it starts to twist. If you add side pressure, the stress gets worse. Heat builds, the blade loses strength, and then it breaks.
Tight curves punish small mistakes fast. A little push to the left or right may feel harmless, but it puts the blade in a bind. The same thing happens if you try to swing the wood too quickly instead of turning it in place.
A dull blade adds even more strain because it cuts slower and needs more force. Pros: finding the root cause is usually easy once you check size, tension, and technique. Cons: if you ignore the early signs, you may keep breaking blades and think the saw is the problem when the real issue is the cutting method.
Choose the Right Blade Size for the Radius
Blade size is one of the biggest reasons for snapping on curves. A larger blade stays straighter and lasts longer, but it needs more room to turn. A smaller blade can handle tighter radius cuts because it is narrower and thinner. That is why fine detail work usually needs a small blade.
Choose the smallest blade that can still handle your wood thickness. For many tight curves in thin stock, a small blade such as 2/0, 1, or 3 works better than a 5 or 7. If the wood is thick or dense, go up a size so the blade still has enough strength.
Pros of a smaller blade: tighter turns, narrower kerf, better detail.
Cons of a smaller blade: easier to bend, easier to break, slower in thick wood.
Pros of a larger blade: more strength, straighter cuts, better life in thick stock.
Cons of a larger blade: poor performance on small curves, more binding in fine fretwork.
Pick the Best Tooth Style for the Cut
Tooth style affects how the blade clears dust, how smooth the cut looks, and how much heat builds on curves. A skip tooth blade clears dust well because it has more space between teeth. That helps on thicker wood where packed dust can slow the cut and overheat the blade.
A reverse tooth blade can leave a cleaner bottom surface because the lower teeth cut upward. This is helpful if bottom fuzz bothers you. The trade off is that some reverse tooth blades do not clear dust as freely as a skip tooth blade.
Spiral blades can cut in any direction, which sounds great for tight curves. Yet they often feel harder to control and can leave a wider cut. Pros of skip tooth: better dust removal and less heat. Cons: bottom surface may look rougher. Pros of reverse tooth: cleaner bottom cut. Cons: dust can build faster. Pros of spiral: easy direction changes. Cons: less precision for many users.
Set Blade Tension So the Blade Stays Straight
Blade tension must be firm enough to keep the blade straight, but not so high that it becomes brittle under pressure. A loose blade bows, wanders, and twists in curves. A very tight blade can snap from stress, especially in hard wood or during a sharp turn.
A useful check is the sound test. Many users lightly pluck the blade and listen for a clear ping or ting. That sound does not replace judgment, but it gives you a quick clue. You also want the blade to resist side deflection without feeling stiff like wire.
If you see the blade bow forward while cutting, back off the feed pressure first. Then check tension again. Pros of proper tension: better control, straighter cuts, fewer breaks. Cons: it takes a little trial and error on each saw. Once you find the sweet spot on your machine, write it down so you can return to it faster.
Check Blade Installation and Clamp Grip
A good blade can still fail if it is installed badly. The teeth should point forward and down. The blade should sit straight in the clamps, and the clamps should hold it firmly without crushing it. If the blade sits crooked, it will carry uneven stress through every curve.
Look closely at the clamp faces and set screws. Dirt, oil, sawdust, or worn grooves can stop the blade from seating well. That can make the blade slip, twist, or pinch at the ends. All of those problems increase the chance of breakage.
Before you cut, turn the saw by hand or watch the blade at low speed to make sure it tracks straight. Pros of a careful installation check: fast fix, no cost, better safety. Cons: many people skip it because it feels too simple. Yet a thirty second clamp check can solve a problem that feels much bigger than it is.
Slow the Feed and Let the Blade Cut
Many snapped blades come from one habit. The user pushes the wood faster than the blade can cut. That extra force bends the blade and adds heat. On a tight curve, that same force also shoves the blade sideways, which makes breakage much more likely.
Use light, steady forward pressure. Let the teeth remove waste at their own pace. If the blade starts to drift, do not shove harder. Ease off, back up if needed, and enter the curve again with a softer hand.
A helpful trick is to pause your push for a moment and see whether the workpiece springs back. If it does, you were applying side pressure. Pros of a slower feed: cleaner lines, less heat, longer blade life. Cons: the cut takes more time. Still, slow cutting is much faster than stopping every few minutes to replace another broken blade.
Turn the Wood the Right Way on Curves
Tight curves need a pivot, not a sweep. If you try to drag the workpiece through a sharp corner in one fast move, the blade twists in the kerf. That twist is often what snaps the blade in the middle.
The better method is simple. Move forward gently until you reach the turn. Then reduce pressure and rotate the wood in small amounts around the back of the blade. Think of the blade as a pivot point, not a steering wheel. This lets the teeth keep cutting while the wood changes direction little by little.
For very sharp turns, make a series of tiny turns instead of one big turn. You can also make small relief cuts in waste areas to free the blade. Pros of this method: less twist, better accuracy, smoother corners. Cons: it feels slow at first. After a little practice, it becomes natural and your blade life improves fast.
Drill Better Entry Holes and Use Relief Cuts
Entry holes matter more than many users expect. If the hole is too small, the blade has little room to turn at the start of an inside cut. That cramped space can force the blade into a bad angle before the curve even begins.
Use the largest entry hole the pattern allows. A slightly larger hole makes threading easier and gives you room to pivot into the first turn. For fine veining cuts, use the smallest hole that still fits the blade cleanly.
Relief cuts also help a lot on tight curves. A relief cut removes waste from the outside of a sharp turn so the blade does not stay trapped in a tight pocket. Pros of larger entry holes and relief cuts: less binding, easier turning, lower stress. Cons: you must plan ahead, and a hole that is too large may show on delicate work. Used well, these methods make hard curves far easier.
Reduce Heat With Tape, Wax, and Short Pauses
Heat weakens blades. On a tight curve, the blade stays in one area longer, so friction rises fast. Thick wood, hard wood, and packed dust make the problem worse. If the blade gets hot, it dulls faster and becomes more likely to snap.
A simple fix is to use clear packing tape or masking tape on the cut line. Many woodworkers find that it reduces friction and helps the blade glide more smoothly. A little blade wax or even a plain white candle can also help. Less friction means less heat, and less heat means fewer breaks.
Short pauses help too. Let the blade cool for a moment during long inside cuts. Pros of these methods: low cost, easy to try, smoother cutting. Cons: tape can affect line visibility, and too much wax can feel messy. Even so, a cooler cut usually gives you better control on tight curves.
Match the Blade to Wood Thickness and Wood Type
The same blade will not perform the same way in every material. Thin soft wood is forgiving. Thick maple, oak, or other dense wood is harder on a small blade. If you use a very fine blade in stock that is too thick, the blade may struggle to clear dust and survive the turn.
Match the blade to both the curve and the wood. If your pattern has tight curves in wood that is thick or hard, choose a blade that is still small enough for the radius but strong enough for the job. Sometimes going one size larger and cutting with more patience works better than using a tiny blade that snaps every few minutes.
Pros of matching blade to material: better cut speed, less heat, fewer failures. Cons: you may give up a little turning radius. That trade can still be worth it if the blade stays alive and the cut remains accurate.
Know When the Blade Is Already Dull or Damaged
A blade does not need to be broken to cause trouble. A dull blade cuts slower, heats up faster, and needs more pressure. That added force often leads to breakage on curves. You may also notice fuzzy edges, burning, or a rough feel in the cut.
Look at the blade before you start. If it has rust, bent spots, missing teeth, or signs of wear, replace it. A tired blade asks your hands to do extra work, and that is where trouble starts. New blades often solve problems that feel like tension or technique issues.
Pros of changing a dull blade early: smoother cuts, less pressure, fewer surprises. Cons: you use more blades. Still, blades are cheap compared with wasted wood, broken patterns, and lost time. If a blade feels wrong, trust that feeling and swap it out before the next inside cut.
Use a Fast Troubleshooting Routine Before the Next Cut
If your blade snapped once, do not rush to install a new one and keep cutting the same way. Use a quick routine first. Check the blade size. Check the tooth style. Check the tension. Check the clamps. Check your wood thickness. Check your entry hole. Then think about your feed pressure on the last curve.
This fast review turns a random problem into a clear fix. Most blade breaks have a simple cause, and you can usually find it in under a minute. If you keep breaking blades in the same spot, the pattern itself may need a relief cut or a larger turning path.
A simple routine also builds confidence. Pros: fewer repeat mistakes, better habits, less frustration. Cons: it adds a short pause before you resume cutting. That pause is worth it because it helps you solve the real problem instead of guessing.
FAQs
Why does my blade break in the middle instead of at the clamp?
A break in the middle often points to twist, side pressure, or heat. Tight curves can force the blade to bend in the center if you turn too fast or push sideways. A dull blade can make this worse because it needs more force.
Is a smaller blade always the best choice for tight curves?
No. A smaller blade turns better, but it also breaks more easily in thick or hard wood. Choose the smallest blade that can still handle the wood thickness. That balance gives you detail without giving up too much strength.
Should I use a spiral blade for very tight curves?
You can, but many users find spiral blades harder to guide accurately. They are useful if you want cutting freedom in many directions. For clean, controlled curves, many people still prefer a flat blade that matches the pattern well.
How do I know if my tension is wrong?
If the blade bows forward, wanders, or feels loose, the tension may be low. If the blade snaps very easily after installation, the tension may be too high. Aim for a firm blade that stays straight and gives a clear ping when lightly plucked.
What is the fastest fix if I keep snapping blades today?
Start with three changes. Use a smaller blade if the curve is very tight. Lower your feed pressure. Turn the wood in tiny pivots instead of one big sweep. If the problem stays, check clamp grip and replace the blade with a fresh one.

Hi, I’m Leah Ray — the voice behind CraftBench Vault. I’m a passionate woodworking enthusiast dedicated to reviewing the best wood cutting tools and woodworking products. Through honest research and hands-on experience, I help fellow crafters make smarter buying decisions. Welcome to my workshop!