How to Fix Water Damage on Wood? Step by Step Guide
Water damage on wood is one of the most frustrating problems homeowners face. A single spill, a leaky pipe, or a forgotten glass can leave ugly stains, warped surfaces, and soft spots on your favorite furniture or flooring. The good news? Most water damage on wood is fixable if you act fast and use the right methods.
Whether you are dealing with white rings on a coffee table, dark stains on hardwood floors, or swollen cabinet doors, this guide walks you through every solution.
You will learn how to identify the type of damage, choose the best repair method, and protect your wood from future problems. Every fix in this guide uses practical, hands on techniques you can do at home without calling a professional.
Key Takeaways
- Identify the damage type first. White stains mean moisture is trapped in the finish. Dark stains mean water has reached the wood itself. Warping, buckling, and soft spots signal deeper structural damage. Each type requires a different approach.
- Act quickly for the best results. The longer water sits on wood, the deeper it penetrates. Drying the area within 24 to 48 hours gives you the best chance of a full recovery. Use fans, dehumidifiers, and dry towels to remove moisture as fast as possible.
- Simple home remedies work for light damage. An iron and a cloth can lift white water rings. Baking soda paste, vinegar and olive oil mixtures, and even toothpaste can remove surface stains from finished wood. These cost almost nothing and take minutes.
- Sanding and refinishing fix moderate damage. When stains go below the surface finish, you will need to sand the area down and apply a new coat of stain or sealant. This restores the wood’s original look and adds a fresh layer of protection.
- Epoxy and wood filler save severely damaged wood. For soft, rotted, or deeply gouged wood, two part epoxy systems harden weak fibers and fill missing sections. This method can save wood that looks beyond repair.
- Prevention is always easier than repair. Sealing wood with polyurethane, marine varnish, or penetrating oil finishes creates a barrier against future water damage. Use coasters, wipe spills immediately, and control indoor humidity to keep your wood safe.
How to Identify the Type of Water Damage on Your Wood
Before you grab any tools, you need to know what kind of damage you are dealing with. White or cloudy marks on the surface mean moisture is trapped inside the finish layer. This is the easiest type to fix because the wood underneath is still in good shape.
Dark stains, usually black or dark gray, mean water has soaked through the finish and into the wood grain. These require more effort because you will need to remove the finish and treat the wood directly. You may also notice the grain feels raised or rough.
Warping, cupping, or buckling indicates the wood has absorbed a large amount of water. This is common after floods or prolonged leaks. The wood fibers swell unevenly, causing the surface to bend or lift. Soft or spongy spots are the most serious sign. They mean the wood has started to rot, and you will need to use fillers or replace sections entirely.
How to Dry Water Damaged Wood Before Starting Repairs
Drying is the most important first step. Never attempt repairs on wood that still contains moisture. Trapped water will cause mold growth, continued warping, and finish failure down the road.
Start by removing any standing water with towels or a wet vacuum. Open windows and doors to increase air circulation. Place fans directly on the affected area and run them continuously. A dehumidifier pulls moisture from the air and speeds up drying dramatically.
For hardwood floors, this drying process can take one to four weeks depending on the severity. Use a moisture meter to check the wood’s moisture content. Most hardwoods should read between 6% and 9% before you begin repairs. Patience here saves you from redoing the entire job later.
How to Remove White Water Stains From Wood Using an Iron
White water rings and cloudy patches are the most common type of water damage on furniture. The good news is that an ordinary clothes iron can fix this in minutes. The heat draws trapped moisture out of the finish without damaging the wood.
Lay a clean, dry cotton cloth or old t shirt flat over the stain. Set your iron to a medium heat with no steam. Press the iron gently onto the cloth and move it in slow, circular motions. Lift the cloth every 10 to 15 seconds to check your progress. The white mark should fade gradually.
Pros: This method is fast, free, and works on most polyurethane and lacquer finishes. It requires no special tools.
Cons: Too much heat can scorch the finish or the cloth. It does not work on dark stains or deep damage. Always test on a small hidden area first to make sure the finish can handle the heat.
How to Fix Water Stains on Wood With Common Household Items
You do not need expensive products to remove light water stains. Several items already in your kitchen or bathroom can do the job. These methods work best on white or hazy stains that have not penetrated the wood.
Baking soda paste works well for stubborn white marks. Mix one tablespoon of baking soda with a few drops of water to form a thick paste. Rub it onto the stain with a soft cloth, following the wood grain. Wipe clean and repeat if needed.
A mixture of equal parts white vinegar and olive oil is another effective option. Apply it with a soft cloth, rub along the grain, and let it sit for one hour. The vinegar cuts through residue while the olive oil conditions the wood. Non gel toothpaste also works as a mild abrasive for very light surface marks.
Pros: These remedies are cheap, safe, and use items you already own. They work quickly on surface level damage.
Cons: They only address cosmetic stains on the finish layer. They will not fix dark stains, warping, or structural damage. Results vary depending on the type of finish on your wood.
How to Sand and Refinish Water Damaged Wood Surfaces
When water has stained the actual wood beneath the finish, surface remedies will not be enough. Sanding removes the damaged finish and the discolored wood fibers, giving you a clean surface to work with.
Start with 120 grit sandpaper to remove the old finish and the stained layer. Sand evenly and always follow the direction of the wood grain. Once the stain is gone, switch to 180 grit and then 220 grit sandpaper to smooth the surface.
Wipe away all dust with a tack cloth. If the original stain color needs matching, apply a wood stain that matches the surrounding area. Let it dry completely before adding a protective finish. Apply two to three coats of polyurethane, sanding lightly with 220 grit between coats.
Pros: Sanding and refinishing gives a like new result. It works on floors, tables, desks, and cabinets. You can match any color or sheen.
Cons: It is time consuming and creates a lot of dust. You need multiple grits of sandpaper and finish products. Uneven sanding can leave visible marks, so steady hands and patience are required.
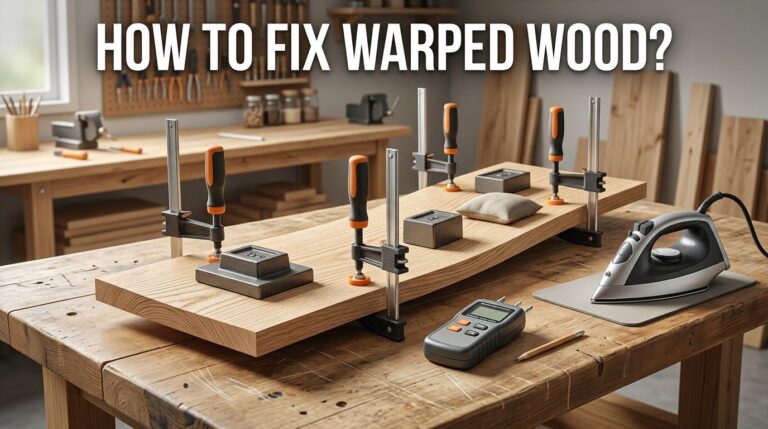
How to Fix Warped or Buckled Wood Caused by Water Damage
Warped wood happens when one side absorbs more water than the other. The wet side swells and the dry side stays the same, causing the board to bend or cup. The key to fixing warped wood is reintroducing moisture evenly and then applying pressure as it dries.
For mild warping, place the concave (cupped) side face down on a damp towel. Add weight on top, such as heavy books or concrete blocks. Leave it for 24 to 48 hours. The damp towel adds moisture to the dry side while the weight flattens the board as it equalizes.
A steam iron technique also works well. Place a damp cloth over the warped area and run a hot iron over it. The steam softens the wood fibers, making them flexible. Immediately clamp the wood flat and let it dry completely under pressure. This can take several days.
Pros: These methods use basic household items and can fully restore mild to moderate warps.
Cons: Severe warping may not fully correct. The process takes days of patience. Wood can re warp if not sealed properly after repair.
How to Repair Swollen Wood Furniture and Cabinets After Water Exposure
Swollen wood is common in cabinets, doors, and particleboard furniture that gets exposed to moisture. The wood fibers absorb water and expand, causing tight fits, rough textures, and peeling veneer. You must dry the piece completely before any repair work.
Use fans and a dehumidifier to dry the furniture over several days. Once dry, lightly sand the swollen areas with 150 grit sandpaper. This removes raised fibers and smooths the surface back down. For veneer that has bubbled or lifted, apply wood glue underneath with a thin spatula or syringe.
Press the veneer flat and clamp it overnight. Wipe away any excess glue immediately before it dries. Once everything is smooth and bonded, apply a matching finish or paint to seal the repaired area.
Pros: This approach saves furniture that might otherwise be thrown away. It works on both solid wood and veneer surfaces.
Cons: Particleboard and MDF can crumble when severely water damaged. Veneer repairs may show slight imperfections. Swollen joints may need disassembly and re gluing for a proper fit.
How to Use Wood Filler and Epoxy to Repair Rotted or Soft Wood
When water damage causes wood to become soft, spongy, or rotted, fillers and epoxy systems can rebuild the structure. Two part epoxy is the strongest option for restoring wood that has lost its structural strength.
First, remove all loose and rotted material with a scraper, chisel, or stiff brush. Drill a series of small holes around the damaged area to help the epoxy soak deeper into the surrounding wood. Apply a liquid epoxy consolidant to harden any remaining soft fibers. Let this cure fully according to the product directions.
Next, mix a two part epoxy wood filler and pack it into the void. Shape it to match the original contour of the wood. Once cured, sand it smooth and apply paint or finish. The repair will be as hard as the original wood and fully waterproof.
Pros: Epoxy repairs are extremely strong and long lasting. They can fill large voids and rebuild missing sections. The cured material is waterproof.
Cons: Epoxy products can be messy and have strong fumes. You need to work quickly before the mixture hardens. Color matching can be difficult without paint or stain over the repair.
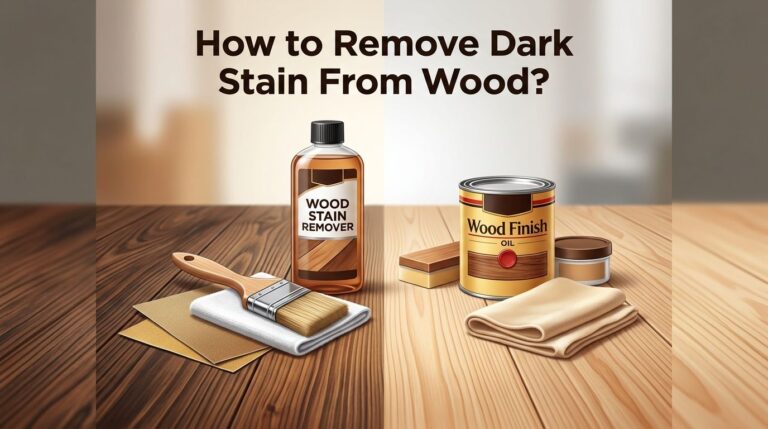
How to Remove Dark Water Stains From Hardwood Floors
Dark or black water stains on hardwood floors mean the water reached the bare wood beneath the finish. These stains are caused by a chemical reaction between water and tannins in the wood. Surface cleaners will not remove them.
You need to sand the affected area down to bare wood. Use 120 grit sandpaper and work carefully to avoid sanding too deep or creating a dip. Once the dark stain is exposed, apply hydrogen peroxide or oxalic acid (wood bleach) directly to the stain. Let it sit for several hours or overnight.
Rinse the area and let it dry completely. If the stain remains, repeat the treatment. Most dark stains need two to three applications to fully disappear. Once the color is even, apply a matching wood stain and two to three coats of polyurethane to blend the repair with the rest of the floor.
Pros: This method can fully remove even old, deep set dark stains. It restores the original wood color.
Cons: Oxalic acid requires safety gloves and proper ventilation. Spot repairs on floors can be visible if the stain match is not exact. Large areas may require refinishing the entire floor for a uniform look.
How to Treat Mold and Mildew on Water Damaged Wood
Mold and mildew often follow water damage, especially if the wood stayed damp for more than 48 hours. You should address mold immediately because it spreads fast and can cause health problems.
Put on gloves, safety glasses, and a mask before starting. Mix one cup of white vinegar with one cup of water in a spray bottle. Spray the affected area generously and let it sit for one hour. Scrub with a stiff brush and wipe clean. For stubborn mold, a solution of one part bleach to ten parts water works on unfinished or painted wood.
Never mix bleach and vinegar together as this creates toxic fumes. After cleaning, dry the wood completely with fans and a dehumidifier. Sand the surface lightly if any staining remains, then seal with a protective finish.
Pros: Vinegar and bleach solutions are effective and affordable. They kill mold spores and prevent regrowth when followed by sealing.
Cons: Bleach can lighten or discolor some wood finishes. Strong chemicals require good ventilation and protective gear. Deeply embedded mold may require professional remediation.
How to Protect Wood From Future Water Damage With Sealants and Finishes
Fixing water damage is only half the job. Sealing your wood with a protective finish is the best way to prevent it from happening again. The right product depends on where the wood is located and how much moisture exposure it gets.
Polyurethane is the most popular choice for indoor furniture and floors. Oil based polyurethane provides a thicker, more durable coat. Water based polyurethane dries faster and has less odor. Both create a strong moisture barrier.
Marine varnish offers the highest level of water resistance. It is ideal for wood near bathrooms, kitchens, or outdoor areas. Penetrating oil finishes like tung oil or linseed oil soak into the wood grain and protect from the inside. They give a natural look but need regular reapplication.
For wood in extreme conditions, epoxy based sealers create a fully waterproof coating. These are overkill for most indoor applications but perfect for boat decks, docks, or outdoor structures.
How to Prevent Water Damage on Wood With Simple Daily Habits
The best repair is the one you never have to make. A few simple habits can protect your wood surfaces for years and save you hours of repair work.
Always use coasters under glasses and hot pads under dishes. Wipe up spills immediately rather than letting them sit. Keep indoor humidity between 30% and 50% with a humidifier or dehumidifier depending on the season. This prevents wood from absorbing excess moisture from the air.
Check under sinks, around dishwashers, and near water heaters regularly for leaks. Even a slow drip can cause serious damage over time. Place mats at exterior doors to catch rain and snow from shoes. Reapply finish or sealant every one to three years on high traffic floors and frequently used furniture to maintain the protective barrier.
These small steps cost nothing and take seconds. They will keep your wood surfaces looking great and free from water damage for decades.
Frequently Asked Questions
How to Tell if Water Damage on Wood Is Too Severe to Repair?
If the wood is deeply soft, crumbling apart, or has widespread mold throughout its core, it may need full replacement. Small areas of rot or softness can be repaired with epoxy filler. However, large structural beams or subfloor sections that have lost their strength should be assessed by a professional before you rely on a patch repair.
How to Fix Water Damage on Wood Without Sanding?
For white surface stains, try the iron and cloth method, baking soda paste, or a vinegar and olive oil mixture first. These methods remove stains from the finish layer without any sanding. If the stain is in the wood itself, sanding is usually necessary. Some people use hydrogen peroxide on bare wood to lighten dark stains, but this still requires finish removal.
How Long Does Water Damaged Wood Take to Dry Completely?
Drying time depends on the type of wood, the amount of water, and the conditions in the room. A small surface spill may dry in hours. Hardwood floors after a leak may take one to four weeks with fans and dehumidifiers running. Always use a moisture meter before starting repairs to confirm the wood has reached the correct moisture level.
How to Fix Water Damage on a Wood Veneer Surface?
Veneer is a thin layer of real wood glued over a base material. If the veneer has bubbled or lifted, inject wood glue underneath with a syringe, press flat, and clamp overnight. If the veneer is peeling badly, you may need to remove it, glue it back, and refinish the surface. Particleboard bases under veneer often swell permanently and may need replacement.
How to Prevent Water Rings on Wood Tables Without Using Coasters?
If coasters are not your style, choose a table finish with strong water resistance like marine varnish or oil based polyurethane. You can also apply a paste wax over the finish for an extra moisture barrier. Reapply the wax every few months to maintain protection. However, coasters remain the simplest and most reliable prevention method.

Hi, I’m Leah Ray — the voice behind CraftBench Vault. I’m a passionate woodworking enthusiast dedicated to reviewing the best wood cutting tools and woodworking products. Through honest research and hands-on experience, I help fellow crafters make smarter buying decisions. Welcome to my workshop!