How to Retrofit an Old Cabinet Saw With a Modern Riving Knife Safety System?
Old cabinet saws are workhorses. They cut clean, run quiet, and last for decades. But most of them shipped before 2009, which means they came with a basic splitter or no kickback protection at all. That gap in safety puts your hands and your project at risk every time you rip a board.
A riving knife changes that. It rides with the blade, hugs the kerf, and stops the wood from pinching shut behind the cut.
The good news is you can add one to most older saws with patience and the right approach. The harder news is that no single bolt on kit fits every machine.
In a Nutshell:
- A true riving knife rises, lowers, and tilts with the blade, while a splitter stays fixed in one position. Older cabinet saws use splitters by default, and most cannot accept a factory riving knife without major modification to the trunnion assembly.
- Aftermarket options like the BORK system or Shark Guard ARK offer the closest thing to a true riving knife for older Unisaws, Powermatic 66, and similar cabinet saws. They mount to existing splitter brackets or trunnion rods.
- The riving knife body must be thinner than the blade kerf but thicker than the blade plate. A standard target is 0.090 inch thick for a 0.125 inch kerf blade. Mismatched thickness causes binding or wandering.
- Alignment matters more than the part itself. The knife must sit dead parallel to the blade, centered on the kerf, with the leading edge no more than 8mm from the blade teeth.
- Budget between $80 for a DIY splitter plate and $300 for a full aftermarket riving knife system. Factor in shipping, mounting hardware, and possible throat plate modification.
- Always test cut with scrap before live work. A misaligned knife is worse than no knife at all because it gives false confidence.
Why Older Cabinet Saws Lack Riving Knives in the First Place
Before 2009, no US safety standard required a riving knife on stationary saws. The Underwriters Laboratories standard UL 987 changed that, forcing manufacturers to ship saws with modern blade guards and riving knives.
Saws built before that date, including beloved models like the Delta Unisaw, Powermatic 66, and Jet XACTA, came with a fixed splitter mounted behind the blade.
The splitter worked, but it had real flaws. It sat too far behind the blade, did not move with blade height, and had to come off for non through cuts.
Most woodworkers removed them and never put them back. That single habit caused thousands of kickback injuries each year. Retrofitting solves the convenience problem that made splitters get tossed in a drawer.
Understanding the Difference Between a Splitter and a Riving Knife
A splitter is a flat metal plate behind the blade that keeps the kerf open. It bolts to the trunnion or table and stays at full height no matter where you set the blade. You must remove it for dado cuts or grooves.
A riving knife curves around the back of the blade. It sits just below the top of the teeth and moves up, down, and side to side with the blade. You can leave it on for almost every cut except complete through cuts where the workpiece passes over it.
The difference matters because riving knives stay in place during partial cuts like rabbets and shallow dadoes. A splitter forces you to remove safety hardware for many common operations, while a riving knife stays on the job. This is why retrofitting toward a true riving knife is worth the effort.
Checking If Your Cabinet Saw Can Accept a Riving Knife Retrofit
Not every old saw can accept a true riving knife. Older saw blades move in an arc as you raise and lower them, while modern riving knives rely on a parallel lifting mechanism. This is why Grizzly and most major brands tell owners that factory retrofits are not feasible.
Open the cabinet and look at the trunnion assembly. If the blade pivots on a single point at the front and the back of the arbor swings in an arc, you cannot install a true OEM style riving knife. You can still add a near riving knife or improved splitter. If your saw has parallel arbor movement, a factory style knife may bolt right in.
Take photos and measurements before shopping. Note the splitter mount location, bolt pattern, and clearance behind the blade. This data drives every decision that follows.
Method One: Installing an Aftermarket Riving Knife System
The BORK system and the Shark Guard ARK are the two most respected aftermarket options for older cabinet saws. Both mount to the existing splitter bracket and provide a near riving knife experience. They tilt with the blade and stay close to the kerf, but require manual adjustment when you change blade height.
Installation usually takes one to two hours. Remove your old splitter, bolt on the new bracket, slide in the knife plate, and align it to the blade. Most kits include shims and adjustment screws for fine tuning.
Pros: Professional fit, tested designs, includes blade guard options, tilts with the blade, works with thin kerf blades.
Cons: Costs $200 to $350, requires manual height adjustment, may need throat plate modification, limited stock and long wait times from small makers.
Method Two: Fabricating a Custom Riving Knife From Scratch
If you have metalworking skills or know a friend with a plasma cutter, building your own knife is rewarding and cheap. Start with cold rolled steel plate at 0.090 inch thickness for a standard 1/8 inch kerf blade. Trace the blade profile, leaving a 5mm to 8mm gap around the teeth.
Cut the plate, smooth the edges, and drill mounting holes that match your saw’s splitter bracket. A pivot mount lets the knife move with the blade tilt. You can also build a raising mechanism that links to the trunnion, though this requires real engineering skill.
Pros: Costs under $50 in materials, perfectly matched to your saw, satisfying project, easy to repair or replace.
Cons: Requires metal cutting tools, takes 4 to 8 hours of shop time, no liability backing if something goes wrong, alignment is harder without precision tooling.
Method Three: Upgrading to a Modern Zero Clearance Splitter
If a full riving knife retrofit feels out of reach, a modern splitter system is a strong middle ground. Products like the MicroJig MJ Splitter or similar zero clearance designs mount inside a custom throat plate. They sit close to the blade and provide kickback protection during ripping.
You make a zero clearance throat plate from phenolic or hardwood, then press fit the splitter pins behind the blade. The whole setup takes about an hour once you have the throat plate stock.
Pros: Cheap at around $25 to $40 per set, easy install, works on any saw, very close to the blade for maximum kickback prevention, no trunnion modification needed.
Cons: Does not raise with the blade, must be removed for non through cuts, fits only the throat plate it was installed in, no blade guard attachment.
Sourcing the Right Steel and Hardware for Your Build
For a DIY knife, material choice matters. Use AISI 1018 or A36 cold rolled steel for the body. These grades cut cleanly, drill easily, and resist warping under heat. Avoid stainless because it work hardens and dulls cutting tools fast.
Match the thickness to your blade carefully. Measure your blade plate thickness with calipers, then pick steel that is at least 0.005 inch thicker than the plate but at least 0.005 inch thinner than the kerf. For a 0.125 inch kerf with a 0.083 inch plate, choose 0.090 inch steel.
Buy grade 8 bolts for the mounting hardware. Use lock washers or thread locker because vibration loosens fasteners over time. A wandering knife is a dangerous knife.
Aligning Your New Riving Knife to the Blade
Alignment is the single most important step. A misaligned knife pushes wood into the blade and causes the exact kickback you are trying to prevent. Start by raising the blade to full height with the saw unplugged.
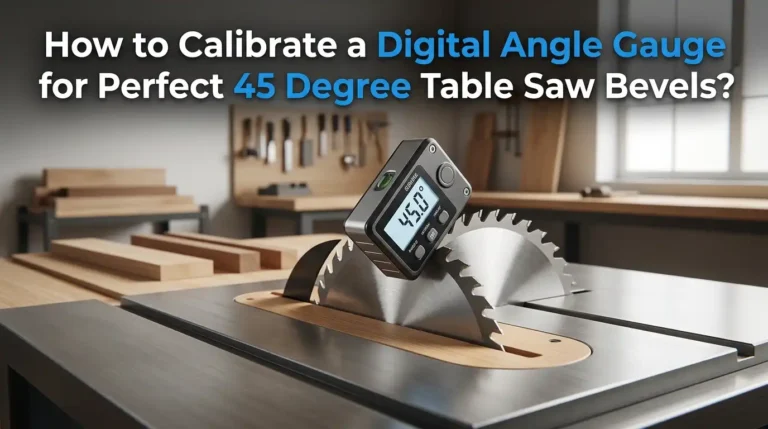
Place a straight edge along the side of the blade plate, touching two teeth on the same side. The riving knife should sit flush against the straight edge with no gap and no push. Check both sides. The knife must be perfectly parallel to the blade, not just close.
Next, check the gap behind the blade. The leading edge of the knife should sit between 3mm and 8mm from the back teeth. Tighten all mounting bolts, then recheck alignment. Vibration during tightening can shift the position by a fraction of a degree, which matters at this scale.
Modifying the Throat Plate for Riving Knife Clearance
Most old saws have a throat plate with a small slot for a splitter. A riving knife needs a wider opening that extends further forward and curves with the blade arc. You will likely need to make a new throat plate.
Use 3/4 inch phenolic or Baltic birch plywood. Trace your existing plate, cut to shape, and level it flush with the table surface using set screws. Install the plate, raise the spinning blade slowly to cut its own kerf, then turn off the saw and mark the riving knife slot.
Cut the slot with a jigsaw or router. Test fit with the knife at full height and at lowest height to confirm clearance through the full range. A snug fit gives the best zero clearance support.
Testing Your Retrofit With Scrap Wood First
Never put valuable lumber on a freshly retrofitted saw. Start with softwood scrap at least 12 inches long and 4 inches wide. Set the blade to full height and the fence to a 2 inch rip. Push the board through slowly with a push stick.
Watch the board behind the blade. It should pass cleanly past the knife with no contact or drag. If you hear scraping or feel resistance, stop and recheck alignment. Try cuts at different blade heights and tilt angles to confirm the knife tracks correctly.
Make at least 20 test cuts before trusting the system with real work. Vary the wood thickness, cut depth, and angle. A retrofit that works at 90 degrees may bind at 45 degrees if the mounting bracket is not centered correctly.
Maintenance and Long Term Care of Your Retrofit System
A retrofitted knife needs more attention than a factory unit. Check alignment monthly, especially after heavy use or after changing blades. Vibration loosens bolts and shifts brackets over time.
Keep the knife clean. Pitch buildup on the leading edge increases friction and can cause binding. Wipe the knife with mineral spirits after each session and apply a thin coat of paste wax to reduce sap stick.
Inspect mounting bolts for stretching or thread wear every six months. Replace any bolt that shows fatigue. Store backup hardware in a labeled bag near your saw so a quick fix never becomes a long downtime. If you swap between thin and full kerf blades, swap riving knives too. One thickness will not safely serve both.
When to Call a Professional Instead of DIY
Some retrofits go beyond home shop skill. If your saw has unusual trunnion geometry, severely worn parts, or no aftermarket support, a machinist or repair shop can build a custom mount that bolts directly to the cast iron.
Expect to pay $300 to $600 for a professional retrofit including parts and labor. The work usually includes a custom bracket, a precision cut knife, and full alignment testing.
Pros: Professional quality, proper engineering, liability backing, often includes a warranty, faster turnaround.
Cons: Higher cost, may require shipping parts out, fewer shops have woodworking saw experience, results vary by shop skill.
Choose this route if you lack metalworking tools, if your saw is rare and valuable, or if you simply want peace of mind from a tested install.
Frequently Asked Questions
Can I install a true riving knife on any old cabinet saw?
No. Saws with arc style blade lifting cannot accept a true riving knife because the geometry does not match. You can install a near riving knife or improved splitter on almost any saw, but only newer designs with parallel blade movement accept factory style knives.
How much does a complete retrofit cost?
Costs range from about $40 for a DIY zero clearance splitter to $600 for a professional installation. Most aftermarket kits fall between $200 and $350. Add another $20 to $50 for throat plate stock and mounting hardware.
Will a retrofitted riving knife work with a dado stack?
No. Riving knives and splitters must be removed for dado work and non through cuts. The knife sits behind the blade in a space that the wider dado stack does not allow. Always remove the knife for these cuts and reinstall it before regular ripping.
How thick should my riving knife be?
The knife should be thinner than your blade kerf but thicker than the blade plate. For most standard blades, that means a steel plate between 0.085 and 0.095 inch thick. Always measure your specific blade with calipers before buying or cutting material.
Is a splitter as safe as a riving knife?
A splitter prevents kickback well during through cuts, but it must be removed for many operations. A riving knife stays in place for more cuts, which means it is more likely to actually be installed when you need it. The safest device is the one you keep on the saw.
Can I use the same riving knife with both thin and full kerf blades?
No. Each kerf width needs a matched knife thickness. Using a thick knife with a thin kerf blade causes binding. Using a thin knife with a thick kerf blade lets the wood pinch closed behind the cut, which defeats the purpose. Keep one knife per blade type and label them clearly.

Hi, I’m Leah Ray — the voice behind CraftBench Vault. I’m a passionate woodworking enthusiast dedicated to reviewing the best wood cutting tools and woodworking products. Through honest research and hands-on experience, I help fellow crafters make smarter buying decisions. Welcome to my workshop!