Why Does My Biscuit Joiner Cut Slots Too Deep?
You just plunged your biscuit joiner into a test board, and the slot swallowed the biscuit whole. The joint rattles. The pieces refuse to sit flush. Something is clearly wrong with the depth setting, and your project is stalled.
A biscuit joiner that cuts slots too deep is one of the most common and frustrating problems woodworkers face. The biscuit drops into the slot instead of fitting snugly.
The joint loses alignment strength, and glue alone cannot fix the gap. The good news is that this problem almost always traces back to the depth stop mechanism, and you can fix it yourself with a few basic tools and about 30 minutes of focused effort.
In a Nutshell
- A biscuit joiner cuts too deep when the depth stop fails to limit the blade’s plunge distance. This can happen because of a worn stop mechanism, a loose plunge rod nut, sawdust buildup, or an incorrect dial setting. Each of these causes allows the blade to travel farther into the workpiece than intended.
- The ideal slot depth is about 1/16 inch deeper than half the width of the biscuit. For a #20 biscuit (1 inch wide), the slot should be roughly 9/16 inch deep. For a #10 biscuit (3/4 inch wide), aim for about 7/16 inch. For a #0 biscuit (5/8 inch wide), the target is about 3/8 inch. This small extra space allows room for glue and lets the joint close tightly.
- Recalibration involves loosening the stop nut on the plunge rod and adjusting the stop position. Most biscuit joiners use a turret dial that rotates between preset depth stops. A datum pin on the plunge rod contacts these stops to limit travel. You adjust depth by repositioning the nut or fine tuning an Allen key set screw.
- Sawdust and debris inside the plunge mechanism are a hidden cause of inaccurate cuts. Compressed wood chips can prevent the stop from engaging fully, which lets the blade plunge deeper than the setting allows. Regular cleaning with compressed air solves this issue.
- Always test your recalibrated settings on scrap wood before cutting your actual workpiece. One test cut with a biscuit inserted will confirm whether the depth is correct. The biscuit should fit snugly without high centering or dropping freely into the slot.
- A dull or damaged blade can also cause perceived depth problems. A blade with chipped or rounded teeth may deflect during the cut, producing an inconsistent slot profile that affects how the biscuit seats.
How the Depth Stop Mechanism Works
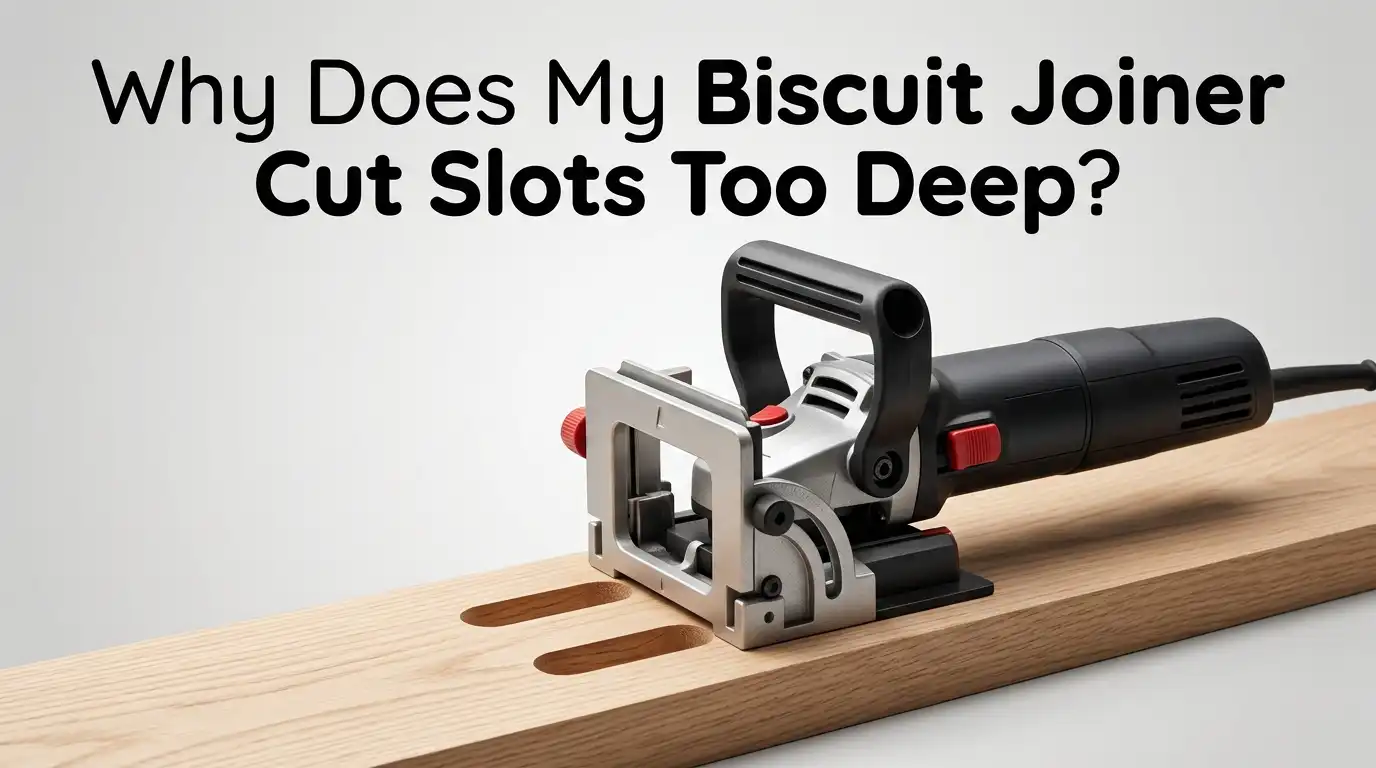
The depth stop on a biscuit joiner controls how far the blade extends past the faceplate during a plunge cut. Most machines use a turret style dial marked with biscuit sizes like #0, #10, and #20. When you rotate the dial, it positions a different stop peg or recess in front of a datum pin attached to the plunge rod.
As you push the joiner forward against its spring, the datum pin travels until it hits the selected stop. This contact point determines the maximum blade depth. If any part of this system is loose, worn, or clogged with debris, the pin will travel past the intended stop point and the blade will cut too deep.
Some machines also feature an adjustable datum pin. This pin can be repositioned with an Allen key for fine tuning. Understanding this simple chain of parts (dial, stop, pin, and plunge rod) makes troubleshooting much easier.
Common Reasons Your Biscuit Joiner Cuts Too Deep
Several factors can cause your machine to exceed the correct slot depth. A loose stop nut on the plunge rod is the most frequent culprit. Vibration from repeated use can loosen this nut over time, which allows the rod to travel farther before the pin contacts the stop.
Sawdust packed into the plunge mechanism is another common cause. Compressed wood chips wedge between moving parts and prevent the stop from seating properly. This shifts the effective stop point deeper.
A worn or damaged turret dial can also cause problems. If the stop pegs are rounded or chipped, the datum pin will slide past the intended contact surface. Similarly, a bent plunge rod changes the geometry of the stop engagement. Finally, an incorrect dial setting is the simplest explanation. Double check that the dial actually matches the biscuit size you are using.
How Slot Depth Affects Joint Quality
Slot depth directly determines how well a biscuit joint holds two pieces of wood in alignment. A slot that is too deep allows the biscuit to sit below the mating surface. This creates a gap that prevents the joint from closing tightly.
When the biscuit drops too far into one slot, the opposing piece cannot make full contact. The alignment purpose of the biscuit is lost. You end up with surfaces that are not flush, and you must rely entirely on clamping pressure and glue to close the gap.
Conversely, a slot that is the correct depth positions the biscuit so that it bridges both pieces evenly. The recommended target is a slot about 1/16 inch deeper than half the biscuit width. This small clearance gives room for excess glue and allows the joint faces to press together firmly under clamp pressure.
Tools You Need for Recalibration
Recalibrating a biscuit joiner depth stop requires only a few simple tools. You will need a set of Allen keys (hex wrenches), because most datum pin adjustments use an Allen screw. A small adjustable wrench or the correct size open end wrench is necessary for the stop nut on the plunge rod.
Keep a dial caliper or a reliable ruler nearby. You will measure slot depth and biscuit width to confirm accuracy. A can of compressed air is essential for cleaning debris from the plunge mechanism before making adjustments.
You also need scrap wood that matches the thickness of your project material. Test cuts on scrap are the only reliable way to verify your calibration. Grab the actual biscuits you plan to use, because biscuit thickness and width can vary slightly between brands.
Pros of doing this yourself: Zero cost, quick turnaround, and you gain a deeper understanding of your tool.
Cons: You need patience and the willingness to make multiple test cuts until the depth is perfect.
Step by Step Guide to Recalibrating the Depth Stop
Step 1: Unplug the biscuit joiner from power. Safety comes first, and you will be working near the blade mechanism.
Step 2: Remove the blade guard or faceplate cover according to your owner’s manual. This gives you access to the plunge rod and depth stop assembly.
Step 3: Blow out all sawdust and debris from the plunge mechanism using compressed air. Use a toothbrush or paper clip to remove any stubborn buildup around the stop pegs and datum pin.
Step 4: Set the turret dial to the #20 position. Manually push the plunge rod forward until the datum pin contacts the stop. Measure how far the blade extends past the faceplate using your caliper. The correct distance for a #20 biscuit is approximately 9/16 inch (about 14mm).
Step 5: If the measurement is too deep, loosen the stop nut on the plunge rod with your wrench. Adjust the nut position to reduce the plunge distance. If your machine has an Allen screw on the datum pin, turn it to fine tune the depth.
Step 6: Tighten the stop nut securely. Reassemble the faceplate.
Step 7: Make a test cut in scrap wood. Insert a #20 biscuit. It should fit snugly with about 1/16 inch of extra depth. If the biscuit drops in freely, reduce the depth further and test again.
How to Verify Correct Slot Depth for Each Biscuit Size
After recalibrating for #20, you must verify the other settings too. Rotate the turret dial to the #10 position and repeat the plunge measurement. The blade should extend approximately 7/16 inch (about 11mm) past the faceplate. Make a test cut and check the fit with a #10 biscuit.
Next, switch to the #0 position. The correct extension here is roughly 3/8 inch (about 9.5mm). Again, cut scrap and test with a #0 biscuit. The biscuit should press into the slot with light finger pressure and not wobble or fall out.
A useful verification trick is to insert a biscuit into the slot and draw a pencil line across the biscuit at the wood surface. Then flip the biscuit. If the line sinks below the surface, the slot is too deep. If the line sits above the surface, the slot is too shallow. This simple pencil test catches depth errors quickly.
Cleaning and Maintaining the Plunge Mechanism
Regular cleaning prevents most depth accuracy problems before they start. Sawdust is the number one enemy of a precise depth stop. Fine wood particles work their way into the spring loaded plunge assembly and gradually shift the stop points.
After every major project, remove the faceplate and blow out the interior with compressed air. Use a toothbrush dipped in denatured alcohol to dissolve pitch and glue residue on the stop pegs and datum pin. Pitch buildup on these contact surfaces changes the effective stop position by fractions of a millimeter, which adds up over many cuts.
Inspect the return spring while you have the tool open. A weak or stretched spring can fail to fully retract the blade, which may cause the next plunge to start from a slightly extended position. Wipe all metal surfaces with a light coat of machine oil or dry lubricant to keep the action smooth.
Pros of regular maintenance: Consistent cut depth, longer tool life, and fewer mid project surprises.
Cons: Adds time to your shop routine and requires you to partially disassemble the tool.
What to Do When the Depth Stop Is Worn or Broken
Sometimes cleaning and adjusting are not enough. A cracked or rounded stop peg will never hold the datum pin reliably. In this case, you need a replacement part. Contact the manufacturer or search for the specific stop assembly for your model.
If the turret dial itself is worn, the detent positions may no longer click firmly into place. The dial can slip between settings during a plunge, causing unpredictable depth. Replacing the turret assembly is usually straightforward and requires only basic hand tools.
For a broken plunge rod nut, you can sometimes source a replacement from a hardware store if you match the thread pitch and diameter. Some woodworkers have fabricated custom stop mechanisms using set screws and metal collars when original parts are unavailable.
Pros of replacing worn parts: Restores factory precision and extends the useful life of your tool.
Cons: Replacement parts can take time to source, especially for older or discontinued models.
Blade Condition and Its Effect on Slot Depth
A dull or damaged blade can produce slots that seem too deep even when the depth stop is correctly calibrated. Worn teeth deflect under cutting pressure and can wander during the plunge. This creates a slot with an uneven profile that seats the biscuit poorly.
The standard biscuit joiner blade is 4 inches (100mm) in diameter and 5/32 inch (4mm) thick. Most blades have four or six carbide tipped teeth. Inspect each tooth for chips, rounding, or missing tips. If any teeth are damaged, replace the blade immediately. A partially dull blade also generates excessive heat, which can scorch the slot walls and affect the fit.
Clean pitch and resin from the blade using denatured alcohol or a commercial blade cleaner. Buildup on the teeth effectively increases the blade’s cutting width, which makes the slot slightly wider. This extra width compounds any depth issues by creating a sloppy overall fit.
Avoiding Operator Errors That Cause Deep Slots
Even a perfectly calibrated biscuit joiner can cut too deep if you use it incorrectly. Pushing the machine with excessive force can overwhelm the return spring and drive the blade past the stop. A slow, firm plunge is always better than a fast, aggressive one.
Jostling the machine during the cut is another common mistake. If the joiner shifts up, down, or sideways during the plunge, the blade follows an irregular path. The resulting slot may be deeper on one side or have an enlarged profile. Hold the machine steady with both hands and brace the workpiece securely.
Also confirm that you are referencing from the correct surface. If you switch between using the base and the fence for alignment, the effective blade position changes. Pick one reference surface and use it consistently for all mating cuts in a joint.
Pros of developing good technique: Better results from any biscuit joiner, regardless of price or brand.
Cons: Requires conscious effort and discipline, especially during repetitive production cuts.
When to Consider Professional Service or Replacement
If you have cleaned, recalibrated, replaced the blade, and checked your technique but the slots are still too deep, the problem may be internal. A worn bearing on the motor shaft can introduce play that affects the blade’s plunge trajectory. Bent internal guides or a warped housing can also throw off depth accuracy.
At this point, a qualified tool repair shop can diagnose the issue accurately. The technician can measure internal tolerances and replace components that are beyond workshop adjustment. The cost of professional repair is often less than buying a new machine, especially for higher end models.
However, if your biscuit joiner is a budget model with widespread wear, replacement may be the more practical choice. Investing in a better quality machine with tighter manufacturing tolerances will reduce calibration headaches in the long run and produce more consistent joints.
Quick Reference: Ideal Slot Depths for Standard Biscuit Sizes
Knowing the target numbers speeds up every calibration session. For a #0 biscuit (5/8 inch wide, 1 3/4 inches long), the slot depth should be approximately 3/8 inch. For a #10 biscuit (3/4 inch wide, 2 1/8 inches long), aim for approximately 7/16 inch. For a #20 biscuit (1 inch wide, 2 3/8 inches long), the correct slot depth is approximately 9/16 inch.
These measurements include the recommended 1/16 inch of extra clearance beyond half the biscuit width. Write these numbers on a piece of tape and stick it inside your biscuit joiner case. Having the values on hand eliminates guesswork during setup.
Always measure actual biscuits from the brand you use, because dimensions can vary. Lamello biscuits, for example, may differ slightly from generic brands. A caliper measurement of the actual biscuit width ensures your slot depth target is precise for your specific supplies.
Frequently Asked Questions
How do I know if my biscuit joiner slots are too deep?
Insert a biscuit into the slot and check if it sits flush or drops below the wood surface. If the biscuit disappears entirely into the slot or rattles loosely, the slot is too deep. You can also draw a pencil line across a seated biscuit and flip it. If the line falls below the wood surface baseline, you need to reduce the depth setting.
Can I fix deep slots without recalibrating the machine?
You can use thicker shop made wooden tabs instead of standard biscuits to fill an oversized slot. Cut strips slightly thicker than 5/32 inch from a hardwood offcut using your table saw, then sand them to achieve a snug fit. This is a workable solution for individual projects, but recalibrating the machine is the better long term fix.
How often should I recalibrate my biscuit joiner?
Check your depth settings at the start of each project or whenever you switch biscuit sizes. A full recalibration is recommended after any heavy use period, after the tool has been dropped or bumped, or when you notice biscuits fitting loosely. Routine cleaning after every few sessions also helps maintain accurate depth.
Does biscuit brand affect slot depth requirements?
Yes. Biscuit width and thickness can vary between manufacturers. A biscuit from one brand may be slightly wider or thinner than another. Always test fit the specific biscuits you plan to use in a freshly cut slot on scrap wood. Adjust the depth stop if the fit is too loose or too tight.
What is the correct blade thickness for a biscuit joiner?
The standard blade thickness for all biscuit joiners is 5/32 inch (4mm). If you install a blade with a different thickness, the slot width will change and biscuits will not fit properly. Always verify that a replacement blade matches this specification before installing it.
Can sawdust buildup really change my cut depth?
Absolutely. Packed sawdust around the depth stop pegs and datum pin can prevent the stop from engaging at the correct position. Even a small amount of compressed debris shifts the stop point by enough to produce noticeably deeper slots. Blowing out the mechanism with compressed air before each session is one of the easiest ways to maintain accuracy.

Hi, I’m Leah Ray — the voice behind CraftBench Vault. I’m a passionate woodworking enthusiast dedicated to reviewing the best wood cutting tools and woodworking products. Through honest research and hands-on experience, I help fellow crafters make smarter buying decisions. Welcome to my workshop!