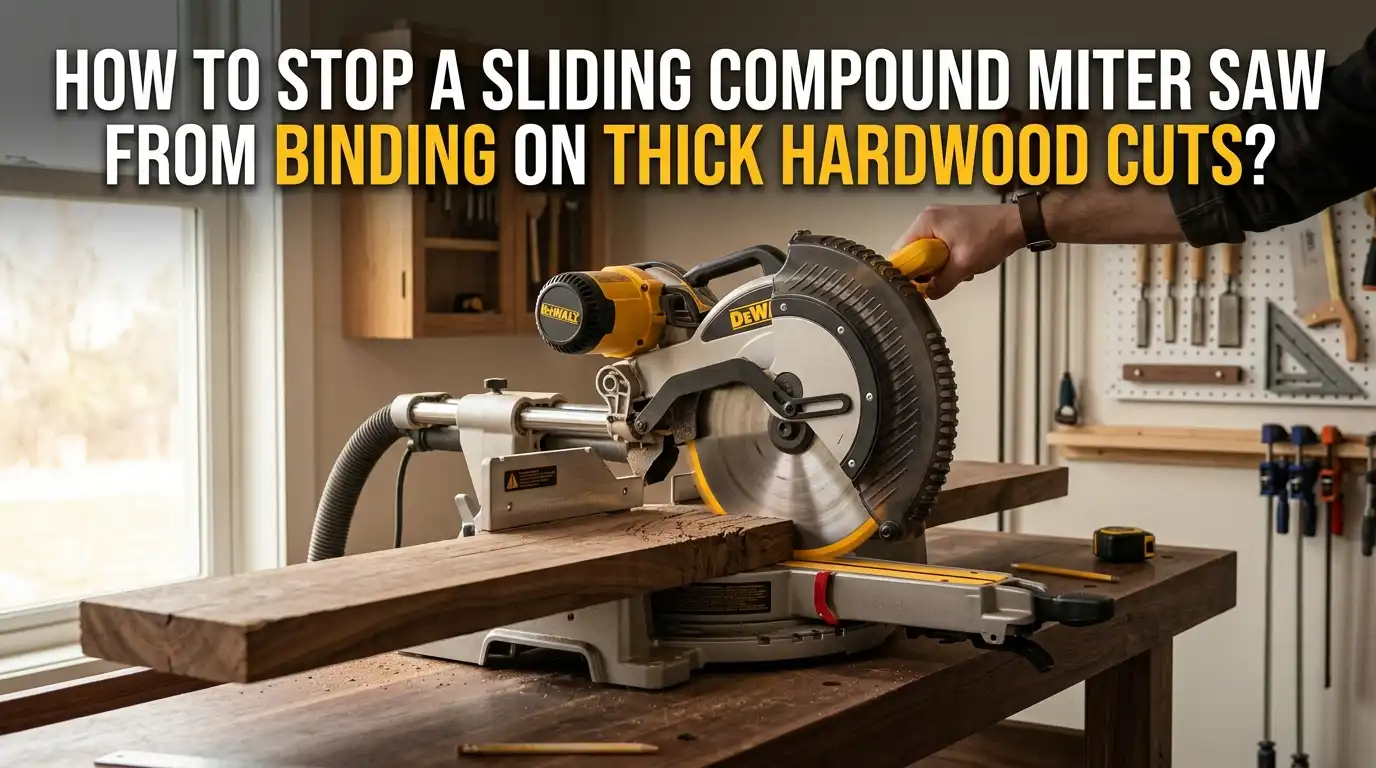
How to Stop a Sliding Compound Miter Saw From Binding on Thick Hardwood Cuts?
Cutting thick hardwood on a sliding compound miter saw should feel smooth and clean. But many woodworkers face a frustrating problem.
The blade slows down, smokes, burns the wood, or grabs the stock and kicks it back. This issue is called binding, and it can ruin your cut, dull your blade, or even injure you.
This guide walks you through every step. You will learn how to spot the problem, correct it, and keep your saw cutting clean lines through oak, walnut, maple, and other dense woods.
Key Takeaways
- Use the right blade. A high tooth count blade with a negative hook angle gives you clean and safe hardwood cuts. Aim for 60 to 80 teeth on a 10 or 12 inch sliding saw.
- Pull, drop, then push. Always pull the blade out first, lower it into the wood, then push it back through the fence. This stops the blade from climbing the stock.
- Score the top first. A shallow scoring pass reduces tear out and lets the blade enter the wood without grabbing the grain.
- Check your saw alignment. A misaligned fence, table, or blade causes heeling, which leads to binding and burn marks.
- Support long stock. Use roller stands or outfeed tables to keep the wood flat and stable during the cut.
- Slow down and let the blade work. Forcing the saw through dense hardwood loads the motor and pinches the blade in the kerf.
Understand Why Binding Happens on Thick Hardwood
Binding starts when the blade gets pinched inside the kerf or when the teeth cannot clear the chips fast enough. Thick hardwood adds more friction, more heat, and more resistance than softwood.
The blade also has to remove a larger volume of material per pass. If the teeth cannot eject chips, sawdust packs into the gullets. This packed dust heats up the blade and bends it slightly. A bent blade rubs the kerf walls, which causes burning and grabbing.
Dense species like hard maple, white oak, hickory, and ipe push back harder. The wood fibers can also pinch the blade as internal tension releases during the cut. Knowing this helps you choose the right fix for each cause.
Pick the Right Saw Blade for Thick Hardwood
Your blade choice matters more than any other factor. A general purpose blade with 40 teeth will struggle in 8/4 oak. You need a blade built for crosscutting dense wood.
Look for a high tooth count blade, ideally 60 to 80 teeth for a 10 or 12 inch saw. Choose a blade with a negative hook angle between 5 and 7 degrees. This pulls the wood down into the table instead of lifting it up.
Pros of a dedicated hardwood blade include cleaner cuts, less burning, and longer blade life. Cons include a higher upfront cost and slower feed speeds. Still, the cut quality and safety gain are worth it.
Keep the Blade Clean and Sharp
A dirty or dull blade is one of the top causes of binding. Pitch and resin build up on the teeth and the body of the blade. This coating adds friction and heat, which leads to burning and pinching.
Clean the blade every few hours of use. Soak it in a blade cleaner or simple oven cleaner for 10 minutes. Then scrub the teeth with a soft brass brush and dry the blade fully.
Sharpness also matters a lot. A dull tooth needs more force to cut, which loads the motor and deflects the blade sideways. Send your blade out for sharpening once it stops slicing clean. Pros of sharpening include lower long term cost. Cons include downtime while the blade is at the service.
Use the Correct Cutting Technique: Pull, Drop, Push
This is the single most important habit for sliding miter saw users. Many beginners plunge the blade into the wood first and then push it forward. That motion makes the blade climb the stock and grab.
The correct method is simple. Pull the saw fully toward you with the blade still raised. Start the motor. Lower the blade slowly into the wood at the front of the cut. Then push the saw back through the workpiece toward the fence.
Pros of this technique include safer cuts, less kickback risk, and smoother blade entry. Cons include a slight learning curve for new users. Once it becomes muscle memory, your cuts will feel effortless.
Score the Cut Before the Full Pass
For thick hardwood over 1.5 inches, a single pass can overload the blade. A scoring pass solves this problem. It also gives you a cleaner edge with no tear out.
To score, pull the saw out and lower the blade just 2 to 4 millimeters into the top of the workpiece. Push the blade back across the wood at this shallow depth. This creates a clean groove on the top surface.
Now raise the blade and make a full depth cut following the same path. The blade has less material to remove in each tooth pass. Pros include cleaner cuts and less binding. Cons include slightly longer cutting time per piece.
Check and Adjust the Fence Alignment
A misaligned fence forces the wood to twist against the blade. This twist pinches the blade between the kerf walls and causes binding. Fence alignment is easy to check.
Place a known square against the fence and the blade. The blade body should sit parallel to the fence at 90 degrees. If there is a gap at the top or bottom, you need to adjust the fence bolts.
Loosen the fence bolts, square the fence to the blade, and retighten. Pros of regular alignment checks include accurate cuts and safer operation. Cons include the time spent checking, but you only need to do it every few months or after a bump.
Fix Blade Heeling on the Saw
Heeling is when the back of the blade is not parallel to the front of the blade in the direction of travel. The rear teeth scrape the wood as the blade slides. This causes burning, binding, and wandering cuts.
To check for heeling, unplug the saw and lower the blade. Use a precision square against the slide rails and the blade face. The blade should sit flat against the square at both the front and the back.
If it does not, follow your saw manual to adjust the pivot bolts or the rail mounts. Pros include burn free cuts and longer blade life. Cons include a tricky adjustment process that may need patience.
Support Long and Heavy Stock Properly
Thick hardwood is heavy. If one end droops or tilts during the cut, the kerf closes on the blade. This pinch causes immediate binding.
Use roller stands, sawhorses, or extension wings to keep the workpiece flat and level with the saw table. Both sides of the cut should be supported. If the offcut side hangs free, it can drop suddenly at the end of the cut and snap the blade sideways.
Pros of proper support include safer cuts, square ends, and no last second pinching. Cons include extra setup time and the need for more shop space. A simple folding roller stand solves most support problems for under a small budget.
Clamp the Workpiece Down
A board that shifts during the cut will bind the blade. Hardwood is heavy enough to resist hand pressure, but vibration can still move it. A small shift turns into a big problem fast.
Most sliding miter saws come with a hold down clamp slot built into the table. Use a vertical or horizontal clamp to lock the wood against the fence and table. The clamp should sit close to the cut but not in the blade path.
Pros include rock solid stock, no movement, and free hands. Cons include slower setup for repeat cuts. For production work, use a sliding stop block with a clamp for fast and accurate results.
Slow Down Your Feed Rate
A common mistake is forcing the blade through dense wood. The motor cannot remove chips fast enough, so the blade overheats and bends. Bent blades bind every time.
Listen to your saw. If the motor pitch drops a lot, you are pushing too hard. Ease back until the motor returns to its full speed. The blade should glide through the wood, not chew through it.
For 8/4 oak or maple, a single crosscut may take 4 to 6 seconds at full depth. Pros of a slow feed include cleaner cuts, less burning, and longer blade life. Cons include slower production, but the quality gain is huge.
Let the Blade Reach Full Speed Before Cutting
Some users touch the blade to the wood before the motor reaches full RPM. This causes the blade to grab and bind right at the start of the cut.
Always squeeze the trigger fully and wait 1 to 2 seconds for the blade to spin up. You can hear the motor settle into its top speed. Only then should you lower the blade into the wood.
This habit protects the motor, the blade, and your fingers. Pros include smoother cut entry, less kickback risk, and less wear on the saw. Cons are basically none. It costs you two seconds and pays back every time.
Maintain the Slide Rails and Pivot Points
The slide rails on your saw must move freely and smoothly. Dust, rust, or dried lube on the rails causes jerky motion. A jerky slide changes the blade angle mid cut and pinches the blade.
Wipe the rails clean with a dry cloth after each session. Once a month, apply a dry silicone lubricant or a light machine oil to the rails. Avoid heavy grease because it traps dust.
Check the pivot points on the cutting head too. Loose pivots create blade wobble. Pros of regular maintenance include accurate cuts, longer saw life, and smooth slides. Cons include 10 minutes of upkeep per month, which is a small price for safety.
Let the Wood Rest Before Cutting
Hardwood holds internal stress from the drying process. When you cut a board, this stress releases and the wood can pinch the blade as the kerf closes.
If you know your stock is freshly milled or kiln dried, let it rest in your shop for one to two weeks. The wood will reach equilibrium with the shop humidity. Cutting acclimated wood reduces binding from internal movement.
You can also look at the board before cutting. If it is bowed or cupped, place the crown facing up against the fence. This way, the kerf opens during the cut instead of closing.
Pros include fewer pinch cuts and more stable results. Cons include the extra wait time before you can use the wood.
FAQs
Why does my miter saw blade smoke when cutting oak?
Smoke means the blade is burning the wood due to friction. The cause is usually a dull blade, a dirty blade, too slow a feed rate, or a misaligned fence. Clean the blade, check the alignment, and use the pull and push technique.
Can I use a 40 tooth blade for thick hardwood?
You can, but it will not give you the best results. A 40 tooth blade is built for general use. For thick hardwood crosscuts, a 60 to 80 tooth blade with a negative hook angle works much better and reduces binding.
Is it safe to pull a sliding miter saw through the cut?
Pulling the blade into the wood is the unsafe direction. The blade climbs the stock and can throw it back at you. Always pull the saw out first, drop the blade, and push it back through the wood toward the fence.
How often should I sharpen my miter saw blade?
It depends on how much you cut. For hobby use, once a year is enough. For daily hardwood cutting, sharpen every 3 to 6 months. If the blade burns the wood or needs more force to cut, sharpen it sooner.
What if my saw still binds after all these fixes?
Check the saw for worn bearings, bent slide rails, or a warped blade. Take the saw to a service center if you cannot find the problem. A professional tune up costs less than a new saw and often solves stubborn binding issues.

Hi, I’m Leah Ray — the voice behind CraftBench Vault. I’m a passionate woodworking enthusiast dedicated to reviewing the best wood cutting tools and woodworking products. Through honest research and hands-on experience, I help fellow crafters make smarter buying decisions. Welcome to my workshop!