Why Is My Table Saw Fence Not Locking Parallel To The Blade?
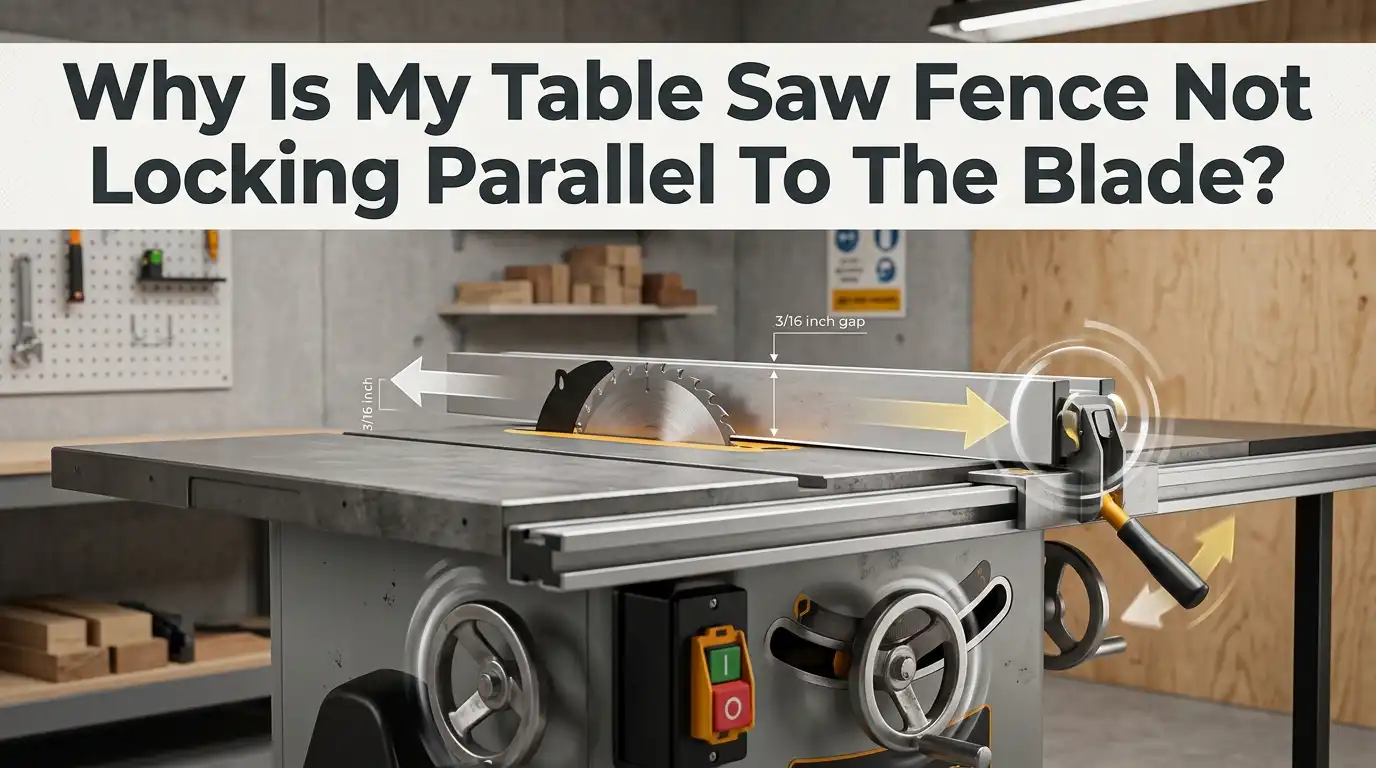
Your table saw fence should clamp down straight every single time. But sometimes you lock the lever and the back end of the fence swings sideways.
Your cuts come out uneven, the wood burns, and you feel a scary tug from the blade. This problem is common, and the good news is that you can fix most of it yourself in your own shop.
This guide walks you through every reason your fence refuses to lock parallel. You will learn how to test it, adjust it, and stop it from drifting again.
Key Takeaways
- Always align the blade first, then the fence. Your blade must be parallel to the miter slot before you touch the fence. Aligning the fence to a crooked blade only hides the real problem.
- A worn cam or clamp finger is the top cause of a fence that locks crooked. The part that grips the rail wears down over time and stops pulling the fence tight.
- Debris and dried glue on the rail push the fence off line. A simple wipe down and a dry lubricant often fixes the drift in minutes.
- Loose rail bolts and worn glide pads let the fence shift as you lock it. Snugging these parts up gives the fence a solid, repeatable lock.
- A tiny toe out is your friend. Setting the back of the fence a hair wider than the front, around three to five thousandths of an inch, reduces burning and kickback while staying parallel for practical cuts.
- Use the right tool to measure. A combination square works for quick checks, but a dial indicator gives you exact numbers for a perfect setup.
What Parallel To The Blade Actually Means
Many woodworkers think the fence must line up with the blade. That is partly true, but the order matters. Your blade and your fence both reference the same point, which is the miter slot in your table.
Parallel means the fence runs the same distance from the blade along its whole length. If the front of the fence sits one inch from the blade, the back should sit one inch too. When the back swings closer, the wood pinches between the blade and the fence. This causes burning and kickback.
The miter slot is your master reference line. The blade gets aligned to it first. Then the fence gets aligned to the same slot. When both reference the slot, they end up parallel to each other. This is the only reliable way to set things up right.
First Step: Check If Your Blade Is Parallel To The Miter Slot
Do not adjust the fence yet. You must check the blade first. Unplug the saw and raise the blade all the way up. Mark one tooth with a marker so you measure the same spot every time.
Use a combination square set in the miter slot. Slide the square so it touches the marked tooth at the front of the blade. Note the gap. Now rotate that same tooth to the back and measure again. The two numbers should match.
If they do not match, your blade is off and you must fix that first. A fence will never lock parallel to a crooked blade. For most saws you loosen the trunnion bolts under the table and nudge the blade until front and back read the same.
Pros: This step finds the real root of many problems. Cons: Adjusting trunnions takes time and patience, and some cabinet saws have stiff bolts that need a long wrench.
Inspect The Cam And Clamp Mechanism For Wear
This is the most common cause of a fence that will not lock straight. The cam is the part connected to your lock handle. It pushes a finger or hook against the rear rail to pull the fence tight. Over years of use, this part wears down.
Flip the fence over and look underneath. Push the lever and watch how the clamping finger moves. If it barely grips or feels loose, the metal has worn smooth. A worn cam cannot pull the fence square.
You can sometimes shim the worn area with a thin metal washer or a strip of tape as a temporary fix. For a lasting repair, replace the cam or the clamp finger with a new part from the saw maker.
Pros: Replacing the cam restores a firm, even lock for cheap. Cons: Finding parts for older saws can be hard, and a temporary shim wears out fast and needs checking often.
Clean Debris And Glue Off The Guide Rail
Sawdust, dried glue, and old wax build up on the rail your fence rides on. Even a tiny lump pushes the fence off line when you lock it. This is one of the easiest fixes you can do, and it costs nothing.
Wipe the entire length of the front and rear rails with a clean rag. For stubborn spots, use mineral spirits and a plastic scraper. Never gouge the metal with a hard tool. Pay close attention to the surfaces the cam finger touches.
After cleaning, apply a dry lubricant or a light paste wax. A dry lube does not attract dust the way oil does. This keeps the fence sliding smooth and locking in the same spot every time.
Pros: Cheap, fast, and safe for the saw. Often solves the drift on its own. Cons: It is only a fix if dirt was the cause, and you must repeat it as part of regular maintenance.
Tighten Loose Rail Bolts And Brackets
Your fence rails bolt to the front and back of the saw table. If these bolts work loose, the whole rail shifts when you clamp down. A shifting rail means the fence can never lock in the same place twice.
Unplug the saw and check every bolt that holds the rails to the table. Use a wrench and snug each one firmly. Do not crank them down hard yet, because you may need to slide the rail for alignment first.
Also check the brackets that hold the fence body together. Loose screws on the fence head let the fence twist. A reddit user found their wiggly fence tightened right up after replacing two missing screws on the front bracket.
Pros: Quick to check and often the hidden cause of sudden problems. Cons: Over tightening can crack cast parts or strip threads, so use steady, even pressure and stop when snug.
Adjust The Rear Glide Pads Or Guide Bar
Many T square style fences ride on plastic pads or a guide bar at the rear of the table. These pads control how the back of the fence sits. When they wear or sit out of adjustment, the back end swings as you lock the lever.
Look at the rear of your fence where it meets the back rail. Some fences have small set screws that push the rear pads in or out. Turning these screws shifts the back of the fence left or right.
Adjust one screw at a time and test the lock after each turn. Worn plastic pads should be replaced because no amount of adjusting fixes a pad that is squashed flat.
Pros: Gives you fine control over the rear of the fence. Cons: Not all fences have this feature, and the set screws can be tiny and hard to reach without the right driver.
Align The Fence To The Miter Slot Step By Step
Now that the parts are clean and tight, you set the fence parallel. Slide the fence right up against the edge of the miter slot. The fence body should touch the slot edge along its full length.
Lock the fence and look for any gap between the fence and the slot. A gap at the front or back tells you which way to adjust. Most fences have two adjustment screws under the fence head, one on each side.
Loosen the screws slightly, line the fence flush with the slot, then retighten. On a Biesemeyer style fence, tightening the left screw pitches the fence right, and the right screw pitches it left. Lock and unlock several times to confirm it stays put.
Pros: This is the core fix and sets true parallel. Cons: It takes trial and error, and you must lock the fence each time you check, since the locking action is what you are testing.
Set A Slight Toe Out For Safety And Clean Cuts
Many pro shops do not set the fence dead parallel. They set the back of the fence a tiny bit wider than the front. This is called toe out, and it makes your saw safer.
When the back of the fence opens out by about three to five thousandths of an inch, the wood moves away from the blade after the cut instead of pinching. This cuts down on burning and lowers the chance of kickback.
The key word is tiny. Too much toe out makes your cuts taper and ruins accuracy. You want it so small that the fence still cuts straight for all normal work. One master cabinetmaker even set his fences with a wider gap, but most people keep it under five thousandths.
Pros: Safer cuts, less burning, smoother feed. Cons: It is technically not parallel, so very precise joinery work may want true parallel instead.
Use A Dial Indicator For Exact Alignment
A combination square works fine for most shops, but a dial indicator removes the guesswork. A dial indicator reads gaps down to one thousandth of an inch. This lets you set parallel or toe out with real numbers.
Mount the indicator on a base that rides in your miter slot. Run the tip against the fence at the front and slide it to the back. The needle shows you exactly how much the fence moves along its length.
Adjust the fence screws until the needle reads zero front and back for true parallel, or a few thousandths wider at the back for toe out. Lock and unlock the fence between readings to test the clamp.
Pros: The most accurate method you can use at home. Cons: A dial indicator costs more than a square, and it takes a little practice to read and mount it correctly.
Fix A Fence That Locks Crooked Every Single Time
Sometimes the fence drifts the same amount in the same direction with every lock. This points to a mechanical fault, not random dirt. The good news is that a repeatable error is easy to track down.
Lock the fence and measure the drift. Note which way the back swings and how far. If it always swings left by two millimeters, the cam is pulling unevenly or one rear pad is worn.
Adjust the rear pad on the side it swings toward, or shim the worn cam finger so it pulls square. Then set the front adjustment screws to cancel out any leftover lean. Lock it ten times in a row and measure each time to confirm the fix holds.
Pros: A steady error is simple to diagnose and correct. Cons: If the cause is a cracked casting, no adjustment fixes it and you may need a new part.
Know When To Repair Versus Replace The Fence
Some fences are worth saving, and some are worn out junk. Decide based on cost, parts, and how the fence feels. A quality fence with one worn part deserves a repair.
If the parts are cheap and easy to find, fix it. Replacing a cam, a pad, or a few screws costs little and brings the fence back to life. Many older cast fences are built to last for decades with simple care.
But if the fence body is bent, the castings are cracked, or no parts exist, replacement makes more sense. A sloppy fence is a safety risk that no fix can fully cure. A solid aftermarket fence ends the problem for good.
Pros of repair: Cheap and keeps your saw original. Pros of replacement: A new fence locks dead solid every time. Cons: Repair may not last, and replacement costs more upfront.
Keep Your Fence Locking Parallel With Regular Maintenance
Once your fence locks straight, you want to keep it that way. A few minutes of care each month prevents most repeat problems. Maintenance is far easier than chasing a drifting fence.
Wipe the rails clean after big projects and reapply a dry lubricant or wax. Check the rail bolts and fence screws every few months and snug any that loosen. Look at the cam and pads for wear before they fail.
Store the fence so nothing bumps or bends the body. Test the lock with a quick square check now and then, so you catch small drift before it ruins a cut. A clean, tight fence stays parallel for years.
Pros: Stops problems before they start and keeps cuts safe. Cons: It takes regular effort, and it is easy to forget until the fence drifts again.
Frequently Asked Questions
Why does the back of my table saw fence move when I lock it?
The back swings because the cam is worn, the rear glide pads are loose or squashed, or debris sits on the rail. Clean the rail first, then check the cam and pads. Most fences move a tiny bit when locking, but a swing of two millimeters or more needs a fix.
Should my fence be exactly parallel or slightly toed out?
Either works, but a slight toe out of three to five thousandths of an inch is safer. It lets the wood pull away from the blade and reduces burning and kickback. True parallel is fine for precise joinery, but most shops favor a tiny toe out.
Do I align the blade or the fence first?
Always align the blade to the miter slot first. The miter slot is your master reference line. Once the blade is parallel to the slot, you align the fence to the same slot. A fence can never lock parallel to a crooked blade.
What tool do I need to check fence alignment?
A combination square handles quick checks for most shops. A dial indicator gives exact readings down to one thousandth of an inch for a perfect setup. Use a marked tooth on the blade so you measure the same spot front and back.
How often should I check my table saw fence?
Check it whenever your cuts start burning, drifting, or feel rough. For steady use, give it a quick square check once a month. Wipe the rails clean and snug the bolts every few months to keep the fence locking parallel and safe.
Can I fix a worn cam myself?
Yes, in many cases. A thin shim of metal or tape behind the worn cam finger works as a temporary fix. For a lasting repair, order a replacement cam from the saw maker. If parts are not available, an aftermarket fence may be the better choice.

Hi, I’m Leah Ray — the voice behind CraftBench Vault. I’m a passionate woodworking enthusiast dedicated to reviewing the best wood cutting tools and woodworking products. Through honest research and hands-on experience, I help fellow crafters make smarter buying decisions. Welcome to my workshop!