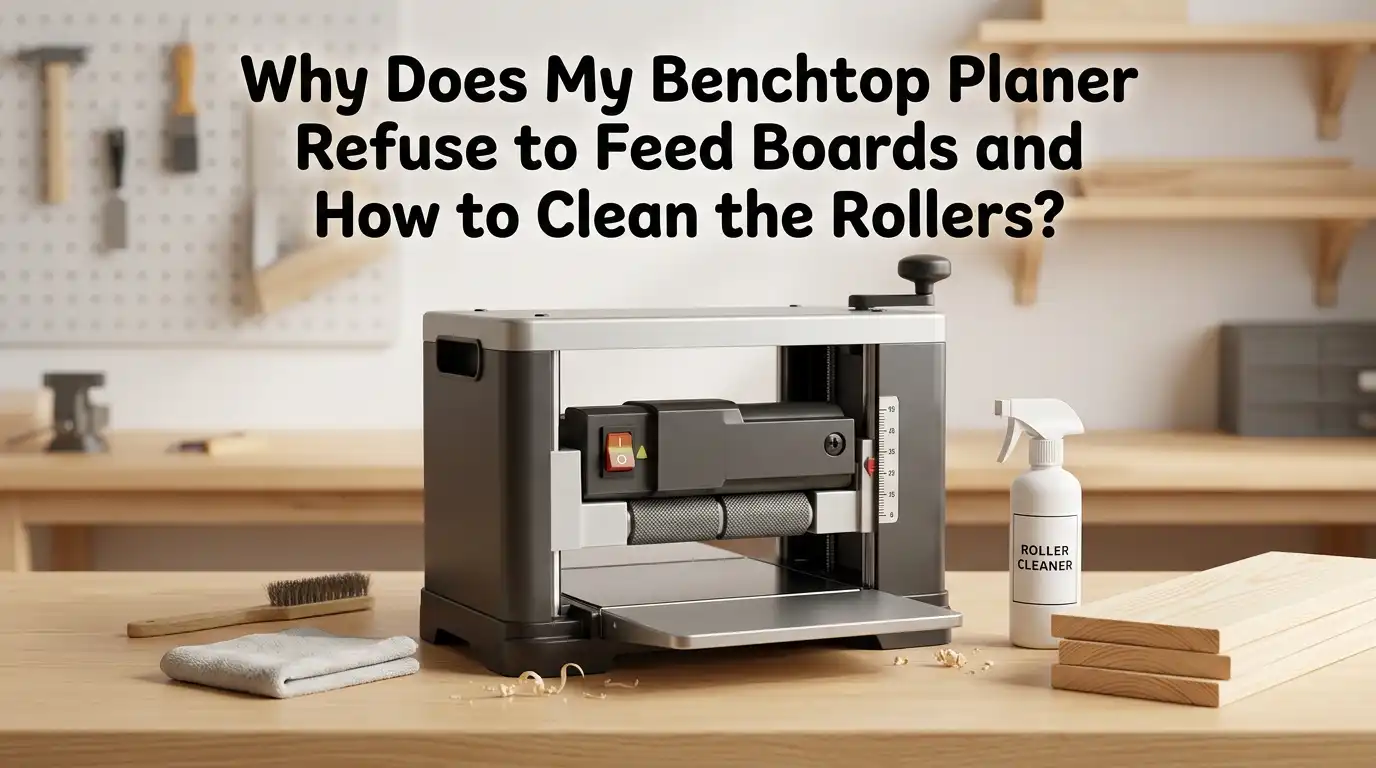
Why Does My Benchtop Planer Refuse to Feed Boards and How to Clean the Rollers?
A benchtop planer should pull a board through with steady grip and leave a clean, even surface. When it suddenly stops feeding, the whole job slows down.
You push the board, the machine strains, and the finish gets worse with every pass. That is frustrating, but the good news is that most feed problems have simple causes and simple fixes.
This guide walks you through the problem in a clear order, so you can find the cause, clean the rollers the right way, and get your planer working smoothly again.
Key Takeaways
- Start with the easy checks first. A lot of feed problems come from pitch, resin, dust, or wax buildup in the wrong place. Clean the bed, inspect the rollers, and clear the chip path before you assume the planer has a major fault.
- Dirty rollers often cause slipping. Feed rollers need grip. When sap, dust, or oil coats them, they stop grabbing the board well. Clean rollers can turn a weak feeding planer back into a strong one in a short time.
- A slick bed helps the rollers do their job. The board must slide across the table with little drag. A clean bed with a light coat of paste wax reduces friction and helps the feed system pull stock through with less strain.
- Dull knives can make feeding worse. Many woodworkers think only the rollers matter. In truth, dull knives add load, increase heat, and make the machine work harder. If your planer sounds strained or leaves rough wood, check the knives too.
- Lighter passes solve many problems. A deep cut on a wide or wet board can overwhelm a small planer. Taking less off per pass often improves feed, improves finish, and lowers stress on the motor and drive parts.
- Good habits prevent repeat trouble. Clean chips often, check rollers after heavy use, wax the bed on a regular schedule, and avoid feeding dirty lumber. Simple care keeps the planer feeding well and saves time later.
What Your Benchtop Planer Is Telling You When It Stops Feeding
When a planer refuses to feed boards, it usually gives clear signs before it stops completely. The board may move part way, pause under the cutter head, or need a push to keep going. You may also hear the motor work harder than usual. These clues matter because they point to friction, poor roller grip, or excess load.
If the board enters but slows down in the middle, the planer bed may be dragging the stock. If it slips at the start, the infeed roller may be dirty. If the board exits badly or stalls near the end, chips, roller buildup, or table support may be part of the problem. Watch where the board fails and you will shorten the repair time.
The good part is that most of these issues are not serious. Poor feed is often a maintenance problem, not a machine death sentence. A careful check helps you fix the true cause instead of replacing parts you do not need.
The Most Common Reasons Boards Will Not Feed Properly
Most benchtop planers stop feeding for five common reasons. The first is dirty feed rollers. Pitch, gum, and fine dust coat the roller surface and reduce grip. The second is a sticky table. If the bed has sap, glue, rust spots, or dry grime, the board drags instead of sliding.
The third cause is dull knives. Dull edges increase resistance and make the planer work much harder. The fourth cause is chip buildup in the dust hood or cutter area.
Packed chips can interfere with smooth stock movement. The fifth cause is operator setup, such as taking too deep a cut, feeding rough twisted stock, or running long boards with poor support.
Each cause has a direct fix, which is why a step by step check works so well. Do not jump to the worst case first. Start with dirt, friction, and cut depth. Those three issues solve a large share of feeding complaints in small planers.
Start With Safety and a Quick Inspection
Before you touch anything, unplug the planer. This is a simple step, but it matters a lot because the rollers and knives sit close together. You need your hands free and your mind calm while you inspect the machine. Never clean or reach inside a planer that is still connected to power.
Now do a quick visual check. Look at the infeed area, outfeed area, bed, rollers, and dust hood. Check for stuck chips, shiny sap spots, or roller surfaces that look glazed. Spin what you can by hand only if the manual allows it and the machine is fully safe to handle. If not, just inspect closely with a light.
This first check has clear pros and cons. The pro is speed. You can often spot the issue in minutes. The con is that some hidden buildup sits under covers or behind guards. Still, a quick inspection helps you decide whether you need only cleaning or a deeper repair.
Check the Planer Bed Before You Blame the Rollers
Many people focus on rollers first, but the planer bed plays a big role in feeding. The rollers must pull the board while the board slides across the bed. If the bed is dirty or dry, the rollers have to fight extra friction. That makes slipping much more likely.
Wipe the bed clean with a cloth first. Remove dust, sap, and any glue residue. Then apply a light coat of paste wax and buff it off. The goal is a slick surface, not a greasy one. Do not leave heavy wax buildup. Also keep wax away from parts where grip matters, such as the rollers.
There are simple pros and cons here. Paste wax has the pro of low cost, easy use, and better glide. The con is that you need to renew it from time to time. Cleaning only with a dry rag is fast, but it does less for friction. For most shops, a clean and waxed bed is one of the easiest feed fixes.
How Dirty Rollers Stop the Board From Moving
Feed rollers need a clean surface to grab wood with steady pressure. When resin, pitch, dust, or oil builds up, the roller surface becomes slick. The roller may still turn, but it will not hold the board well. That is why the board feels like it wants to move, then slips or stalls.
A dirty roller often leaves clues. You may see shiny bands, dark streaks, or sticky patches. In some cases, the board enters only if you push it by hand. In other cases, the planer feeds dry hardwood better than sappy softwood because sap buildup is part of the problem. Dirty rollers do not always look terrible, so inspect closely.
This is where many owners get relief fast. Cleaning rollers is usually cheaper and easier than chasing belts or gears right away. The pro is that roller cleaning often works at once. The con is that badly worn or hardened rollers can look clean but still perform poorly, so cleaning is a strong first test, not always the final answer.
Step by Step Guide to Clean the Rollers Safely
Start by unplugging the planer and opening whatever access the manual allows. Remove loose chips and dust first with a vacuum, brush, or clean air. Do this before using any cleaner. Loose debris turns into a mess if you wet it too early.
Next, dampen a clean rag with a mild cleaner that is safe for your roller type. Wipe the roller surface slowly and turn the roller as needed. Do not soak the machine. Do not flood cleaner into bearings or hidden parts. For stubborn pitch, hold the rag against the roller and let the cleaner soften the residue before wiping again. A soft pad can help, but do not gouge the surface.
Finish by wiping the rollers dry and letting all moisture or solvent flash off before use. Clean, dry rollers grip best. The pro of this method is control and safety. The con is that it takes patience. If you rush, you leave residue behind, and the planer still feeds poorly.
Which Roller Cleaning Method Works Best
Different shops use different cleaners, and each method has tradeoffs. A mild soap and water wipe works well for light dirt and is gentle on many roller surfaces. The pro is safety and low risk. The con is that it may struggle with heavy pitch.
Mineral spirits or naphtha style cleaners often work better on sticky resin. The pro is stronger cleaning power. The con is that you must use them with care and keep them off parts that should not be exposed. Some owners also use alcohol for fast cleanup. The pro is quick drying. The con is that it may not remove heavy buildup as well as a pitch remover.
The best choice is the one your planer manual allows. Start mild, then go stronger only if needed. Avoid harsh chemicals that may harm nonmetal parts or roller material. If you are unsure, test a small hidden area first and keep the amount of cleaner light.
Check the Knives and Cutter Head Next
If the rollers are clean and the bed is slick, but the planer still struggles, look at the knives. Dull knives increase cutting force. That extra load can make a small planer feel weak and can contribute to poor feed, rough finish, and burn marks. You may also hear a harsher sound during the cut.
Inspect the knives for dull edges, nicks, or heavy pitch. Dirty knives can act dull, so wipe off pitch before you decide to replace or rotate them. Many benchtop planers use double sided disposable knives, so you may be able to flip them. If the surface finish has dropped and feed has become less steady, knives are a strong suspect.
There are pros and cons here too. Cleaning knives is quick and cheap, but it only helps if buildup is the issue. Rotating or replacing knives restores cutting quality, but it takes more time and care. If your planer leaves ridges, tears grain, or strains under normal cuts, do not ignore the cutter head.
Reduce the Depth of Cut and Support the Board Better
A benchtop planer has limits. If you try to remove too much material in one pass, the feed system has to do more work while the cutter head removes more wood. That combination can make the board stall. Wide boards, hard species, wet stock, and twisted boards make the problem worse.
Lower the depth of cut and take lighter passes. This change often solves feeding trouble at once. It also improves surface quality and reduces stress on knives, rollers, and the motor. For long boards, support both ends so the stock stays level as it enters and exits. A dropping board can add drag and make the rollers lose grip.
The pro of light passes is better control and less strain. The con is time, because you make more passes. Good support has the pro of smoother feed and less snipe. The con is that it needs extra setup space. In most shops, though, these small changes are worth it.
Clear Chips and Improve Dust Flow
A planer makes a huge volume of chips fast. If those chips do not leave the machine well, they collect around the cutter head, dust shroud, and internal passages. That buildup can reduce feed quality, leave marks on the wood, and add drag inside the machine. In some cases, the board seems to feed badly when the real issue is poor chip removal.
Open the machine as your manual allows and clear packed chips. Clean the dust hood and check the hose for blockage. If your planer uses a blower fan, make sure the path is open. Then improve collection during use. Empty the bag or bin sooner and avoid long planing sessions with weak airflow.
There are clear pros and cons. Using dust collection keeps the machine cleaner and reduces repeat problems. The con is cost and setup. Manual cleanup is cheap and works fine, but you must stay on top of it. If your planer feeds worse as the session goes on, chip flow is a strong area to inspect.
Know When the Problem Is Mechanical
Sometimes the problem goes past dirt and setup. If the rollers are clean, the bed is slick, the knives are sharp, the cut is light, and the chips are clear, you may be dealing with a worn or broken part. Possible causes include a damaged drive belt, worn gears, weak spring pressure, hardened rollers, or alignment issues.
Mechanical problems often show up as rollers that do not turn right, uneven feed from side to side, or sudden failure after a jam. At that point, a manual based inspection helps. Look for obvious belt damage, loose parts, or parts that no longer move in sync. Do not force a repair you are not comfortable doing.
The pro of a do it yourself repair is lower cost. The con is risk, especially if you misalign parts or miss a deeper fault. Professional service costs more, but it can save time and prevent repeat trouble. If the planer still will not feed after full cleaning and light cuts, a mechanical check is the next smart step.
Build a Simple Maintenance Routine That Prevents Feed Trouble
The easiest planer repair is the one you never need. A short routine keeps the machine feeding well and saves frustration later. After each use, brush or vacuum out chips. Wipe the bed clean. Check the rollers for fresh pitch if you worked with resin rich wood. If needed, clean them before the buildup hardens.
Every so often, apply a light coat of wax to the bed and buff it smooth. Inspect the knives for buildup and edge wear. Look at the dust hood and hose. Also pay attention to what you feed into the planer. Dirt, dried glue, paint, and grit all shorten knife life and add trouble across the machine.
This routine has almost no downside. The only real con is that it asks for a few extra minutes after a job. The pro is huge. Clean rollers, a slick bed, sharp knives, and clear chip flow give you steady feed, better finish, and fewer surprise stoppages. That is a very good trade.
FAQs
How often should I clean planer rollers?
Check the rollers after each heavy planing session, especially if you worked with pine or other resin rich wood. If the rollers look shiny, feel sticky, or the board starts to slip, clean them right away. In a light use shop, you may not need a full cleaning every time, but a quick check should become routine.
Can I use any solvent on planer rollers?
No. Use only cleaners that are safe for your roller material and allowed by your planer manual. Mild soap and water can work for light dirt. Mineral spirits, naphtha style cleaners, or alcohol may help with heavier buildup, but harsh chemicals can damage some parts. Start with the least aggressive option.
Why does my planer feed better after I wax the bed?
Wax reduces friction between the board and the planer bed. That means the feed rollers do less work to pull stock through the machine. A clean waxed bed often fixes feeding issues that seem like roller trouble. Just keep wax off the rollers, because rollers need grip while the bed needs slip.
Can dull knives really cause feeding problems?
Yes. Dull knives increase resistance during the cut. That extra load can make the planer strain and can contribute to poor feeding, rough finish, and burning. If your rollers are clean but the planer still struggles, inspect the knives for wear, pitch, or nicks and replace or rotate them if needed.
Should I push the board through if it stalls?
No. Pushing can make the problem worse and can be unsafe. Stop the machine if needed, unplug it, and inspect the cause. Pushing may hide the real issue for one pass, but it does not solve roller slip, bed drag, chip clogging, or dull knives. A proper fix is safer and gives better results.
What is the first fix I should try for a planer that will not feed?
Start with the simplest full check. Unplug the planer, clear chips, clean the bed, apply a light coat of paste wax to the bed, and inspect the rollers for pitch or grime. Then take a lighter pass on a straight board. This order solves a large share of feeding problems without major repair.

Hi, I’m Leah Ray — the voice behind CraftBench Vault. I’m a passionate woodworking enthusiast dedicated to reviewing the best wood cutting tools and woodworking products. Through honest research and hands-on experience, I help fellow crafters make smarter buying decisions. Welcome to my workshop!