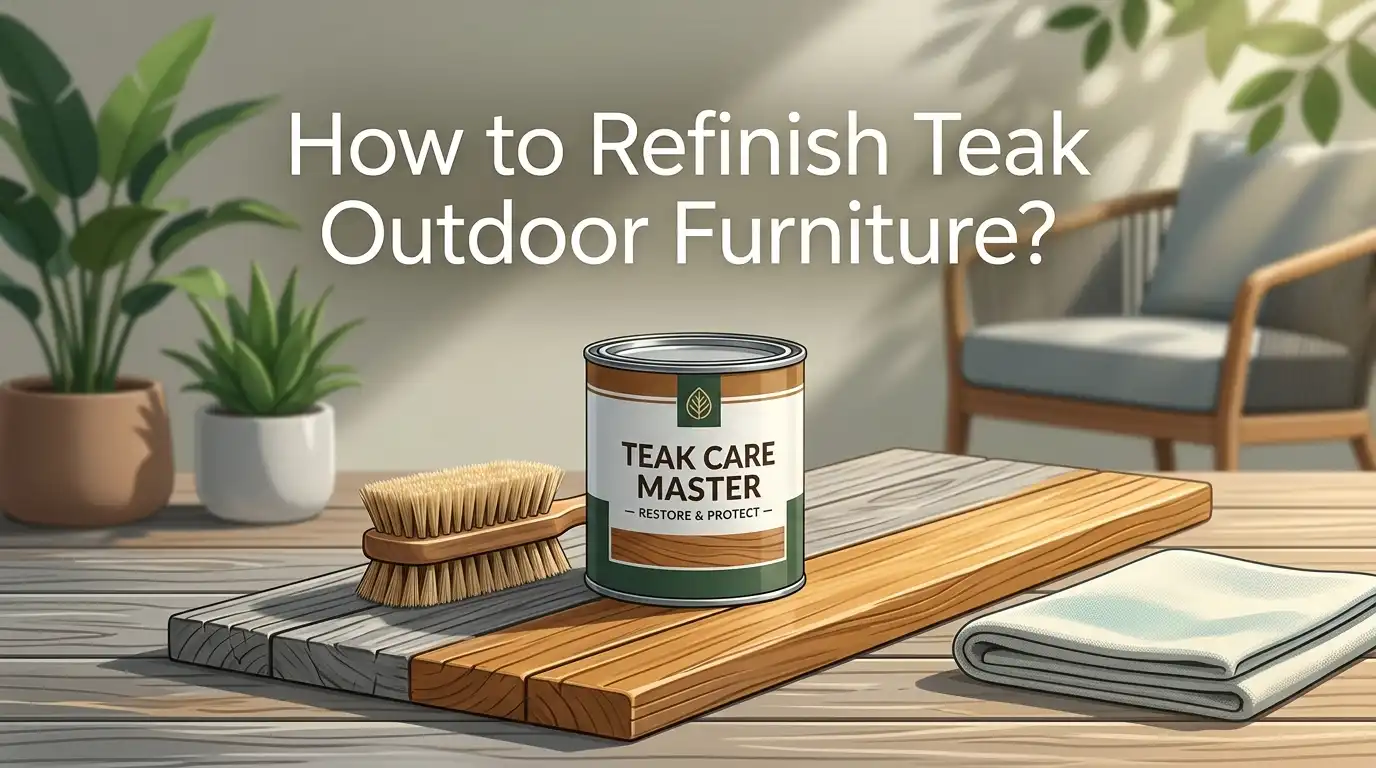
How to Refinish Teak Outdoor Furniture? A Complete Guide
Your beautiful teak patio set has turned silver gray. The once warm, golden brown wood now looks dull and lifeless. You might think it is ruined, but here is the good news.
Teak is one of the most durable hardwoods on the planet, and that gray patina is only surface deep. With the right tools, a free weekend, and a clear plan, you can bring your teak outdoor furniture back to its original glory.
This guide walks you through every stage of the refinishing process. You will learn how to clean, sand, and protect your teak pieces so they look brand new again.
In a Nutshell
- Teak turns gray because of UV exposure and oxidation, not decay. The silvery patina is purely cosmetic. The wood underneath remains strong and sound. A proper refinishing job removes this surface layer and reveals the honey gold color hiding below.
- Cleaning is the first and most important step. Use a teak cleaner or a simple homemade solution of mild soap, warm water, and white vinegar. This removes dirt, mildew, and surface grime before you sand.
- Sanding brings back the original color. Start with 80 grit sandpaper to strip the weathered layer. Then move to 120 grit and finish with 220 grit for a smooth surface. Always sand in the direction of the wood grain.
- You have three main finishing options: teak oil, teak sealer, or leaving it natural. Teak oil gives a rich warm tone but needs reapplication every few months. Teak sealer lasts longer and offers UV protection with less upkeep. Leaving it bare lets the natural patina return with zero maintenance.
- Proper maintenance extends the life of your finish. Regular cleaning, covering furniture during harsh weather, and reapplying your chosen finish on schedule will keep your teak looking great for years.
- You do not need professional help for this project. The entire process is beginner friendly. Basic tools like sandpaper, a soft bristle brush, and a clean cloth are all you need to get started.
Why Teak Furniture Turns Gray Over Time
Teak wood contains natural oils and a substance called rubber that make it extremely resistant to rot, insects, and moisture. This is why it is such a popular choice for outdoor furniture. However, prolonged exposure to sunlight and rain causes the surface to oxidize.
This oxidation process turns the warm golden brown color into a flat silver gray. The change is cosmetic, not structural. Your furniture is still perfectly strong underneath. Many people actually prefer the weathered gray look because it feels natural and coastal.
If you prefer the original warm color, refinishing is the answer. The process strips away the oxidized surface layer and exposes fresh wood. Once you protect that fresh surface with oil or sealer, you can enjoy the rich teak tone for months before the next touch up is needed.
Tools and Materials You Will Need
Gathering your supplies before you start saves time and frustration. You do not need expensive or hard to find items. Most of what you need is available at any local hardware store.
For cleaning, you will need a bucket, warm water, mild dish soap or a commercial teak cleaner, white vinegar, and a soft bristle brush. For sanding, grab sandpaper in 80 grit, 120 grit, and 220 grit. An orbital sander speeds up the job on large flat surfaces, but hand sanding works fine for smaller pieces and detailed areas.
For finishing, choose teak oil, teak sealer, or a marine grade varnish depending on your preference. You will also need clean lint free cloths, painter’s tape, and a drop cloth to protect your work area. Safety gear like gloves, a dust mask, and eye protection is also essential during the sanding phase.
Step 1: Clean the Teak Furniture Thoroughly
Cleaning removes surface dirt, mold, mildew, and debris that would otherwise clog your sandpaper and produce an uneven finish. Never skip this step. Start by rinsing the entire piece with a garden hose to wash away loose dust and leaves.
Next, mix a cleaning solution. You can use a commercial teak cleaner or make your own by combining a few drops of mild dish soap, one cup of white vinegar, and a gallon of warm water. Apply the solution with a soft bristle brush and scrub gently along the wood grain.
For stubborn mold or black spots, sprinkle a small amount of baking soda on the stain and scrub with the brush. Rinse the furniture completely with clean water and let it dry for 24 to 48 hours. The wood must be fully dry before you move on to sanding.
Pros of homemade cleaning solution: cheap, non toxic, easy to make.
Cons of homemade cleaning solution: may not remove deep set stains as effectively as commercial cleaners.
Step 2: Inspect and Repair Any Damage
Once the furniture is clean and dry, take a close look at every surface. Check for cracks, loose joints, splintering, and rough patches. Small cracks can be filled with an exterior grade wood filler that matches the teak color. Press the filler into the crack, smooth it level with a putty knife, and let it cure according to the product instructions.
Loose joints should be re glued with waterproof wood glue. Clamp the joint firmly and allow the glue to set for at least 24 hours. Fixing structural issues before sanding ensures a stable and uniform final result.
If any screws or bolts have corroded, replace them with stainless steel hardware that will resist rust outdoors. Taking the time for these repairs now prevents bigger problems later and gives your furniture a longer lifespan after refinishing.
Step 3: Sand the Weathered Surface
Sanding is where the real transformation happens. This step removes the gray oxidized layer and reveals the beautiful golden wood beneath. Always sand in the direction of the grain to avoid scratches that will show through your finish.
Start with 80 grit sandpaper to remove the weathered surface. Apply even pressure and keep the sandpaper flat against the wood. Once the gray is gone and you see fresh teak color, switch to 120 grit to smooth out the coarser scratches. Finally, finish with 220 grit for a silky surface that absorbs oil or sealer evenly.
An orbital sander makes quick work of flat surfaces like tabletops and bench seats. Use hand sanding for legs, armrests, and curved details. Wipe the dust away with a tack cloth or damp rag between grit changes. After the final sanding pass, rinse the piece lightly and let it dry completely before applying any finish.
Pros of sanding: restores original color, creates a smooth surface, allows finish to penetrate deeply.
Cons of sanding: time consuming on large pieces, creates dust, removes a thin layer of wood each time.
Step 4: Choose Your Finish (Oil vs Sealer vs Natural)
This is the most important decision in the refinishing process. Each option has distinct advantages and trade offs, and the best choice depends on how much maintenance you want to do.
Teak Oil penetrates deep into the wood grain and produces a warm, rich, amber tone. It highlights the natural beauty of the wood. However, teak oil breaks down faster outdoors and typically needs reapplication every two to three months. It can also promote mildew growth if over applied.
Teak Sealer sits on the surface and forms a protective barrier against UV rays, moisture, and oxidation. It keeps the golden color longer and only needs reapplication once or twice per year. Sealer is generally the better choice for outdoor furniture that faces heavy sun and rain exposure.
Leaving Teak Natural requires no products at all. The wood will return to its silver gray patina over time, but it will remain structurally sound for decades. This option is perfect if you enjoy the weathered aesthetic and want zero maintenance.
How to Apply Teak Oil Correctly
If you choose teak oil, application is straightforward. Make sure the wood is clean, sanded, and completely dry before you begin. Work in a shaded area on a dry day with temperatures between 50 and 85 degrees Fahrenheit.
Dip a clean, lint free cloth into the oil and apply a thin, even coat along the grain. Do not flood the surface. A thin coat absorbs better than a thick one. Let the first coat soak in for about 15 to 20 minutes, then wipe away any excess with a dry cloth.
Wait four to six hours and apply a second coat the same way. Two coats are usually enough for most furniture. Allow the final coat to cure for 24 hours before using the furniture. Repeat this process every two to three months, or whenever the wood starts to look dry and faded.
Pros of teak oil: deep warm color, easy to apply, affordable.
Cons of teak oil: frequent reapplication, can attract mildew, fades quickly in direct sunlight.
How to Apply Teak Sealer for Longer Protection
Teak sealer offers a low maintenance alternative that lasts significantly longer than oil. The application process is similar but the results are more durable. Begin with clean, sanded, and dry furniture just as you would with oil.
Shake the sealer container well before opening. Use a clean cloth or a foam brush to apply a thin, even layer in the direction of the grain. Work in small sections so the sealer does not dry before you can smooth it out. Wipe off any excess after 15 minutes.
Most sealers require only one coat, though some products recommend two. Check the instructions on your specific sealer for drying and cure times. Typically, the furniture is ready to use within 24 hours. One application can last six months to a full year depending on your climate and sun exposure.
Pros of teak sealer: long lasting protection, UV resistance, less frequent maintenance.
Cons of teak sealer: slightly less natural look than oil, higher upfront cost, requires thorough sanding before reapplication.
Can You Refinish Teak Without Sanding?
Yes, you can skip sanding in certain situations. If your furniture has only light weathering and no deep gray oxidation, a teak cleaner combined with a brightener may restore the color without sandpaper. Teak brighteners contain mild acids like oxalic acid that dissolve the gray surface layer chemically.
Apply the cleaner first, scrub with a brush, rinse, and then apply the brightener. Let it sit for the recommended time, usually 10 to 15 minutes, and rinse again. This method works best on furniture that has been maintained regularly and has not been neglected for years.
For heavily weathered pieces with deep gray coloring, sanding is still the most effective method. The no sanding approach saves time but does not produce the same deep color restoration that proper sanding achieves.
Pros of the no sanding method: faster, easier, less physical effort.
Cons of the no sanding method: less dramatic results, may not work on heavily weathered wood, requires chemical products.
Common Mistakes to Avoid During Refinishing
Many DIY refinishers make errors that reduce the quality and longevity of their work. The most common mistake is rushing the drying time. Applying oil or sealer to damp wood traps moisture inside and can cause mold or peeling. Always wait a full 24 to 48 hours after cleaning before you sand.
Another frequent error is sanding against the grain. This leaves visible scratches that show through any finish you apply. Always check the grain direction before you start and follow it consistently.
Using too much oil is also a problem. Excess oil sits on the surface, turns sticky, and attracts dirt and mildew. A thin, wiped on coat always outperforms a thick one. Also avoid using a pressure washer on teak. The high pressure can damage the wood fibers and create a fuzzy, rough surface that is difficult to sand smooth.
How to Maintain Your Refinished Teak Furniture
Regular maintenance keeps your teak looking freshly refinished for much longer. Clean your furniture every four to six weeks with mild soapy water and a soft brush. This prevents dirt and mildew from building up and breaking down your finish prematurely.
Cover your furniture with breathable covers during extended periods of rain, snow, or harsh sun. Avoid using plastic tarps because they trap moisture and encourage mold growth. If your furniture stays outdoors year round, store cushions separately and tilt the table slightly so rainwater drains off the surface.
Reapply your chosen finish on a regular schedule. Oil needs attention every two to three months. Sealer lasts six to twelve months. Keep an eye on the color. When the wood starts to look dry or grayish, it is time for another coat. Consistent upkeep means your next full refinishing project can wait years instead of months.
When to Call a Professional Instead
Most teak refinishing projects are very doable at home. However, some situations benefit from professional help. If your furniture has deep structural damage, large cracks, or broken joints, a professional woodworker can make repairs that require specialized tools and expertise.
Antique or high value teak furniture may also warrant professional attention. A skilled restorer can preserve the character and value of the piece while delivering a flawless finish. If you have a large collection of outdoor teak pieces, such as a full dining set plus loungers, hiring a professional can save you many hours of labor.
Professionals also have access to commercial grade sealers and application methods that produce a more uniform and longer lasting result. The cost typically ranges from $150 to $500 per piece depending on the size and condition. For everyday patio furniture, though, the DIY approach described in this guide works beautifully and saves significant money.
Final Thoughts on Refinishing Teak Outdoor Furniture
Refinishing your teak outdoor furniture is a rewarding weekend project that delivers dramatic results. The process is simple: clean, repair, sand, and finish. Each step builds on the last, and the end result is furniture that looks and feels brand new.
Choose a finish that matches your maintenance commitment. Go with sealer if you want longer protection with less work. Pick oil if you love the rich, warm glow and do not mind reapplying regularly. Or leave the wood bare and embrace the natural silver patina.
Your teak furniture was built to last decades. With proper refinishing and regular care, it will continue to be the centerpiece of your outdoor space for many years to come. Take your time, follow these steps, and enjoy the process of bringing your favorite pieces back to life.
Frequently Asked Questions
How often should I refinish my teak outdoor furniture?
A full refinishing with sanding is usually needed every two to three years for furniture that stays outdoors. If you maintain it regularly with cleaning and reapplication of oil or sealer, you can stretch that timeline further. Furniture stored under a covered patio may need refinishing even less often.
Can I use regular wood stain on teak furniture?
Standard wood stain does not work well on teak because the natural oils in the wood prevent even absorption. Use products designed specifically for teak, such as teak oil or teak sealer. These formulas are made to work with the unique properties of teak wood and deliver better, longer lasting results.
Is it okay to power wash teak furniture?
Power washing is generally not recommended for teak. The high pressure stream can damage the soft fibers between the growth rings, leaving the surface fuzzy and rough. A regular garden hose with moderate pressure, combined with a soft bristle brush, is the safest and most effective cleaning method.
How long does teak sealer last compared to teak oil?
Teak sealer typically lasts six to twelve months before needing reapplication. Teak oil lasts only two to three months in outdoor conditions. Climate, sun exposure, and usage all affect how quickly the finish breaks down. Sealer is the better option for furniture in direct sunlight or harsh weather.
Will refinishing remove deep water stains from teak?
Sanding with 80 grit paper can remove most surface stains, including water marks. Very deep stains that have penetrated far into the wood may lighten significantly but not disappear entirely. Applying a teak brightener after cleaning and before sanding can help reduce stubborn discoloration.
Can I refinish teak furniture during winter?
Cold temperatures and high humidity slow drying times and can affect how oil and sealer cure. The ideal conditions are dry weather with temperatures between 50 and 85 degrees Fahrenheit. If you must work in winter, do so in a garage or covered area and allow extra drying time between each step.

Hi, I’m Leah Ray — the voice behind CraftBench Vault. I’m a passionate woodworking enthusiast dedicated to reviewing the best wood cutting tools and woodworking products. Through honest research and hands-on experience, I help fellow crafters make smarter buying decisions. Welcome to my workshop!