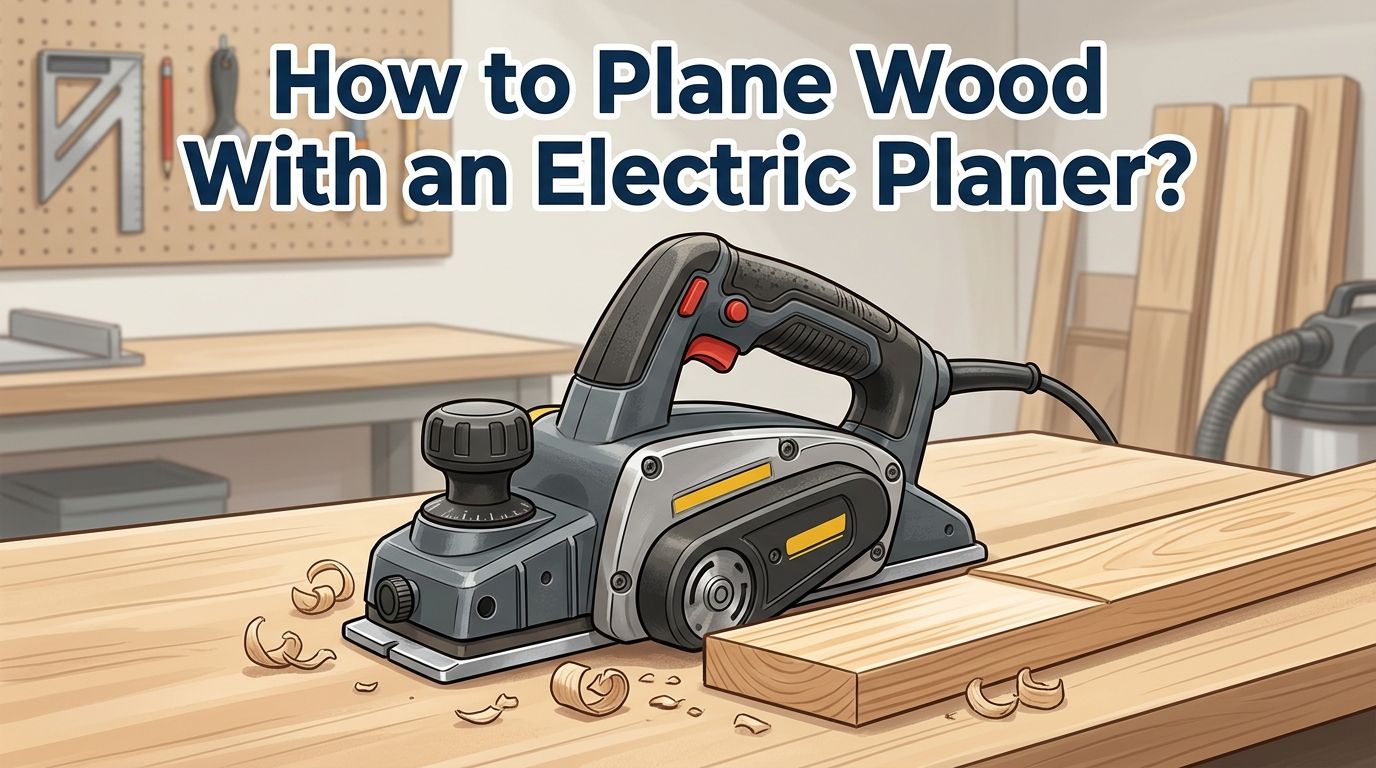
How to Plane Wood With an Electric Planer? A Complete Guide
An electric planer can transform rough, uneven lumber into smooth, flat boards in minutes. But if you have never used one before, you might feel unsure about where to start.
A wrong move can gouge the wood, create uneven surfaces, or even cause a safety hazard. The good news is that learning to use an electric planer is straightforward once you understand the basics.
This guide covers everything you need to know. You will learn how to set up your planer, position your body, read the grain, avoid common mistakes, and get a smooth finish every time.
Key Takeaways
- Always start with a shallow cutting depth. Set your electric planer to remove only a thin layer of wood per pass. A depth of about 1/32 inch is a safe starting point. Taking off too much material at once leads to rough cuts, tearout, and loss of control over the tool.
- Read the grain direction before you begin. Planing against the grain causes chips, splinters, and an uneven surface. Look at the edge of the board to identify which way the wood fibers run. Always push the planer in the direction that follows the grain for a clean result.
- Keep both hands on the planer at all times. Use one hand on the front knob to guide direction and one hand on the rear handle to push the tool forward. This two hand grip gives you maximum control and safety while you work.
- Shift your pressure from front to back during each pass. Apply downward pressure on the front shoe as you enter the cut. Shift that pressure to the rear shoe as you exit the cut. This technique prevents snipe, which is a common dip or gouge at the beginning or end of a board.
- An electric planer is not a substitute for a jointer or thickness planer. It follows the surface contour of the wood. It is best used for removing material quickly, trimming edges, and preparing rough lumber before running it through stationary machines.
- Wear safety glasses, hearing protection, and a dust mask every time. Electric planers are loud, produce fine wood chips at high speed, and generate a lot of dust. Proper gear protects your eyes, ears, and lungs.
What Is an Electric Planer and How Does It Work
An electric planer is a handheld power tool that uses a spinning drum with two or more sharp blades. The drum sits between a front shoe and a rear shoe. You adjust the front shoe up or down to control the cutting depth. As you push the tool across the wood, the blades shave off a thin layer of material.
Most electric planers have motors between 5 and 7.5 amps. The blade drum spins at speeds of around 16,000 RPM. This high speed produces fast, efficient cuts. The rear shoe rides on the freshly cut surface while the front shoe sets how deep the cut goes.
Corded models deliver consistent power for long sessions. Cordless models offer portability and work well in tight spaces. Both types follow the same basic operating principles. The planer does not flatten a board on its own. It removes material from wherever the sole of the tool sits. You must guide it with skill and intention.
Tools and Materials You Need Before You Start
Gather your supplies before you plug in the planer. Having everything ready saves time and keeps you focused on the work.
You need the planer itself with sharp, properly installed blades. Dull blades produce rough cuts and increase the risk of kickback. You also need a sturdy workbench or two sawhorses. The wood must be clamped or braced so it does not move while you plane it.
Keep a straight edge or a long ruler nearby. You will use this to check the flatness of the board as you work. A pencil is useful for marking high spots on the surface. Safety gear includes safety glasses, ear protection, and a dust mask or respirator.
A shop vacuum or dust collection bag attachment helps control the mess. Electric planers produce a high volume of wood shavings. Connecting your planer to a dust collection system keeps your work area clean and your lungs safe.
How to Set Up Your Electric Planer Correctly
Proper setup prevents mistakes and protects both you and the wood. Start by inspecting the blades. Make sure they are sharp, clean, and seated evenly in the drum. Uneven blades create ridges and an inconsistent surface.
Set the cutting depth to the lowest possible setting for your first pass. Most planers have a dial or knob on the front that raises or lowers the front shoe. A shallow setting of 1/32 inch lets you test how the tool reacts to the wood before you commit to deeper cuts.
Check the sole plates for debris. Any dust, resin, or buildup on the front or rear shoe can scratch the wood surface or cause the planer to skip. Wipe the soles clean and apply a light coat of paste wax for smoother gliding.
Secure your workpiece firmly. Clamp it to a bench or brace it against a stop block. The wood should not shift or slide while you plane. Movement during a pass creates uneven results and increases the danger of losing control.
How to Read the Grain Direction
Reading the grain is one of the most important skills for getting a clean result. If you plane against the grain, the blades dig under the wood fibers and rip them out. This creates tearout, which looks like rough patches and splintered areas on the surface.
Look at the edge of the board. You will see lines or fibers that angle in one direction, similar to hair lying flat on a surface. You want to push the planer in the direction those fibers lay down, not against them. Think of it like petting a cat. Go with the fur, not against it.
Some boards have tricky grain that changes direction partway through. Figured woods like curly maple are especially prone to this. For these boards, take very shallow passes and slow down your feed rate. A lighter cut reduces the chance of tearout even if the grain shifts.
If you are still unsure about the direction, do a test pass on scrap wood from the same board. This lets you see the result without risking your workpiece.
Step by Step Process to Plane a Board
Follow these steps for a clean, even result every time. First, mark the high spots on the board using a pencil and straight edge. This tells you exactly where you need to remove material.
Step 1: Rest the front shoe of the planer flat on the wood. The blades should not touch the surface yet. Start the motor and let it reach full speed before you begin cutting.
Step 2: Push the planer forward slowly and steadily. Apply downward pressure on the front knob as you enter the cut. Keep the tool flat and avoid tilting it side to side.
Step 3: As the planer passes over the board, gradually shift your pressure to the rear handle. This transition prevents the tool from dipping at the end of the cut, which is called snipe.
Step 4: Lift the planer off the board at the end of the pass. Do not drag it backward over the cut surface. Return to the starting position, overlap your next pass slightly with the previous one, and repeat.
Step 5: Check flatness with your straight edge after every few passes. Mark new high spots and continue until the surface is even.
How to Plane Edges and Narrow Surfaces
Planing a board edge requires a steady hand and good balance. The narrow surface means the planer has less support, so tipping is a real risk.
Hold the planer firmly with both hands. Keep the sole flat against the edge of the board throughout the entire pass. Some woodworkers attach an auxiliary fence to the planer to help maintain a consistent 90 degree angle.
Start with light passes. Edge planing removes material quickly because the surface area is small. A deep cut on a narrow edge can remove too much wood in one pass and ruin the piece.
Pros of using an electric planer for edges: It removes material fast. It handles long edges on doors and large boards efficiently. It saves a lot of time compared to a hand plane.
Cons of using an electric planer for edges: It is harder to keep square without a fence. The short sole length can follow dips instead of flattening them. Fine adjustments are more difficult than with a traditional hand plane.
For the best results on edges, clamp the board in a vise so both your hands are free to guide the planer.
How to Flatten a Cupped or Twisted Board
Cupped and twisted boards are common, especially with rough or reclaimed lumber. An electric planer can help fix these issues, but it requires a careful approach.
For a cupped board, place the crowned (convex) side up. Take light passes from the high center down to the lower edges. Work diagonally across the cup if needed. Check your progress often with a straight edge to avoid removing too much material.
For a twisted board, use winding sticks. These are two straight strips of wood that you place at each end of the board. Sight across them to see which corners are high. Plane down the high corners with shallow passes. Feather your cuts across the surface as you go.
The electric planer follows the existing contour of the wood. It does not automatically create a flat surface. You must identify the high spots and target them specifically. This is where the straight edge and pencil marks become essential tools.
After you flatten one face, you can use a marking gauge to scribe a consistent thickness line. Then plane the opposite face down to that line for a board with parallel faces.
How to Prevent Snipe and Common Surface Defects
Snipe is the most frequent complaint from electric planer users. It shows up as a shallow depression at the beginning or end of a board. It happens because the planer tips slightly as it enters or exits the workpiece.
The fix is simple. Apply firm downward pressure on the front shoe as the planer enters the board. Then transfer that pressure to the rear shoe before the planer exits. This keeps the cutting drum at a consistent depth throughout the entire pass.
Scalloping is another common defect. It appears as tiny, parallel ridges across the surface. This happens because the rotating blades leave small arcs in the wood. To reduce scalloping, slow down your feed rate. The slower you push the planer, the closer together those arcs become, and the smoother the surface appears.
Gouging occurs if you tilt the planer during a pass or set the cutting depth too deep. Always keep the sole flat and use shallow settings. If you notice a gouge, reduce your depth and take corrective passes to blend it out.
Safety Rules You Must Follow
Electric planers spin sharp blades at extremely high speeds. Treating this tool with respect keeps you safe.
Never start the planer while the blades touch the wood. Always let the motor reach full speed first. Starting under load can cause kickback or damage the workpiece.
Keep both hands on the tool at all times during operation. Never reach under or near the blade area while the drum is spinning or coasting to a stop. Wait until the blades have completely stopped before setting the planer down.
Wear safety glasses to protect against flying wood chips. Wear hearing protection because electric planers produce noise levels above 90 decibels, which can damage your hearing over time. A dust mask or respirator is also important because the fine dust particles are harmful to your lungs.
Do not wear loose clothing, jewelry, or gloves that could get caught in the spinning blades. Keep your work area clean and your footing stable. Always unplug the planer before changing blades or making adjustments.
Blade Maintenance and Replacement
Sharp blades are the single biggest factor in getting a clean cut. Dull blades tear the wood instead of slicing it. They also force the motor to work harder, which shortens the life of the tool.
Check your blades before every session. Look for nicks, chips, or dull edges. Many electric planers use reversible double sided blades. When one side gets dull, you can flip the blades to the fresh side before needing a full replacement.
Some blades can be sharpened with a fine whetstone or diamond stone. You need a jig to hold the blade at the correct angle during sharpening. This process adds extra life to your blades and saves money over frequent replacements.
When you install new or resharpened blades, make sure they sit at exactly the same height in the drum. Uneven blades create ridges on the surface and put extra stress on the motor. Most planers include a straightedge or setting gauge for this purpose. Follow your tool’s manual for the correct installation procedure.
Electric Planer vs Hand Plane: Which Should You Use
Both tools remove wood, but they serve different purposes. Understanding the strengths of each helps you choose the right tool for the job.
Pros of the electric planer: It removes material very fast. It handles large surfaces and rough lumber with ease. It requires less physical effort than a hand plane. It works well for trimming doors, flattening rough boards, and quick stock removal.
Cons of the electric planer: It produces more tearout on figured grain. It leaves scallop marks that need sanding. It is loud and creates a lot of dust. Fine, precise control is harder to achieve compared to a hand plane.
Pros of the hand plane: It can leave a finish ready surface. It gives you precise control over thin shavings. It works quietly and produces no dust.
Cons of the hand plane: It requires more skill and physical effort. It is much slower for removing large amounts of material.
The best approach for many woodworkers is to use both tools together. Use the electric planer for rough work and material removal. Then follow up with a hand plane for a smooth, refined finish.
Tips for Getting the Smoothest Possible Finish
A few extra techniques can make a big difference in your final surface quality.
Slow down your feed rate. Pushing the planer too fast increases the spacing between blade marks. A slower, steady pass produces a much smoother surface. Think of it as letting the blades do the work.
Take multiple shallow passes instead of one deep cut. Each light pass gives you more control and reduces the stress on the wood fibers. The final pass should be the shallowest possible setting to leave the cleanest surface.
Overlap each pass slightly. This prevents ridges between adjacent planed strips on wide boards. Aim for about a quarter inch of overlap to blend the passes together.
After planing, a light sanding with 150 or 180 grit sandpaper removes any remaining scallop marks. For a furniture quality finish, follow up with 220 grit. Some woodworkers prefer to use a hand plane or cabinet scraper after the electric planer for a glass smooth result without any sanding.
Troubleshooting Common Electric Planer Problems
Even experienced users run into issues. Here are quick fixes for the most common problems.
The planer leaves rough patches. This usually means you are planing against the grain. Flip the board or change your planing direction. It can also mean your blades are dull. Inspect and replace them if needed.
The planer vibrates excessively. Check that the blades are installed evenly and tightened properly. An out of balance blade drum causes vibration and produces a poor surface.
The motor bogs down during cuts. You are trying to remove too much material at once. Reduce the cutting depth and take lighter passes. Also check that the blades are sharp. Dull blades force the motor to strain.
The board keeps moving while you plane. Your workholding setup is not secure enough. Add more clamps or use a bench stop. A stable workpiece is critical for consistent results and safe operation.
The planer leaves burn marks. This happens if you pause during a pass or push too slowly in one spot. Keep the planer moving at a consistent speed from start to finish.
Frequently Asked Questions
Can I use an electric planer on plywood or MDF?
It is not recommended. Plywood has glue layers between the veneers that dull blades very quickly. MDF is made of compressed fibers and adhesive that also damages cutting edges. Both materials can chip and splinter unpredictably. Stick to solid wood for the best results and longest blade life.
How deep should I set the electric planer for each pass?
Start with a depth of about 1/32 inch for most tasks. This shallow setting gives you control and reduces the chance of tearout. For rough lumber with major high spots, you can increase to 1/16 inch. Never exceed the maximum depth listed in your tool’s manual. Multiple light passes always produce a better surface than one heavy cut.
How do I know if my planer blades are dull?
Dull blades leave a rough, fuzzy surface instead of clean shavings. You may also notice the motor working harder or producing a different sound. If the wood tears instead of cutting cleanly, it is time to flip, sharpen, or replace the blades.
Can an electric planer make a board perfectly flat?
An electric hand planer follows the surface contour of the wood. It does not reference a flat table like a stationary jointer does. You can get a board reasonably flat by marking high spots and targeting them with careful passes. For true flatness, combine the electric planer with a jointer or use winding sticks and a straight edge to guide your work.
How do I reduce the noise from an electric planer?
Wear proper hearing protection rated for at least 25 decibels of noise reduction. Working in a shop with sound absorbing materials on the walls can also help. There is no way to make the tool itself quieter. The high RPM blade drum is the source of the noise, and it is a fixed part of how the tool operates.
Is it safe to plane very short or small pieces of wood?
Planing pieces shorter than about 12 inches can be dangerous. The planer can grab and kick back a small piece. If you must plane a short board, clamp it securely and be extra careful with hand placement. Keep your fingers far from the blade area at all times. Some woodworkers attach small pieces to a larger board with double sided tape for safer planing.

Hi, I’m Leah Ray — the voice behind CraftBench Vault. I’m a passionate woodworking enthusiast dedicated to reviewing the best wood cutting tools and woodworking products. Through honest research and hands-on experience, I help fellow crafters make smarter buying decisions. Welcome to my workshop!