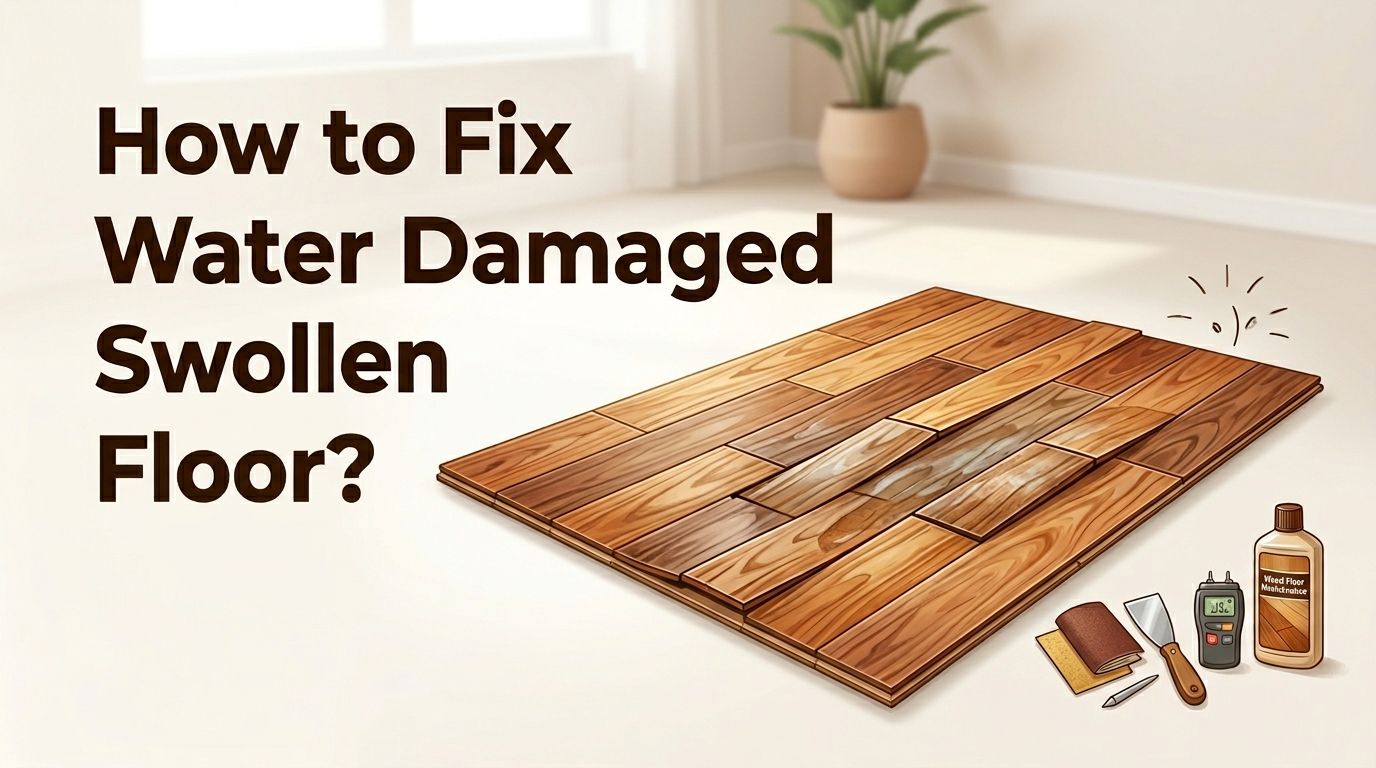
How to Fix Water Damaged Swollen Wood Floor?
Water damage can turn a beautiful wood floor into a warped, swollen mess in just a few hours. Whether a burst pipe, a leaking appliance, or a flood caused the problem, seeing your hardwood floor swell and buckle is stressful.
The good news? Many water damaged wood floors can be saved if you act fast and follow the right steps. This guide walks you through every stage of the repair process, from initial cleanup to final refinishing.
You will learn how to assess the damage, dry the floor properly, sand down swollen areas, and decide whether a full replacement is needed. Every minute counts with water damage, so let’s get right into the solutions.
In a Nutshell
- Act fast to remove standing water. The longer water sits on a wood floor, the deeper it soaks into the planks and subfloor. Use towels, mops, or a wet vacuum to remove water within the first 24 hours. Quick action can mean the difference between a simple repair and a full floor replacement.
- Dry the floor completely before making any repairs. Set up dehumidifiers and fans to pull moisture out of the wood. This process can take anywhere from a few days to several weeks depending on the severity of the damage. Never sand or refinish a floor that still holds moisture.
- Identify the type of damage you are dealing with. Cupping, crowning, and buckling are three different forms of water damage. Each requires a different repair approach. Knowing which type you have helps you choose the right fix and avoid making things worse.
- Sanding and refinishing can fix mild to moderate swelling. Once the wood is fully dry, sanding down the raised areas and applying a new finish can restore the floor’s smooth surface. This method works best for solid hardwood floors with minor to moderate damage.
- Severely damaged boards may need full replacement. If the wood is cracked, moldy, or permanently warped, individual planks or entire sections may need to be pulled up and replaced. This is often the case after long exposure to standing water or flooding.
- Prevention saves you from future headaches. After repairs, seal your floors properly, fix any plumbing issues, and use moisture barriers to protect against future water damage.
Understanding Why Wood Floors Swell From Water Damage
Wood is a natural material that absorbs moisture. When water reaches a hardwood floor, the wood fibers soak it up and expand. This expansion causes the planks to push against each other, leading to swelling, warping, and buckling. Solid hardwood absorbs more water than engineered wood because it consists entirely of natural wood fibers.
The amount of swelling depends on several factors. These include the type of wood, the volume of water, and how long the floor stays wet.
Oak and maple absorb water at different rates, and each species reacts differently. Temperature and humidity in the room also play a role. A floor in a humid climate will dry more slowly than one in a dry environment.
Understanding this process helps you approach the repair with the right expectations. Some floors return to normal after drying, while others need sanding or replacement.
Recognizing the Signs of Water Damage on Wood Floors
Before you start any repair, you need to identify the extent of the damage. There are several clear signs that water has affected your wood floor. Cupping happens when the edges of each board rise higher than the center, creating a concave shape. This occurs because the bottom of the board absorbs more moisture than the top.
Crowning is the opposite. The center of each board pushes up while the edges stay low. This often happens when a floor is sanded too early during the drying process.
Buckling is the most severe form. The boards lift completely off the subfloor and may crack or split. Discoloration, dark staining, and a musty smell are also signs that water has reached your floor. Check for soft or spongy spots by walking across the floor and pressing down with your foot.
Stop the Water Source Immediately
The first and most important step is to stop the water from reaching your floor. Find the source of the leak or flooding and shut it down. Turn off the water supply if a pipe has burst. Move a leaking appliance away from the floor. If the water comes from outside, use sandbags or barriers to redirect the flow.
This step seems obvious, but many homeowners rush to clean up without addressing the root cause. If the source keeps flowing, your repair efforts will be wasted. Fix the cause before you fix the floor. Once the water source is stopped, you can move on to cleanup and drying.
Check all nearby plumbing, appliances, and windows to make sure no secondary leaks exist. Inspect the area under the floor if you have access to a basement or crawl space.
Remove Standing Water as Quickly as Possible
Speed matters here. The faster you remove standing water, the less damage your floor will suffer. Use a wet vacuum to pull water off the surface. If you do not have a wet vacuum, use mops and absorbent towels to soak up as much water as you can.
For larger floods, you may need a sump pump to remove water from the room. Pull up any rugs, mats, or furniture sitting on the wet area. These items trap moisture against the wood and slow down the drying process.
Do not use a regular household vacuum on standing water. Standard vacuums are not built for water removal and can cause electrical hazards. Stick with tools designed for wet cleanup. Once you have removed the visible water, the real drying process begins.
Pros of quick water removal: Reduces overall damage, limits mold growth, and preserves the original floor structure.
Cons: May require renting equipment, and heavy flooding may be too much for DIY cleanup alone.
Dry the Floor Thoroughly With Dehumidifiers and Fans
Drying is the most critical step in fixing a swollen wood floor. Place a dehumidifier on its highest setting in the center of the affected room. Run it continuously for at least 24 to 48 hours. For serious water damage, you may need to run it for one to three weeks.
Set up fans around the room to circulate air across the floor surface. Open windows if the outdoor humidity is low. If you have access to the underside of the floor through a basement or crawl space, place additional fans and dehumidifiers there too.
Use a moisture meter to track the wood’s moisture content over time. Most hardwood floors should read between 6% and 9% moisture content before you attempt any repairs. Sanding or refinishing a floor that is still wet will cause crowning later.
Pros of thorough drying: Allows the wood to return to its original shape naturally, prevents mold, and prepares the floor for repairs.
Cons: Takes time and patience, may require renting commercial grade equipment, and electricity costs add up during extended use.
Assess the Damage After the Floor Has Dried
Once the floor is dry, take a close look at its condition. Walk across every section and note which areas are still raised, warped, or uneven. Minor cupping often resolves on its own once the moisture is gone. The wood shrinks back as it dries, and the planks may settle into their original positions.
If the floor still shows swelling, warping, or gaps between boards after full drying, you will need to do further repairs. Check the subfloor underneath by removing a board in the worst affected area. Look for signs of mold, rot, or structural weakness.
A moisture meter reading above 9% means the floor needs more drying time. Do not rush this step. Making repairs on wood that still holds moisture leads to problems like crowning and cracking down the road.
Sand Down Swollen Areas to Restore a Flat Surface
Sanding is one of the most effective ways to fix a water damaged swollen wood floor. Use a drum sander or orbital sander to flatten the raised areas of the floor. Start with a coarse grit sandpaper (36 or 40 grit) to remove the high spots, then switch to medium grit (60 or 80), and finish with fine grit (100 or 120) for a smooth surface.
Sand in the direction of the wood grain. Never sand across the grain, as this creates visible scratches that are hard to remove. Use an edge sander to reach areas close to walls and corners.
After sanding, vacuum the entire floor and wipe it down with a tack cloth to remove all dust. The surface must be completely clean before applying any finish.
Pros of sanding: Restores a smooth, level surface, removes surface stains and discoloration, and prepares the floor for refinishing.
Cons: Removes a layer of wood (solid hardwood can only be sanded a limited number of times), creates a lot of dust, and requires proper equipment and technique.
Fill Gaps and Cracks Between Boards
Water damage often causes gaps between floorboards as the wood swells and then shrinks during drying. Use a wood filler or putty that matches your floor color to fill these gaps. Apply the filler with a putty knife, pressing it firmly into each gap.
For larger gaps, you can use thin strips of matching wood glued into the spaces. Let the filler or wood strips dry completely before sanding the repaired areas smooth and level with the surrounding floor.
Keep in mind that wood floors expand and contract with seasonal humidity changes. If the gaps are small, they may close on their own during humid months. Filling every tiny gap can cause problems later if the wood has no room to expand naturally.
Pros of gap filling: Creates a clean, finished look, prevents dirt buildup in cracks, and improves the floor’s structural integrity.
Cons: Filler may crack or pop out over time with seasonal movement, and color matching can be tricky.
Refinish the Floor With Stain and Sealant
After sanding and filling, your floor needs a new protective finish. Apply a wood stain that matches the original color of your floor. Use a brush or applicator pad to spread the stain evenly, working with the grain. Allow each coat to dry according to the product instructions.
Once the stain is dry, apply two to three coats of polyurethane sealant. You can choose between oil based and water based options. Oil based polyurethane provides a warm, amber tone and strong protection. Water based polyurethane dries faster and has a clearer finish.
Sand lightly between coats with 220 grit sandpaper to help each layer bond properly. Allow the final coat to cure for at least 48 to 72 hours before placing furniture back on the floor.
Pros of refinishing: Restores the floor’s original beauty, adds a protective layer against future moisture, and extends the floor’s lifespan.
Cons: Strong fumes from oil based products require good ventilation, and the floor is unusable during the curing period.
Replace Severely Damaged Boards
Some boards are too far gone for sanding and refinishing. If a board is cracked, permanently warped, or shows mold growth, it needs to be replaced. Use a circular saw set to the thickness of the floorboard to cut along the length of the damaged plank. Be careful not to cut into the subfloor.
Pry up the damaged board with a pry bar and chisel. Clean the exposed subfloor and check for mold or rot. Treat any mold with an appropriate cleaner before installing the new board.
Cut a replacement board to size and fit it into the gap. You may need to trim the bottom lip of the groove side to allow it to drop into place. Glue and nail the new board, then sand and finish it to match the rest of the floor.
Pros of board replacement: Removes all traces of damage and mold, provides a fresh start for the affected area, and can be done selectively without replacing the entire floor.
Cons: Finding an exact match for older floors can be difficult, and the process requires woodworking skills and tools.
Know When to Call a Professional
DIY repairs work well for minor to moderate water damage. But some situations call for professional help. If the water damage covers more than 30% of the floor, the subfloor is compromised, or mold has spread beneath the surface, hire a restoration specialist.
Professionals have access to commercial grade drying equipment, moisture detection tools, and flooring expertise that can save you time and money in the long run. They can also work with your insurance company to document the damage and file a claim.
The cost of professional hardwood floor repair ranges from $20 to $25 per square foot for board replacement. Full floor refinishing typically costs less. Getting a quote from two or three contractors gives you a clear picture of the total investment needed.
Prevent Future Water Damage to Your Wood Floors
Once your floor is repaired, take steps to prevent water damage from happening again. Apply a high quality sealant to protect the wood from moisture. Check your plumbing, appliances, and HVAC system regularly for leaks.
Place mats near entryways and under kitchen sinks to catch spills. Use a hygrometer to monitor indoor humidity levels and keep them between 30% and 50%. Install water leak detectors near appliances like dishwashers, washing machines, and water heaters.
If your home has a crawl space, install a vapor barrier to prevent ground moisture from reaching the subfloor. Proper ventilation in basements and crawl spaces goes a long way in protecting your floors. Fixing small leaks early prevents big repairs later.
DIY Repair vs Professional Restoration: Which Should You Choose?
The decision between DIY repair and hiring a professional depends on the extent of the damage, your skill level, and your budget. DIY repairs save money and give you control over the process. They work best for small areas with mild swelling or minor cupping.
Professional restoration is the better choice for large areas, deep water penetration, or mold issues. A professional can also handle structural repairs to the subfloor, which is a critical factor in the floor’s long term stability.
Pros of DIY: Lower cost, flexible timeline, and personal satisfaction from doing the work yourself.
Cons of DIY: Risk of mistakes, need for specialized tools, and time investment.
Pros of professional help: Expert results, faster turnaround, access to professional equipment, and potential insurance coverage.
Cons of professional help: Higher cost and the need to schedule around the contractor’s availability.
Frequently Asked Questions
Can a water damaged swollen wood floor go back to normal on its own?
In many cases, yes. If the water exposure was brief and the floor dries completely, mild cupping and swelling can resolve on their own. The wood contracts as it loses moisture and may return to its original shape. This process can take several weeks. However, severe swelling, buckling, or cracking typically requires sanding, refinishing, or board replacement.
How long does it take to dry a water damaged wood floor?
Drying time depends on the amount of water, the type of wood, and the drying conditions in the room. Minor spills may dry in a few days, while serious flooding can take two to four weeks or longer. Using dehumidifiers and fans speeds up the process. Always check with a moisture meter before starting any repairs to confirm the wood has returned to a safe moisture level.
Will insurance cover water damaged wood floor repairs?
Most homeowner’s insurance policies cover sudden and accidental water damage, such as a burst pipe or appliance malfunction. Gradual damage from slow leaks or poor maintenance is usually not covered. Contact your insurance provider as soon as the damage occurs. Document everything with photos and keep records of all repair costs for your claim.
Can engineered wood floors be repaired after water damage?
Engineered wood floors have a thin veneer of real wood on top of a plywood or composite base. They are less tolerant of water damage than solid hardwood. Minor surface damage can sometimes be repaired with light sanding and refinishing. However, if the core layers have swollen or delaminated, the affected planks will need to be replaced because sanding through the thin top layer destroys the board.
How can I tell if the subfloor is also damaged?
After removing a damaged floorboard, inspect the subfloor for soft spots, discoloration, mold, or a musty odor. Press on the subfloor with your hand. If it feels spongy or gives way, it has absorbed too much water and may need to be replaced. A moisture meter can also confirm whether the subfloor holds excess moisture. Subfloor damage must be repaired before installing new floorboards.

Hi, I’m Leah Ray — the voice behind CraftBench Vault. I’m a passionate woodworking enthusiast dedicated to reviewing the best wood cutting tools and woodworking products. Through honest research and hands-on experience, I help fellow crafters make smarter buying decisions. Welcome to my workshop!