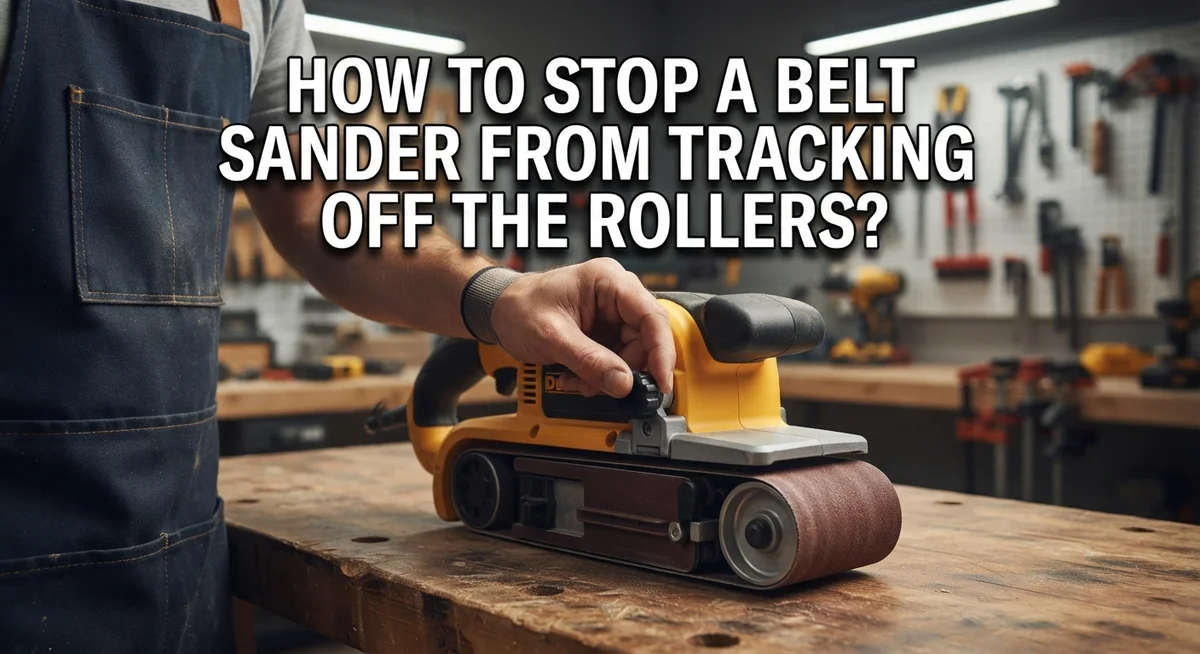
How To Stop A Belt Sander From Tracking Off The Rollers?
Does your belt sander keep throwing its belt off the rollers? You are not alone. This is one of the most common problems sanders face during use.
A belt that slides off mid task can ruin your project. It can also waste time and damage your workpiece.
Many people think tightening the belt fixes everything. But that is not the full story.
Tracking issues often come from a mix of problems. Misaligned rollers, worn belts, and debris can all cause your sander to drift.
In a Nutshell
- Check roller alignment first. Misaligned rollers are often the real culprit behind belt slipping. Adjust them before touching the tension knob.
- Inspect your belt often. A worn or damaged belt cannot track properly, no matter how tight it is. Replace it if you spot fraying or cracks.
- Tension both directions. Belts need even tension side to side, not just front to back. Uneven tension causes constant drifting.
- Clean your workpiece. Dust and debris under the belt create bumps that throw off tracking. A quick wipe down helps a lot.
- Watch for vibration. Excessive play or shaking during use usually points to loose parts or bad alignment, not just tension issues.
- Use the right grit sequence. Skipping grits or using mismatched belts can add stress that leads to slipping.
Understanding Belt Tracking and Why It Happens
Belt tracking happens when your sandpaper belt slides away from the center of the rollers during operation. The belt gradually moves to one side until it falls off completely. This problem stops your work and can damage both your equipment and your project.
Why does tracking occur? Several factors work together to cause this issue. Misaligned rollers sit at slightly different angles, which pushes the belt sideways. A worn belt loses its shape and flexibility, making it harder to stay centered. Excessive vibration and play in the belt system create movement that throws everything off balance.
Dirty workpieces introduce another problem. Dust, debris, and grit particles lodge under the belt and create small bumps. These bumps act like obstacles that knock the belt off center with each pass.
The tension trap
Many people assume tight tension fixes tracking. This is incorrect. Tension alone cannot correct misalignment or worn components. You can overtighten the belt and still have tracking problems. The belt needs proper tension in both directions, but alignment and condition matter far more.
Multiple causes working together
Tracking rarely results from a single issue. Your belt might slip because of two or three problems happening at once. A slightly misaligned roller combined with a worn belt and dirty workpiece creates the perfect storm for tracking failure.
Understanding these causes helps you fix the real problems instead of chasing quick fixes. You will need to inspect multiple components and address each one properly. This systematic approach prevents the frustration of the belt slipping off again after your first adjustment attempt.
Checking and Adjusting Roller Alignment
Roller alignment sits at the heart of belt tracking problems. When your rollers are not parallel to each other, the belt naturally drifts toward the misaligned side. This happens because the belt follows the path of least resistance.
Start by unplugging your sander completely. Safety comes first when you work on moving parts. Allow the machine to stop fully before touching anything.
Look at both rollers from the side of the machine. They should form a straight line when you sight along them. Use a straightedge or level to check this alignment. Place it gently against both rollers and look for gaps between the tool and the roller surface.
Most sanders have adjustment bolts on the rear roller. These bolts let you tilt the roller slightly in either direction. Turning one bolt clockwise while turning the other counterclockwise creates the tilt you need. Make small adjustments only. A quarter turn at a time works better than large changes.
After each adjustment, install a belt and run the sander briefly without material. Watch which way the belt moves. If it drifts left, adjust the rear roller to tilt the belt back right. The goal is to keep the belt centered on both rollers.
Check alignment regularly during your work session. Temperature changes and vibration can shift things over time. A belt that tracks perfectly at startup might drift after thirty minutes of use.
Proper alignment takes patience. Do not rush this step. Spending five minutes on alignment now saves you from ruined projects and wasted belts later. Your sander will reward you with smooth, consistent sanding every time.
Inspecting Belt Condition and Knowing When to Replace It
Your belt’s condition directly affects tracking performance. A worn or damaged belt cannot stay centered, regardless of how tight you make it. Inspect your belt regularly to catch problems early.
Look for visible signs of wear. Check the sanding surface for flat spots, glazing, or uneven material loss. Run your fingers gently along the belt’s edges while unplugged. Feel for tears, fraying, or missing chunks of abrasive material. These damage types prevent proper contact with the rollers.
Pay attention to the belt’s backing material too. If the fabric or cloth backing shows cracks or peeling, the belt has reached the end of its life. Damaged backing causes the belt to flex unevenly, which throws off tracking instantly.
Age matters more than you think. Even unused belts degrade over time. The adhesive that bonds abrasive particles to the backing loses strength. Old belts shed particles faster and track poorly. Most belts lose effectiveness after one to two years in storage.
Test your belt’s flexibility. A healthy belt bends smoothly around the rollers. A stiff or brittle belt resists bending and creates tension imbalances. This stiffness is a clear sign replacement time has arrived.
Replace your belt when you notice any of these issues. Using a worn belt wastes your time and energy. You’ll sand slower, achieve poor results, and fight constant tracking problems. A fresh belt costs far less than the frustration of a malfunctioning sander.
Keep spare belts on hand. This way you can swap them out immediately when problems appear. You won’t interrupt your work schedule waiting for supplies to arrive.
Getting Belt Tension Right in Both Directions
Belt tension works in two directions on your sander. The front to back pressure keeps the belt snug against the rollers. The side to side pressure ensures the belt stays centered. Both matter equally for stopping tracking problems.
Start by checking front to back tension first. Your sander manual shows the correct tightness level. You should feel resistance when you press the belt by hand, but it should not feel rock hard. Too loose and the belt slides off. Too tight and you stress the motor and rollers.
Side to side tension is just as important. The belt must sit evenly across both rollers without leaning left or right. Uneven side tension pulls the belt toward the tighter side. This causes tracking away from center. Check this by looking at the belt from the side while the machine runs empty.
Many people think tightening everything solves tracking. This approach often makes things worse. Excessive tension strains your motor and wears out rollers faster. It also masks the real problem, which is usually misalignment.
Adjust tension gradually and test after each change. Run the sander without material for a few seconds. Watch how the belt moves. If it drifts, stop and make another small adjustment. This patient approach saves you time and equipment damage.
Keep your tension settings consistent during work sessions. Belts can loosen slightly as you sand, so check periodically. Write down the correct tension settings for your machine. This reference helps you get back to proper settings quickly next time.
Preparing Workpieces to Prevent Debris-Related Slippage
Debris on your workpiece creates real problems for belt tracking. Dust, dirt, and loose particles get caught between the belt and the material you’re sanding. This causes the belt to slip sideways as it encounters resistance.
Clean your workpieces thoroughly before you start sanding. Use a dry brush or compressed air to remove all surface dust. Pay special attention to corners and edges where debris collects. A quick wipe with a clean cloth helps too.
Grit sequence matters for preventing slippage. Start with coarser grits and work your way to finer ones. This approach removes material efficiently and reduces the chance of the belt wandering. Each grit level prepares the surface for the next stage.
Check your workpiece for embedded particles before sanding. Small stones or hard spots can cause sudden belt movement. Run your hand across the surface to feel for anything unusual. Remove any foreign objects you find.
Proper workpiece positioning prevents many tracking issues. Place your material flat and stable on the sander bed. Uneven surfaces cause the belt to catch and shift. Make sure nothing protrudes beyond the sander’s edges.
Feed your workpiece at a steady, even pace. Rushing or applying excessive pressure increases belt strain. Let the sander do the work without forcing it. Consistent speed and light pressure keep the belt centered.
Moisture in wood can also affect belt behavior. Allow freshly cut or wet wood to dry before sanding. Damp material creates friction problems that lead to tracking. Dry workpieces sand more smoothly and keep your belt stable.
Step-by-Step Process to Fix Persistent Tracking Problems
When your belt keeps drifting off the rollers, you need a systematic approach. Start with the basics first. Unplug your sander completely before touching anything. Safety comes before troubleshooting.
Next, examine both rollers from the side of your machine. Look for visible damage, wear patterns, or debris buildup. Most sanders have adjustment bolts on the rear roller. These bolts let you fine tune the roller position. Turn them slowly, just a quarter turn at a time.
After each small adjustment, install a fresh belt and run the sander briefly without any material. This test run shows you whether tracking improved. If the belt still drifts, make another quarter turn adjustment. Patience matters here. Rushing through adjustments usually makes things worse.
Check your belt’s condition too. A worn or damaged belt won’t track properly no matter how well your rollers align. Look for fraying edges, thin spots, or backing material that’s separating. Replace the belt if you see any damage.
Belt tension needs attention in both directions. Front to back tension and side to side tension work together. Your sander manual shows the correct tightness level for your specific model. Many people assume tighter is always better. This thinking often backfires and causes more tracking problems.
Adjust tension gradually and test your results. Keep tension settings consistent during your work sessions. This consistency helps you identify real problems versus temporary issues.
Finally, clean your workpieces before sanding. Embedded particles and debris create friction that pulls your belt sideways. A clean workpiece sits flat and stable on the sander bed. Feed material at a steady, even pace throughout your work.
These steps work together to stop persistent tracking problems.
Common Mistakes That Make Tracking Issues Worse
Many people make mistakes that actually make tracking worse instead of better. Understanding these errors helps you avoid them.
Relying only on tension adjustment is the biggest mistake. You tighten the belt thinking it will stay centered, but tension alone cannot fix a misaligned roller. If your rollers sit at different angles, no amount of tightening stops the belt from drifting. The belt follows the roller geometry, not the tension setting.
Ignoring roller alignment completely creates ongoing problems. Some operators assume their rollers are straight when they actually sit crooked. You need to check alignment from the side of your machine. A roller that leans even slightly will pull the belt off track consistently.
Using worn belts and hoping they work wastes your time. An old belt with stretched fibers or worn edges tracks poorly no matter what adjustments you make. Worn belts also vibrate more, which increases drift. Replacing a damaged belt often fixes tracking faster than any adjustment.
Skipping workpiece cleaning introduces hidden problems. Dirt, dust, and debris on your material create uneven resistance. This uneven pressure pushes the belt sideways as it contacts the dirty spots. Clean workpieces sand more evenly and stay on track better.
Making multiple large adjustments at once prevents you from finding the real cause. When you adjust tension, alignment, and belt all together, you cannot tell which change actually helped. Make one small adjustment, test it, then move to the next step.
Continuing to sand with a drifting belt damages your machine further. Each time the belt rubs against the roller edge, it wears faster and pulls more. Stop immediately and fix the problem instead of pushing through.
Troubleshooting Tips for Ongoing or Recurring Tracking Problems
When tracking problems keep returning even after you’ve made adjustments, something deeper needs your attention. Stop and diagnose systematically instead of making random changes to your machine.
Start by checking if your rollers have become misaligned again. Rollers shift over time from vibration and use. Look at both the front and rear rollers from the side of your machine. They should sit perfectly parallel to each other. Even a small angle causes the belt to creep off center repeatedly.
Next, inspect your belt for signs of wear beyond simple surface damage. A belt that’s stretched, frayed, or has hardened areas won’t track properly no matter how much you adjust tension. Worn belts develop flat spots and lose their ability to grip the rollers evenly. Replace the belt completely rather than continuing with a damaged one.
Check if excessive play exists in your belt system. The belt should move smoothly without bouncing or vibrating side to side. Vibration often indicates loose components in your sander’s frame or worn bearing surfaces. Tighten any loose bolts you find, but avoid over tightening which can bend parts.
Clean your entire machine carefully. Dust and debris accumulate inside the roller area and on the belt itself. This buildup prevents proper contact between the belt and rollers. Use compressed air or a brush to remove all particles from both roller surfaces and the belt.
Finally, verify you’re using the correct belt type for your machine. Wrong belt sizes or specifications won’t seat properly on your rollers. Check your machine’s manual for the exact belt dimensions and construction type required.
If problems persist after these checks, your machine may need professional service to address internal alignment issues.
Final Thoughts
Belt tracking problems feel frustrating at first. But most fixes are simple once you know where to look.
Your belt sander depends on a few key things working together. Roller alignment, belt condition, and tension all play a part. Skip one, and tracking issues return.
Take your time with each check. Rushing through adjustments often leads to more guesswork later. Patience saves you effort in the long run.
Remember that a sander is a mechanical tool. Parts wear down. Alignment shifts slightly over time. This is normal, not a sign of a broken machine.
Regular maintenance keeps your sander running smoothly. Check rollers and belts often, even before problems start. Small habits prevent bigger headaches.
Every sander behaves a little differently. What works for one machine might need slight changes for another. Trust your observations as you test and adjust.
If your belt still drifts after trying these fixes, don’t ignore it. Persistent tracking often points to a deeper issue inside the machine.
A quick trip to a repair shop can save your sander from further damage. Professional help is sometimes the smartest choice.
Keep your workspace clean too. Dust and debris cause more tracking problems than most people realize. A clean machine runs better and lasts longer.
Above all, stay consistent. Fixing tracking issues once doesn’t mean they won’t return. Regular checks keep your sander working the way it should.
With the right habits, your belt sander will track true more often than not. You’ll spend less time troubleshooting and more time getting real work done.
A well maintained sander is simply a more reliable tool.
Frequently Asked Questions
Why doesn’t tightening the belt fix tracking problems?
Tension alone cannot solve tracking issues. Your belt may slip off even when tight because the real problem sits elsewhere. Misaligned rollers push the belt sideways during operation. A worn belt loses its shape and won’t stay centered. Debris stuck on your workpiece throws the belt off track. Tension adjustment helps, but it addresses only one small part of the system.
What causes excessive belt vibration during sanding?
Vibration happens when your belt doesn’t sit flat on the rollers. Dirty or damaged rollers create uneven contact points. A worn belt develops flat spots or ridges that bounce as they spin. Loose components in your machine frame amplify vibration. Check your rollers first, then inspect your belt for visible damage.
When should I replace my belt instead of adjusting it?
Replace your belt when you see fraying edges, worn spots, or surface cracks. A belt that continuously drifts after proper adjustment often has internal damage. If the belt feels thin or loses its stiffness, replacement is due. Worn belts won’t respond to tension or alignment fixes. A new belt costs less than machine repairs from continued tracking problems.
How do I know if my rollers are truly misaligned?
Watch your belt movement carefully as the machine runs. If the belt creeps toward one side consistently, misalignment exists. Stop the machine and spin each roller by hand. They should rotate smoothly without wobbling. Misaligned rollers feel uneven or sticky when you turn them manually.

Hi, I’m Leah Ray — the voice behind CraftBench Vault. I’m a passionate woodworking enthusiast dedicated to reviewing the best wood cutting tools and woodworking products. Through honest research and hands-on experience, I help fellow crafters make smarter buying decisions. Welcome to my workshop!