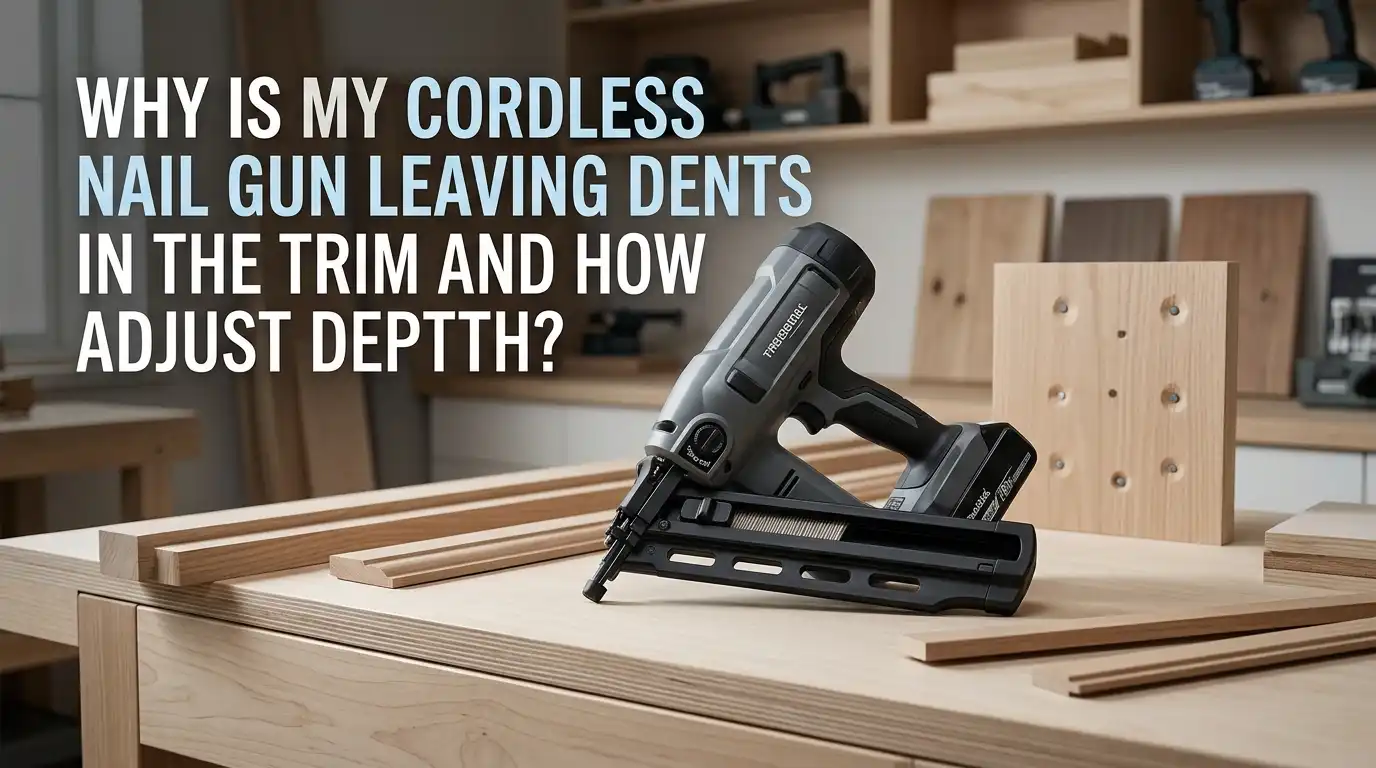
Why Is My Cordless Nail Gun Leaving Dents in the Trim and How to Adjust Depth?
You just finished installing a fresh piece of trim. You step back, look at your work, and notice ugly little circle marks pressed into the wood right next to every nail. Sound familiar?
A cordless nail gun that dents the trim can turn a clean job into hours of filling, sanding, and touch up paint. The good news is that this problem has clear causes and simple fixes.
Most dent issues come from incorrect depth settings, worn no mar tips, wrong nail length, or pressing the nose too hard against soft wood.
Key Takeaways
- Depth dial first: Almost every cordless nailer has a thumb wheel near the nose. Turn it toward the shallow setting in small clicks. Test on scrap wood after every adjustment.
- Check the no mar tip: A missing, worn, or hardened rubber tip is the number one cause of round dents around your nail holes. Replace it before changing anything else.
- Lighten your grip: Pressing the nose hard into soft pine or MDF crushes the surface before the nail even fires. Let the tool sit, do not push.
- Match nail length to material: A nail too long for the trim forces extra power and slams the driver deeper than needed.
- Battery charge matters: A weak battery on some cordless models causes inconsistent firing depth. Always work with a fully charged pack.
- Use a scrap shim: For very soft or finished trim, a thin plastic card under the nose stops the dent before it starts.
Why Cordless Nail Guns Dent Trim More Than Pneumatic Ones
Cordless nailers work differently from air powered models. Most use a flywheel, a gas spring, or a nitrogen piston to drive the nail. That stored energy releases all at once, which gives a strong kick at the nose.
The nose of the tool must press against the wood to release the safety. This pressure, combined with the recoil, leaves a faint or deep circle around the nail head. Soft trims like pine, poplar, or primed MDF show this mark easily. Hardwoods like oak hide it better.
Cordless tools also have a slightly longer nose housing than pneumatic guns. That bigger contact area spreads pressure, but it also leaves a bigger imprint when something goes wrong. Knowing this helps you fix the problem at the source.
Check the Depth Adjustment Wheel First
Every modern cordless brad or finish nailer has a depth adjustment wheel. You will find it just behind the nose or above the trigger. Look for a small ribbed dial or a sliding lever.
Turn the wheel toward the minus or shallow icon to drive the nail less deep. Turn it toward the plus or deep icon to drive it more. Small changes matter. Move the dial only one or two clicks at a time. Then test on a scrap piece of the same trim you are installing.
Pros: Fast, free, and works on every nailer without tools. Cons: Some budget models have stiff dials that drift back during use. Check the setting every twenty to thirty nails.
Inspect and Replace the No Mar Tip
The little rubber or plastic pad on the nose is called the no mar tip. Its only job is to cushion the contact between the steel nose and your soft trim. When this tip wears down, falls off, or hardens with age, dents appear instantly.
Look at the tip. If it is cracked, missing, or shiny smooth, replace it. Most brands sell replacement packs for a few dollars. DeWalt, Ryobi, Milwaukee, Makita, and Ridgid all have their own part numbers.
Pros: A new tip fixes most dent problems on its own. Cons: These pads pop off easily during heavy use. Keep a few spares in your tool bag so you never run out mid project.
Adjust the Battery and Firing Mode for Soft Trim
Many cordless nailers have a high and low power switch. The switch usually sits on the side of the body. Set it to low power when nailing thin trim, baseboards, or shoe molding into softwood or drywall.
High power is meant for hardwood or thick stock. Using it on pine or MDF drives the nail too deep and slams the nose hard enough to leave a circle. Low power gives you a softer hit and a flush finish.
A weak battery can also cause uneven firing depth. Sometimes the driver does not fully return, then the next shot hits harder. Always start a trim run with a full battery and swap it out when you notice misfires.
Match the Nail Length to the Job
Using nails that are too long forces the tool to work harder. The driver has to push extra steel through the wood, which creates a deeper imprint at the nose. For most trim work, an inch and a quarter to two inch brad nail is enough.
A good rule is to pick a nail that goes two thirds of its length into the back material. For half inch trim into a stud, an inch and a half nail is perfect. For thin shoe molding, an inch will do.
Pros: Correct nail length saves battery, reduces recoil, and stops dents. Cons: You need to keep multiple nail sizes on hand, which costs more upfront but saves trim later.
Stop Pressing the Nose Too Hard
This is the mistake almost every new user makes. They lean into the nailer like a hammer, hoping for a stronger hit. The opposite happens. Pressing the nose hard crushes the wood fibers before the nail fires, leaving a permanent dent.
Hold the tool gently. Just enough pressure to release the nose safety is all you need. The tool does the work, not your arm.
Try this trick. Rest the nailer on the trim with one hand and pull the trigger. You will see the nail goes in clean with no circle around it. Keep your free hand off the back of the gun while firing. Loose grip, clean finish.
Use a Scrap Plastic Card or Shim as a Buffer
For very soft pine, prefinished trim, or painted surfaces you cannot risk damaging, place a thin plastic card or a piece of plastic shim between the nose and the wood. Old credit cards, hotel keys, and plastic putty knives all work.
The card spreads the pressure across a wider area. The nail still drives through the plastic and into the wood with no extra effort. The card slides out, and your trim stays flat.
Pros: Almost zero cost, works on any nailer, and protects finished surfaces. Cons: You go slower because you reposition the card for every nail. Best for finish work where appearance matters most.
Set the Driver Blade Correctly
Inside the nose is a thin metal bar called the driver blade. It pushes the nail through the nose into the wood. Over time, the driver blade can wear down or stick in the wrong position.
If your depth dial does not change anything, the driver blade may be set wrong. Check your owner manual for the correct length. Many models have a screw or pin that lets you adjust it.
Pros: A correctly set driver blade gives consistent depth on every shot. Cons: This fix takes more time and sometimes requires a small allen key. Watch a video for your specific model before opening the housing.
Clean and Lubricate the Nose Mechanism
Sawdust, paint flakes, and dried glue build up around the nose safety. When that happens, the safety does not slide smoothly. The tool fires a fraction of a second too early or too late, which changes how deep the nail goes.
Blow out the nose with compressed air every few hours of use. Add a drop of light machine oil to the moving parts if your manual allows it. Some cordless gas powered models say no oil, so check first.
Pros: A clean nose fires consistently and dents disappear. Cons: You need to do this often if you work in dusty conditions like remodel sites or new construction.
Try a Different Angle to Reduce Marks
The shape of the brad tip matters. Brads have a chisel point that acts like a wedge. When the wedge runs across the wood grain, it spreads the fibers and causes a small split or dent around the head.
Turn the nailer so the long edge of the tip lines up with the grain. The wedge then cuts cleanly along the fibers instead of spreading them. This small trick reduces dents and stops blowout on the back side of thin trim.
Pros: Costs nothing and works on every nailer. Cons: Hard to see the chisel direction on small brads. Mark your magazine with a sharpie so you know which way the tip points.
Switch to a Pin Nailer for Delicate Trim
If you work with very thin or expensive trim and dents keep showing up, a pin nailer is the answer. Pin nailers shoot 23 gauge headless pins that leave almost no mark at all. The hole is so small you often skip the filler step.
Pin nails hold less weight than brads, so they work best for delicate molding, small craft pieces, and holding parts while glue dries. For baseboards and door casing, stick with a brad or finish nailer.
Pros: Nearly invisible holes, no dents, perfect for fine work. Cons: Weak holding power, extra tool to buy, and pins are harder to find in stores.
When to Send the Tool for Service
If you have tried every fix and the nailer still dents the trim, the problem may be inside the tool. Worn internal seals, a damaged flywheel, or a bent driver blade all cause inconsistent depth.
Most major brands offer free service within the warranty period. DeWalt, Milwaukee, Makita, and Ridgid all have authorized repair centers that diagnose problems for free in most cases.
Pros: A professional fix saves you from buying a new tool. Cons: You lose the nailer for a week or two. If you work every day, keep a backup tool ready or rent one while yours is in the shop.
Final Quick Test Routine Before Every Trim Job
Build a habit before you fire a single nail on your real trim. Grab a scrap of the same wood you are installing. Fire three nails using your current settings.
Check each nail. Is the head flush, just under the surface, or proud of the surface? Adjust the depth dial one click at a time and fire another three. Once you get a clean flush hit with no dent, you are ready.
This thirty second test saves hours of repair work later. Treat it like a warm up. Every pro carpenter does it, even with tools they have used for years. New trim, new wood, new settings.
Frequently Asked Questions
Why does my cordless nailer leave a circle but no dent in the middle?
That circle is the outline of the no mar tip pressing into the wood. The middle stays smooth because the nail covers it. Replace the no mar tip or reduce nose pressure to remove the circle.
Can I use a cordless brad nailer on hardwood trim?
Yes, but switch to high power mode and use longer nails. Most cordless brad nailers handle oak, maple, and walnut trim if you let the tool do the work. Test on a scrap piece first.
Should I fill the dents or sand them out?
Small dents fill with wood putty in seconds. Larger dents need light sanding or steam. A wet cloth and a hot iron can lift shallow dents out of bare wood before staining.
How often should I replace the no mar tip?
Most users replace the tip every few hundred nails. If you see cracks or shine on the rubber, swap it now. Keep three or four spares in your tool case.
Does battery brand affect nailer depth?
Yes, on some models. A genuine high amp hour battery from the same brand gives steady power. Off brand or low amp hour packs cause weak shots and inconsistent depth.
Is a cordless finish nailer better than a brad nailer for trim?
Finish nailers use thicker fifteen or sixteen gauge nails. They hold better on heavy trim like crown molding. Brad nailers use thin eighteen gauge nails, which work for shoe molding and lighter trim. Pick based on the weight of your trim.

Hi, I’m Leah Ray — the voice behind CraftBench Vault. I’m a passionate woodworking enthusiast dedicated to reviewing the best wood cutting tools and woodworking products. Through honest research and hands-on experience, I help fellow crafters make smarter buying decisions. Welcome to my workshop!