Why Are My Hand Planes Chattering and How to Properly Micro-Bevel the Iron?
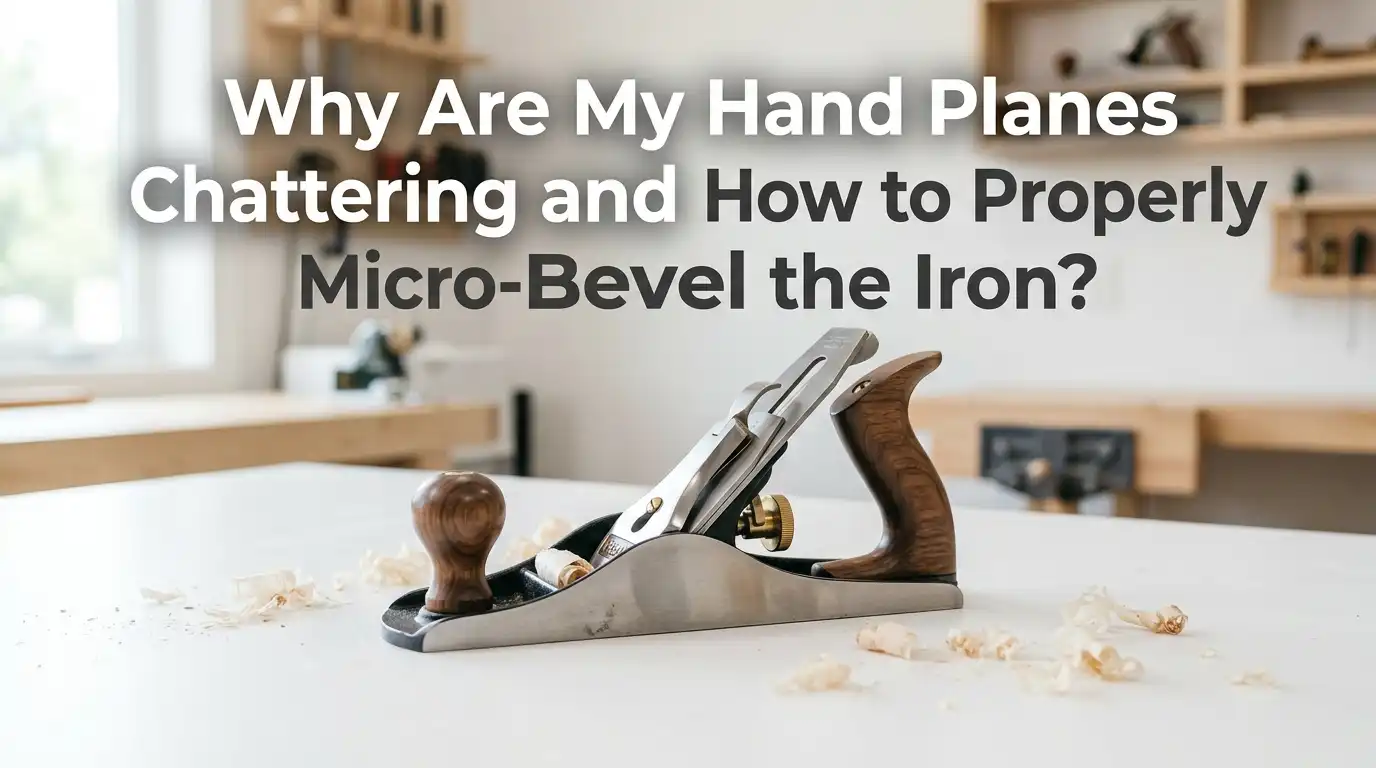
You push your hand plane across a board. Instead of a clean ribbon of wood, you feel a stuttering buzz. The surface comes out with tiny ripples, like a washboard. That sound and feel is called chatter, and it frustrates almost every woodworker at some point.
The good news is simple. Chatter is fixable. Most of the time, the cause sits in your setup, your sharpening, or your technique. A small change like a fresh edge or a proper micro-bevel often solves the whole problem.
This post breaks down every common cause of plane chatter. Then it walks you through a clean, repeatable way to micro-bevel your iron. Let’s get your plane cutting smooth again.
In a Nutshell:
- A dull blade is the number one cause of chatter. A sharp iron slices fibers cleanly. A dull one skips, bounces, and leaves ripples. Sharpen first before you blame anything else.
- Take a lighter cut. A thick shaving forces the blade to fight the wood. Retract the iron so it removes a thin, see-through ribbon. This small change calms most vibration instantly.
- The chip breaker matters a lot. Set it close to the cutting edge, often within a sixteenth of an inch. A tight, well-fitted chip breaker stiffens the cut and stops tear-out.
- A micro-bevel makes sharpening faster and the edge stronger. You hone a tiny secondary bevel at a slightly higher angle. This saves time and adds durability at the tip.
- Solid blade support stops flex. A loose frog, a thin worn blade, or a gappy bed lets the iron vibrate. Tighten everything and seat the frog firmly.
- Technique seals the deal. Steady pressure, a smooth stroke, and good body movement keep the cut consistent across the whole board.
What Plane Chatter Actually Is
Chatter is a fast, repeating vibration of the blade as it cuts. The iron flexes, lifts, drops, and digs in again, many times per second. You hear it as a buzz or rattle. You see it as small even ridges across the wood.
Think of it like a car tire skidding instead of gripping. The blade loses steady contact with the fibers. Each tiny skip leaves a mark.
Chatter is almost always a symptom, not a root cause. Something in your blade, your setup, or your motion is letting the edge bounce. Once you find that one weak link, the marks disappear. The fixes in this post each target a different link in that chain.
A Dull Blade Is the Most Common Cause
If your plane chatters, check the edge first. A dull blade cannot slice cleanly. Instead, it pushes and crushes the wood fibers until they suddenly give way. That sudden release is the bounce you feel.
Run your thumb gently across the edge, away from it for safety. A sharp iron feels keen and almost grabs your skin. A dull one feels rounded and smooth. A dull edge fails first in soft woods like pine, because the fibers compress before they cut.
The fix is direct. Sharpen the iron until it is truly sharp. A properly sharpened blade should shave a thin curl from end grain or even slice paper. Most chatter complaints vanish the moment a fresh edge meets the wood.
Take a Lighter Cut First
Many beginners set the blade too deep. They want fast results, so they extend the iron far past the sole. This forces the plane to remove a thick shaving, and the blade fights hard against the wood.
That heavy load makes the iron flex and vibrate. A lighter cut is the single easiest fix you can try right now.
Retract the depth adjuster until the blade barely peeks below the sole. Aim for a shaving you can almost see through. Thin shavings need far less force, so the blade stays steady. You can always increase depth slowly once the surface stays clean. Start light, then build up. This rule alone saves countless boards from ripple marks.
Why the Chip Breaker Position Matters So Much
The chip breaker, also called the cap iron, sits on top of the blade. Its job is to curl the shaving upward right at the edge. This stiffens the cut and reduces tear-out and chatter together.
Set the chip breaker close to the cutting edge. For a smoothing plane, many woodworkers set it within a sixteenth of an inch or even closer. The tighter the gap, the stronger the supporting action.
If the chip breaker sits too far back, the blade tip flexes alone. That flex invites vibration. Move it forward in small steps and test your cut each time. The right distance changes how the shaving forms and how steady the edge feels. A close, clean chip breaker often calms chatter that sharpening alone could not fix.
Check the Fit Between Chip Breaker and Blade
A close chip breaker only helps if it seats perfectly flat against the iron. If there is a gap at the front edge, shavings slip underneath. Trapped shavings jam the throat and cause skipping and chatter.
Hold the chip breaker against the blade and look toward a light. If you see a sliver of light at the leading edge, the fit is bad.
Fix it by honing the underside front edge of the chip breaker on a fine stone. Aim for a tight, crisp line of contact with no gap. You can also gently flatten the mating surface. A clean fit means shavings ride up and over, never under. This small tune-up pays off every time you plane a tricky board.
Make Sure the Frog Supports the Blade
The frog is the angled metal bed that holds the blade. It must support the iron firmly, especially near the cutting edge. A loose or poorly seated frog lets the blade flex and chatter.
Remove the blade and inspect the frog. It should sit flat and tight against the plane body, with its mating screws snug.
Many older planes have a frog that does not reach close enough to the mouth. The closer the frog edge sits to the blade tip, the less the iron can vibrate. Adjust the frog forward so it supports the blade down low. Check that the back of the blade rests fully on the frog face with no rocking. Solid support turns a buzzing blade into a quiet one.
Consider a Thicker Replacement Iron
Old factory planes often came with thin stamped blades. These flex more under load, so they chatter more easily, especially on wide or hard boards. A thin blade simply cannot stay rigid against tough grain.
Many woodworkers upgrade to a thicker aftermarket iron. A thicker blade resists flex and damps vibration well.
Pros of a thicker iron: it stays stiff, holds an edge longer, and cuts hard woods more calmly. Cons: it may not fit every plane without filing the mouth, it costs money, and it takes longer to sharpen because there is more steel.
Before you buy, try the free fixes first. Sharpening, lighter cuts, and a tight chip breaker solve most problems. A thicker iron is a real upgrade, but it is rarely the only answer.
How to Properly Sharpen the Primary Bevel
Before you add a micro-bevel, your primary bevel must be clean and flat. The primary bevel is the main grind on the iron, usually ground at twenty five degrees. This is your foundation.
Start by flattening the back of the blade. A flat, polished back is essential, because the cutting edge is where the back meets the bevel. Work it on your stones until it shines near the tip.
Next, grind or hone the bevel until it reaches a clean edge. Move through your stones from coarse to fine, keeping the angle steady. You can do this freehand or with a honing guide. The goal is a flat bevel with no rounding. Once the primary bevel is true, you are ready for the fast finishing step that follows.
What a Micro-Bevel Is and Why It Helps
A micro-bevel is a tiny secondary bevel honed right at the tip of the blade. You create it at a slightly higher angle than the primary bevel, often around thirty degrees when the primary sits at twenty five.
The micro-bevel saves time. Instead of honing the whole wide bevel each time, you polish only a thin strip at the edge. That strip is small, so it sharpens in seconds.
It also helps with chatter in two ways. First, the steeper tip angle adds strength, so the edge resists chipping under load. Second, the faster sharpening means you keep the edge keen more often. A keen edge slices cleanly and resists the bouncing that causes ripples. Less honing, stronger edge, smoother cut.
Step by Step: How to Hone a Micro-Bevel
Here is a clean, repeatable method. Follow each step in order.
First, set up your finest stone, around eight thousand grit or a fine polishing stone. A micro-bevel only works on a sharp, well-prepared primary bevel.
Second, place the bevel flat on the stone. If you use a honing guide, set it for your primary angle. Then raise the back of the iron just a few degrees. A tiny lift is all you need.
Third, take five to ten light strokes at this raised angle. You are polishing only the very tip. Fourth, flip the blade and remove the burr from the flat back with one or two passes. Fifth, check the edge. It should be bright and keen. Repeat the back pass if a wire edge remains.
Freehand Versus Honing Guide for Micro-Bevels
You can create a micro-bevel by hand or with a jig. Both work well, so pick what suits you.
A honing guide holds the blade at a fixed angle. It gives repeatable results and a perfectly even micro-bevel every time. Pros: consistency, easy for beginners, and clean angles. Cons: setup takes time, and you must re-clamp the blade for each sharpening.
Freehand honing means you balance the blade by hand and lift slightly at the end. It is much faster once you build the muscle memory. Pros: quick, no setup, fewer tools. Cons: it takes practice, and early results may be uneven.
Some experienced woodworkers skip the micro-bevel and use a rounded freehand bevel instead. That method is fast and sharp too. Try both and keep the one that feels natural to you.
Technique and Body Movement to Stop Chatter
Even a perfect blade chatters if your stroke is shaky. Steady motion keeps the cut consistent across the whole board. Your body, not just your arms, should drive the plane.
Start with firm downward pressure on the front knob as you begin the stroke. Shift that pressure to the rear handle as you reach the end. This keeps the sole flat and the cut even.
Move your whole body forward in one smooth glide. Avoid short, jerky pushes. Keep your wrists locked and let your legs power the motion. Plane in long, confident strokes. A waxed sole also helps the plane glide with less resistance. Smooth movement plus a sharp edge equals a quiet, clean surface every time.
Reading the Wood Grain to Avoid Trouble
Sometimes the wood itself causes the trouble. Planing against the grain tears fibers and triggers chatter and roughness. Reading the grain direction is a skill worth building.
Look at the side of the board. The grain lines usually rise or dip in one direction. Plane downhill, in the direction the fibers lie, for the cleanest cut.
If the surface tears or stutters, flip the board or change direction and try again. On wild or figured grain, take very thin shavings and keep the chip breaker close. End grain needs an extra sharp edge and a light touch. When you match your stroke to the grain, the wood cooperates. The plane glides, the shaving curls, and the ripples stay away for good.
Frequently Asked Questions
What angle should I use for a micro-bevel?
A common setup is a twenty five degree primary bevel with a thirty degree micro-bevel. You only need to lift the blade a few degrees above the primary angle. Harder woods can take a slightly steeper micro-bevel for more edge strength.
Does a thicker blade really stop chatter?
It helps, because a thicker iron flexes less under load. But it is rarely the first fix you need. Sharpen the blade, take lighter cuts, and tighten the chip breaker first. Most chatter clears up with those free steps before you spend money.
How often should I re-hone the micro-bevel?
Hone it as soon as the cut feels harder or the surface looks dull. Because the micro-bevel is so small, refreshing it takes only a minute. That speed is the whole point, so re-hone often and keep the edge keen.
Can I add a micro-bevel to a bevel-up plane?
It is usually not recommended on bevel-up plane irons. The geometry works differently, so a micro-bevel can raise the cutting angle in unexpected ways. Many woodworkers hone bevel-up irons with a single clean bevel instead.
Why does my plane chatter only on hardwoods?
Hard woods resist the blade more, so they expose weak spots in your setup. A thin blade, a loose frog, or a slightly dull edge shows up fast. Tighten support, sharpen well, and take thinner shavings on dense wood.
Is freehand sharpening good enough for a fine edge?
Yes. A skilled freehand stroke produces an edge just as sharp as any jig. It takes practice, but it is fast and needs no setup. Beginners may prefer a honing guide first, then move to freehand as their confidence grows.

Hi, I’m Leah Ray — the voice behind CraftBench Vault. I’m a passionate woodworking enthusiast dedicated to reviewing the best wood cutting tools and woodworking products. Through honest research and hands-on experience, I help fellow crafters make smarter buying decisions. Welcome to my workshop!